Saturday, October 5, 2024

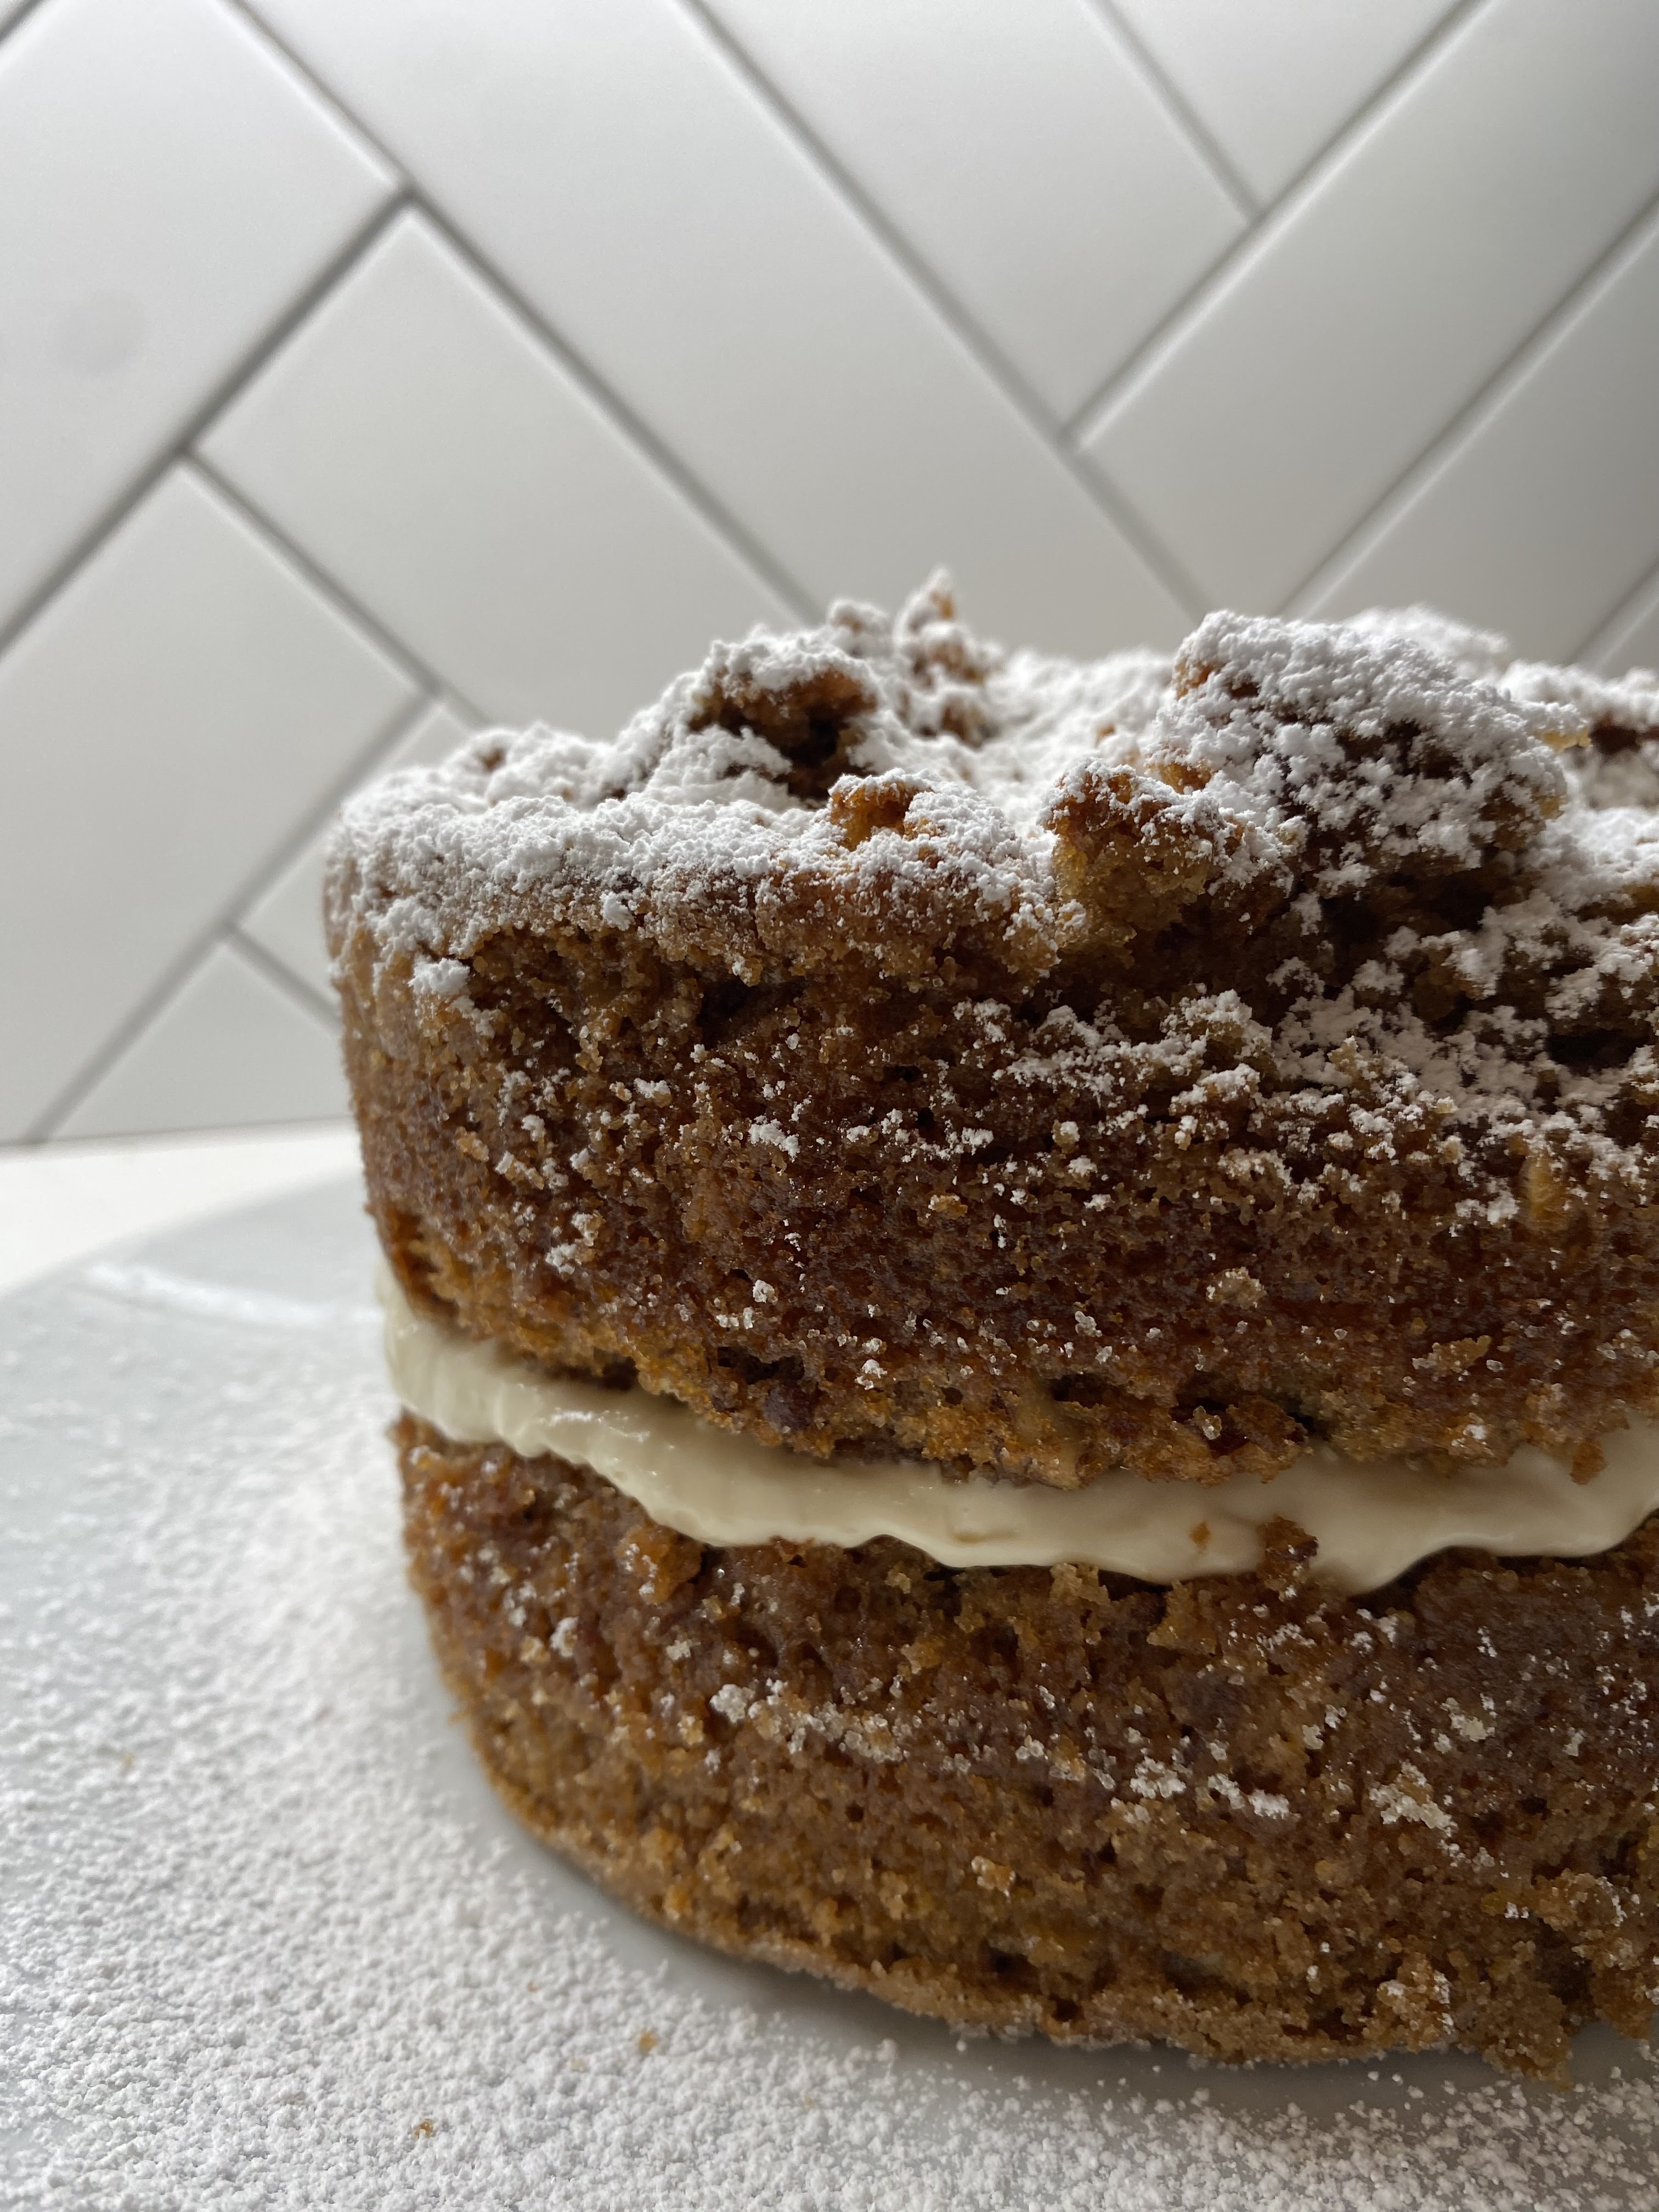
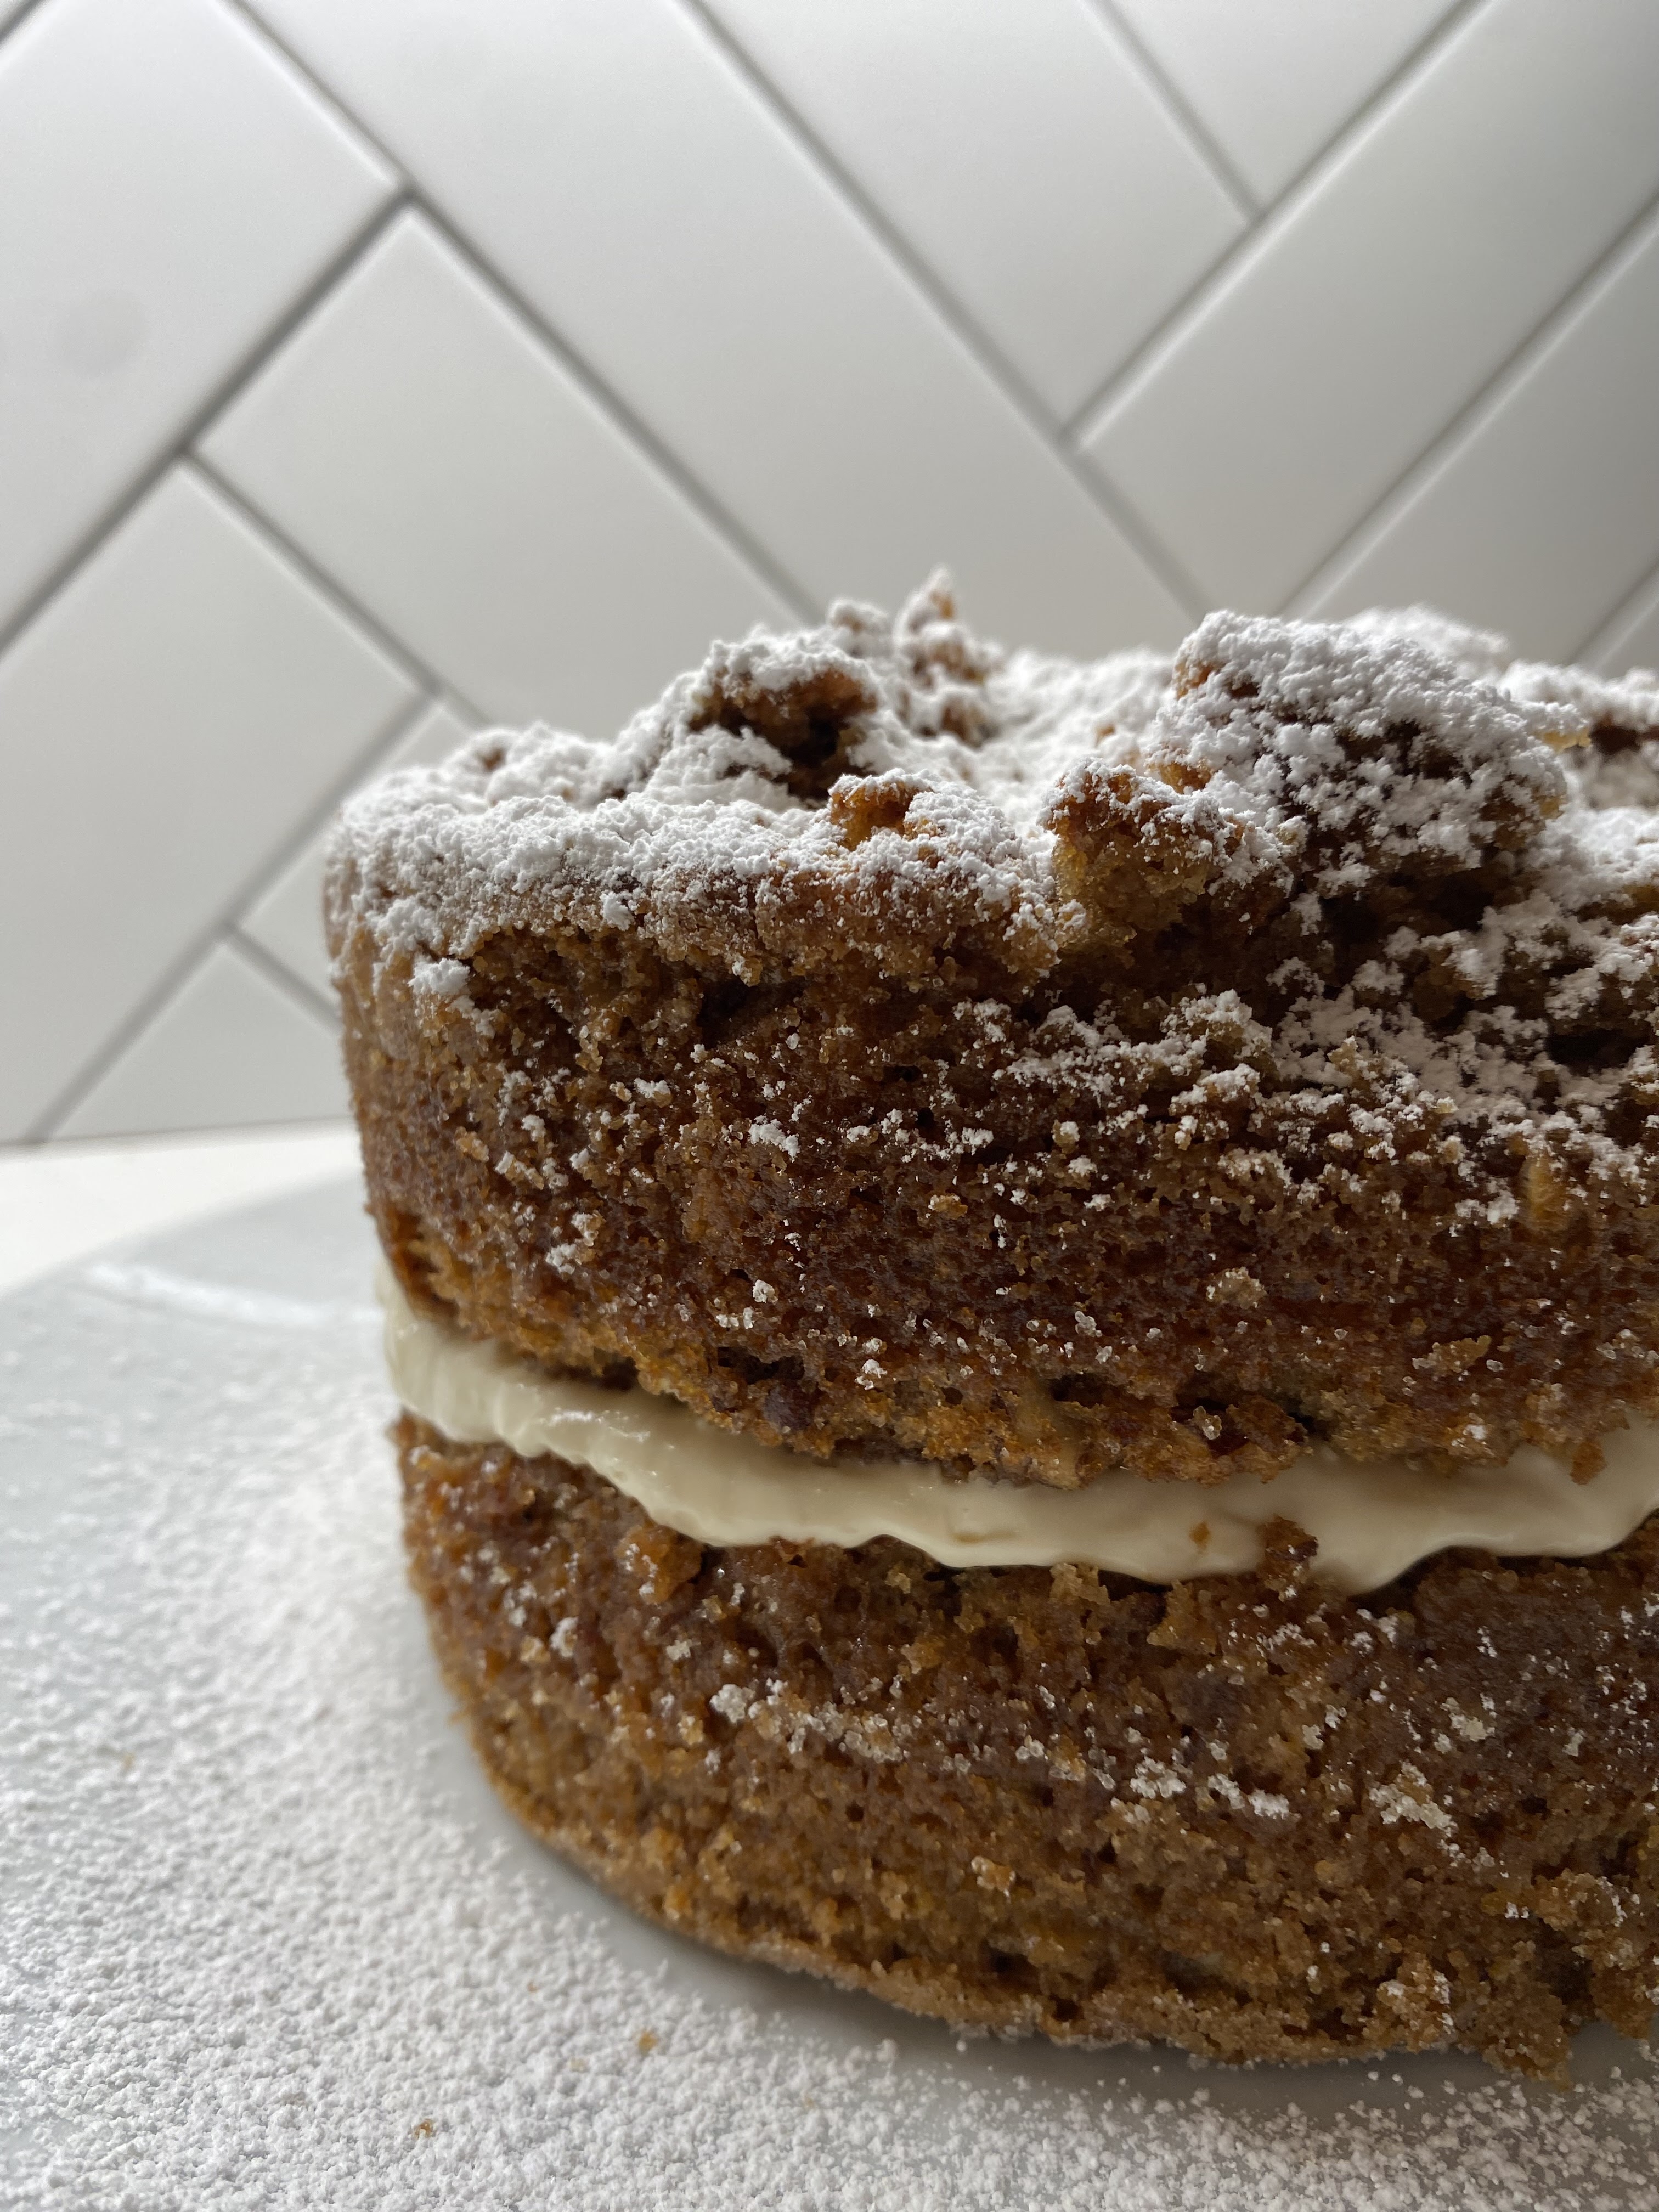
Toasted Pecan, Maple and Parsnip Cake


adapted from the cookbook: 
The Great British Baking Show
A  BAKE  FOR  ALL  SEASONS


Toasted Pecan, 
Maple and Parsnip Cake... 
(Secretly NOT a secret: It's Gluten-FREE) 


PREP and Set Aside:
1 and 1/2 cups peeled and grated parsnips
1 and 1/2 cups pecans, chopped and toasted


DRY  Ingredients Mix and Set Aside:
1 and 1/2 cups gluten-free flour
2/3 cup almond flour
1 and 1/2 teaspoons baking powder
1/2 teaspoon baking soda
2 teaspoons pumpkin pie spice 
1/8 teaspoon sea-salt


WET Ingredients:
1 cup vegetable oil
2 cups dark brown sugar, lightly pressed 
1/2 cup full-fat plain Greek yogurt
4 large eggs
1/3 cup (generous...) maple syrup
1 teaspoon Mexican vanilla


Cream Cheese Filling:
1 - 8 ounce package of full-fat cream cheese 
5 Tablespoons salted (or sweet) butter
3 Tablespoons maple syrup
1 teaspoon Mexican vanilla

powder sugar for dusting


... ... ... ... ... ... ... ... ... ... ... 

To toast pecans:
Pre-heat oven to 325.
Chop pecans to measure 1 and 1/2 cups chopped.
Spread out evenly on baking sheet lined with parchment paper.
Once oven is at temperature, bake (toast!) for 7-8 minutes ONLY; remove from oven and set aside.

RESET the oven to 350.

PEEL and grate enough parsnips to measure out 1 and 1/2 cups; set aside.

Combine all DRY ingredients in a mixing bowl; set aside.

Combine all WET ingredients in a mixing stand bowl or a large bowl to use with a electric hand mixer.

Once all WET ingredients are combined - mix on HIGH for 3 minutes.

Add all DRY ingredients and mix with a hand whisk or spoon until combined.  

FOLD IN grated parsnips and toasted pecans.

Let all combined ingredients rest for 10 minutes.

While ingredients are resting - grease and sugar your baking tins.

Bake for 35-45 minutes for 2 cake tins size: 

Bake for 30-35 minutes for 4 cake tins size:

Let cake cool completely in their baking tins.

When cooled completely, bump out onto cooling racks an additional hour.

Make cream cheese filling.

... ... ... ... ... ... ... ... ... ... ... 


Putting cakes together:
sandwich the cream cheese filling in the middle
Dust the top and the cake plate with powder sugar.
CHILL for 2-4 hours or overnight.
(overnight is preferred!)
 

4 cake tins make 2 small cakes.
(use 1/2 of the cream cheese filling)

2 cake tins makes 1 large cake.
(use ALL of the cream cheese filling)

... ... ... ... ... ... ... ... ... ... ... 
(It's a recipe FOR your recipe!)

CLICK TO GO TO: 


... ... ... ... ... ... ... ... ... ... 


Click Link FOR:       Mama Jo's Recipe Blog TABLE OF CONTENTS  


Sunday, September 29, 2024

GLUTEN-FREE FLOUR MIX


GLUTEN-FREE  FLOUR  MIX:

3 cups -  RICE FLOUR
1 and 1/2 cups -  TAPIOCA FLOUR
3/4 cup -  POTATO STARCH
1 heaping Tablespoon -  XANTHAN GUM
1/2 Tablespoon sea salt 


Mix throughly and store in an air tight container in your pantry. 

OR, if you don’t use gluten-free flour very frequently, put it in the fridge.

Note:
When using in a recipe as a wheat flour substitute:
 - OMIT up to 1 teaspoon salt.


 ... ... ... ... ... ... ... ... ... ... 


This is my mixing box -

The only ingredient I do not keep in this box at the ready is salt.

Several reasons I keep this box in my baking cupboard:

1 - I can keep an eye on my flour-making-ingredients
and levels so that I do not run out of something. 

2 - It makes making the flour often FAST!


To add to my the convenience of the mixing box, 
I have a 3/4 cup measuring cup as a permanent fixture.

When I'm making my mix it makes it extra EASY!

(4) 3/4 cup measurements of rice flour
(2) 3/4 cup measurements of tapioca flour
(1) 3/4 cup measurements of potato starch

 ... ... ... ... ... ... ... ... ... ... 

I purchase my flours and potato starch
typically at my local Kroger or HEB store. 
When they are not available I hop on
Amazon or an online store called VitaCost


... ... ... ... ... ... ... ... ... ... ... 


Click Link FOR:       Mama Jo's Recipe Blog TABLE OF CONTENTS  

Thursday, September 19, 2024

Roasted Garden Sweet Potato and Lentil Salad


NOTE:  Add extra olive oil to any leftovers.


Found this recipe when looking for uses of our 2023 summer sweet potatoes from the garden (we still have some in the pantry and it's September!) 

;0)  We - LOVED - it from the first try!

... ... ... ... ...

THINGS  TO  NOTE:
- add olive oil to any leftovers
- add feta cheese ONLY when you're ready to eat
- great as a meat-free meal!
- pan saute your choice of kale in a little olive oil, kosher salt and coarse pepper
- toasting cashews happens FAST! (and literally stink and burn if you don't watch them closely) toast them on parchment paper for a quick transfer off of a hot baking pan


... ... ... ... ... ... ... ... ... ... ... 


Click Link FOR:       Mama Jo's Recipe Blog TABLE OF CONTENTS  


Tuesday, September 3, 2024

Elevated Rice Crispy Treats // Optional: dairy-free


Heat/Melt in a large pot: 


FOR REGULAR:

6 Tablespoons butter

15 oz bag of large marshmallows


- OR -


FOR DAIRY FREE: 

1/3 cup coconut oil 

15 oz bag of large marshmallows


TAKE OFF THE HEAT 


ADD:

1 teaspoon vanilla 

(Mexican vanilla preferred) 


ADD: 

8 cups

Plain rice crispies


- OR - 


8 cups

chocolate rice crispies


Note: go slow when adding crispies! 1/2 a portion at a time - don’t dump everything all at once. You want to keep it moist and marshmallow heavy.


… … ... ... ... ... ... ... ... ... ...


Dedicated to Susan Anderson who “elevated” my opinion of rice crispy treats with her use of vanilla. ❤️


... ... ... ... ... ... ... ... ... ... ... 


Click Link FOR:       Mama Jo's Recipe Blog TABLE OF CONTENTS  


Sunday, January 21, 2024

Bret’s Gluten-FREE Brownie Cookie // (AKA: Schitt’s Cookies)


... ... ... ... ... ... ... ... ... ... ... 

These cookies are quite literally Bret's Cookies.  
She wanted them, so she made them up!
She wanted a chocolate-chocolate-chip cookie...
We have a perfected gluten-free recipe for regular chocolate chip cookies and she modified it to what her heart desired. 
These are THE BEST!!! 
In fact, we just had them for dinner tonight...

... ... ... ... ... ... ... ... ... ... ... 
(It's a recipe FOR your recipe!)

CLICK TO GO TO: 


... ... ... ... ... ... ... ... ... ... 


Bret’s Gluten-FREE Brownie Cookie
// (AKA: Schitt’s Cookies)


CREAM TOGETHER:
1 cup softened butter (2 sticks)
1 cup packed brown sugar
1 cup white sugar

ADD:
1 teaspoon vanilla extract (Mexican Vanilla preferred)
2 eggs, beaten

COMBINE:
2 1/2 cups of gluten-FREE flour
1 cup old-fashioned oats
1/2 cup cocoa powder
1/4 teaspoon dark cocoa powder
2 teaspoons baking powder
1 teaspoon baking soda

LAST ADDITION:
1 and 1/2 cups semi-sweet chocolate chips

RECOMMENDED: 
use 3/4 cup semisweet chocolate chips and 3/4 cup milk chocolate chips

1. beat butter and sugars together on high for 3 minutes
2. beat in vanilla and eggs
3. combine dry ingredients together and slowly add to wet ingredients
4. add chocolate chips
5. roll dough into balls and place onto a cookie sheet, preferably a clay one, with parchment paper
6. squish dough balls to look like this: / \
7. bake for 10 min at 375°
8. remove from oven and, holding the edges of the parchment paper tightly, lift off the baking sheet to cool on a baking rack or counter 


... ... ... ... ... ... ... ... ... ... ... 


Payton and Garrett had these cookies for
the first time over Christmas break 2023...
Pretty sure these cookies are their
new favorite now too!


Is a warm, gooey chocolate-chocolate chip cookie
needed after a cold day at the beach? Yes indeed.


... ... ... ... ... ... ... ... ... ... ... 


Click Link FOR:       Mama Jo's Recipe Blog TABLE OF CONTENTS  


Monday, September 18, 2023

Enchilada Sauce (Homemade/Gluten-FREE)


Green Chicken Enchiladas
With Pepper Jack Cheese 
And Munster Cheese


I can already feel your eyes on that post title... 

and in your mind you might be saying:

"JO.  REALLY.  Do you have to label everything gluten-FREE???"

Unfortunately - yes. 

YES because when you start reading labels of ready-made and ready-to-eat things nearly every damn thing has gluten in it.  

So if you're like me and want to make something, say enchiladas, ALL the components (okay - nearly ALL) ends up being something YOU have to make yourself.


My enchiladas, green or red, are layered in a 9X13 pan generously rubbed down with olive oil or cooking spray.

Next - a 1/2 cup of sauce spread on the bottom.

20-24 Corn tortillas are at the ready, warmed on the griddle and bendy.

Corn tortillas are filled with shredded rotisarie chicken, shredded pepper jack cheese and a big spoonful of enchilada sauce.

Once all the corn tortillas are filled, rolled and tucked into the 9X13 pan, the entire collection gets 1 cup of enchilada sauce spread over the top with a final layer of pepper jack cheese.

Bake at 400 for 30 minutes.

Broil for an additional 2-5 minutes or until the cheese has some toasty brown spots.

Serve hot with salad and fresh fruit.


... ... ... ... ... ... ... ... ... ... 


Enchilada Sauce - original by Heidi Mark   

"Gluten-FREE" depends on the flour you choose to use.


2 30 oz cans tomato sauce

2 TBSP chicken broth paste

1/4 cup flour OR gluten-free flour mix

2 TBSP oil

1 1/2 TBSP cumin 

1 tsp garlic powder

1 tsp garlic salt

1 tsp onion powder

1 tsp chili powder

1 teaspoon Kosher Salt 

1 teaspoon coarse black pepper 


Combine tomato sauce, oil, and broth paste and spices in a medium or large saucepan.  Whisk together and then add your choice of flour, whisking until smooth. Bring to a simmer - stir often.  Keep temperature low and simmer 6-8 min. 


... ... ... ... ... ... ... ... ... ... 

FOR  GREEN (VERDE) ENCHILADAS

2 jars green salsa 
For a 9X13 pan 

Grease pan

Heat one jar of salsa over medium heat 

ADD: 
1/4 cup water
2 teaspoons cumin
2 Tablespoons better-than-bullion chicken broth 
1 teaspoon coarse black pepper 
1/4 cup gluten-free flour 

Stir constantly until thick 
Remove from heat 

Other salsa jar - pour 1/2 into 9X13 pan - layer enchiladas - pour remaining salsa over enchiladas - cover with shredded or sliced cheese 

Bake at 400 for 30 minutes.

Broil top for 2-5 minutes if cheese needs to be toasty.


... ... ... ... ... ... ... ... ... ... 


Click Link FOR:       Mama Jo's Recipe Blog TABLE OF CONTENTS  


... ... ... ... ... ... ... ... ... ... 


Fun Family Fact:
My husband calls these "WMME's" if you ever meet me in person I'll tell you what this stands for  :0)


Tuesday, September 12, 2023

Better Than HEB Homemade Tortillas

Friend who recently moved to Dallas from Oregon:
"Do you have HEB in Houston?"

ME:
"Yup!"

Friend who recently moved to Dallas from Oregon:
"Have you ever had their butter tortillas???!!!"

ME:
"I have!  A long time ago when I could still eat gluten... They're so GOOD! (I miss them.)"

Friend who recently moved to Dallas from Oregon:
"Sometimes I get home and I realize I've eaten ALL the tortillas..."


... ... ... ... ... ... ... ... ... ... 

3  cups all-purpose flour
1 1/2  teaspoons baking powder
teaspoons salt

1/2 cup bacon grease, cold  
(OR 1/2 cup butter
OR   1/2 cup lard
OR   1/2 cup shortening 
and in that order of preference)

cup hot (very hot) water

... ... ... ... ... ... ... ... ... ... 

INSTRUCTIONS:

 
In a large bowl, combine the flour, salt and baking powder. 

Cut in the bacon grease (or other fat) with a fork or pastry blender until the big chunks of bacon grease (or other fat) are broken up into a fine crumble and incorporated into the flour mixture

Add the hot water and stir until combined. 

Work the dough into a ball.

Keep the dough in your mixing bowl and knead the dough about 2 minutes; adding more a 1/4 cup more flour at a time if needed to take away the stickiness. 

Cover the dough with plastic wrap and let rest for 15-20 minutes. 

Pinch the dough off into pieces slightly larger than a golf ball. 

Work the dough into balls and then press down lightly to form a round roughly the size of your palm.

With a rolling pin or large drinking cup, roll each round out into a circle about a 1/4 inch thick. 

Repeat with the remaining rounds. 

Place the tortillas onto a large HOT cast iron skillet. 

Cook just until light brown circles appear. 

The longer these cook, the crispier they become so adjust you cook time and temp as needed - I like mine slightly floppy especially if I plan to use them for a quesadilla and plan to cook them up again.
  
Wrap in a clean kitchen towel and place in a warm oven until you have finished cooking all of the tortillas and are ready to serve. 

Serve warm or at room temperature.

If there are any leftovers refrigerate and reheat on your cast iron skillet.


... ... ... ... ... ... ... ... ... ... 

Click Link FOR:       Mama Jo's Recipe Blog TABLE OF CONTENTS