|
Homemade noodles...
Quick, FUN and EASY!
(Thank you Tasha for the
original recipe!)
|
It took me a few years of living in Texas to realize that keeping ALL of the 9 months of winter clothing that I had moved here with from Idaho was not going to be a long-term good idea...
The same can be said of my previous habit of happily making soups and chilis 9 months of the year without anyone complaining. (NOTE TO THE DAVIS HOUSEHOLD: please remember that all complaining about food will only be tolerated if done IN SONG! ie: in a movie / broadway musical fashion)
The clothing collection has been rounded out with 9 months of skirts (NOT SHORTS!) and a lovely collection of sun hats. I pray for cold weather so that I can wear my boots without getting sweaty!
...And the happy habit of making soups and chili 9 months out of the year?
I just crank the AC and make sure everyone is singing about it if there's a complaint they want heard. :0)
CHICKEN NOODLE SOUP
Begin with a big soup pot.
Heat oil and add onion; cook until translucent.
2 Tablespoons olive oil
1 large onion, minced
Add each item in the following order, stirring frequently until carrots are softened and garlic starts to caramelize at the end of sautéing when all veggies are combined together.
10-12 big carrots, peeled and sliced into circles
6-8 stalks of celery, sliced
8 garlic cloves (one bundle), minced
Then ADD to cooked veggies:
10 cups cold water
2 large bay leaves
2 teaspoons Kosher salt
1 teaspoon pepper
2 Tablespoons Better-Than-Bullion with 2 chicken bouillon cubes
OR 1/4 cup Better-Than-Bullion
OR 4 chicken bullion cubes
1/3 cup dry parsley flakes
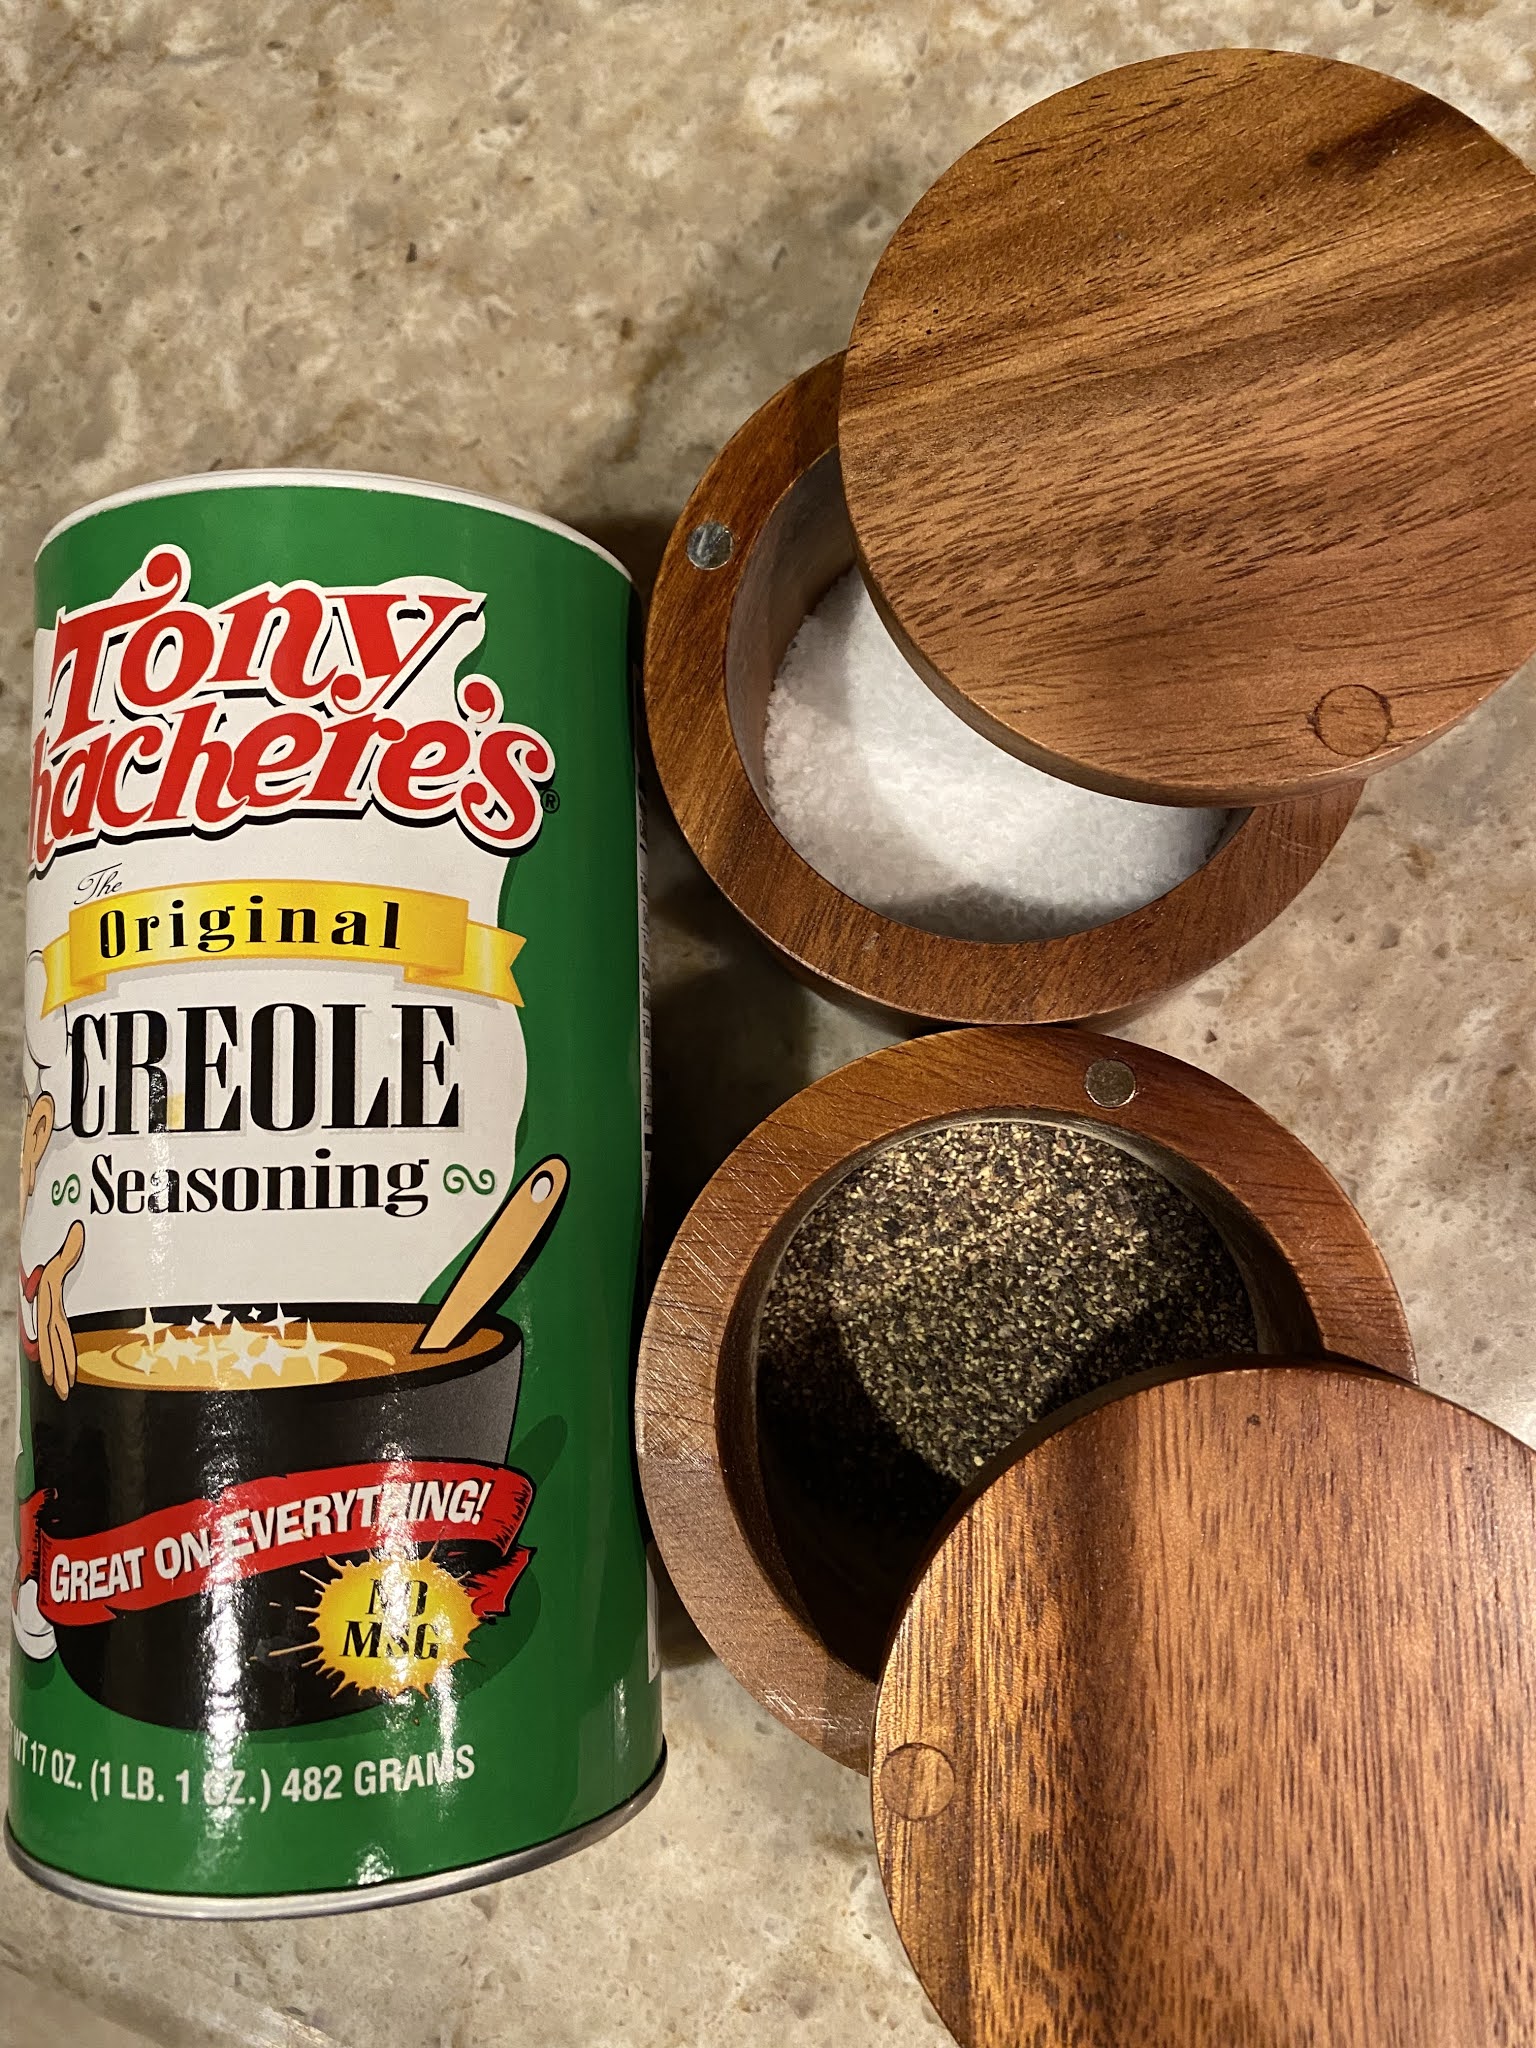
1 teaspoon Tom Chancery’s Original Creole Seasoning
left-over chicken pieced into small pieces
A note on the chicken:
Use a small amount or large… whatever you have
OR use left-over turkey
OR what I usually do - buy a grocery store or Costco rotisserie chicken and pick it apart
OR 2-3 pounds chicken breast cooked in crockpot on high for 3-4 hours before adding to your soup
Bring everything to a boil, turn down to low and simmer for 30 minutes.
A note on the simmering:
Adding more water while cooking will be necessary to maintain a “soup” consistency. Plan on it - Adding only 1 up at a time.
GLUTEN-FREE VERSION OF:
Tasha’s Homemade Egg Noodles
For the Gluten-FREE noodles:
Combine well in a medium bowl:
4 eggs
3 Tablespoons water
When combined well, ADD and combine thoroughly with a wooden spoon:
2 1/3 cups gluten-free flour mixture
Knead egg noodle dough on a floured surface 10-20 times.
Pound out into a large circle.
Push out to a 1/4 - 1/8 thickness with a rolling pin. .
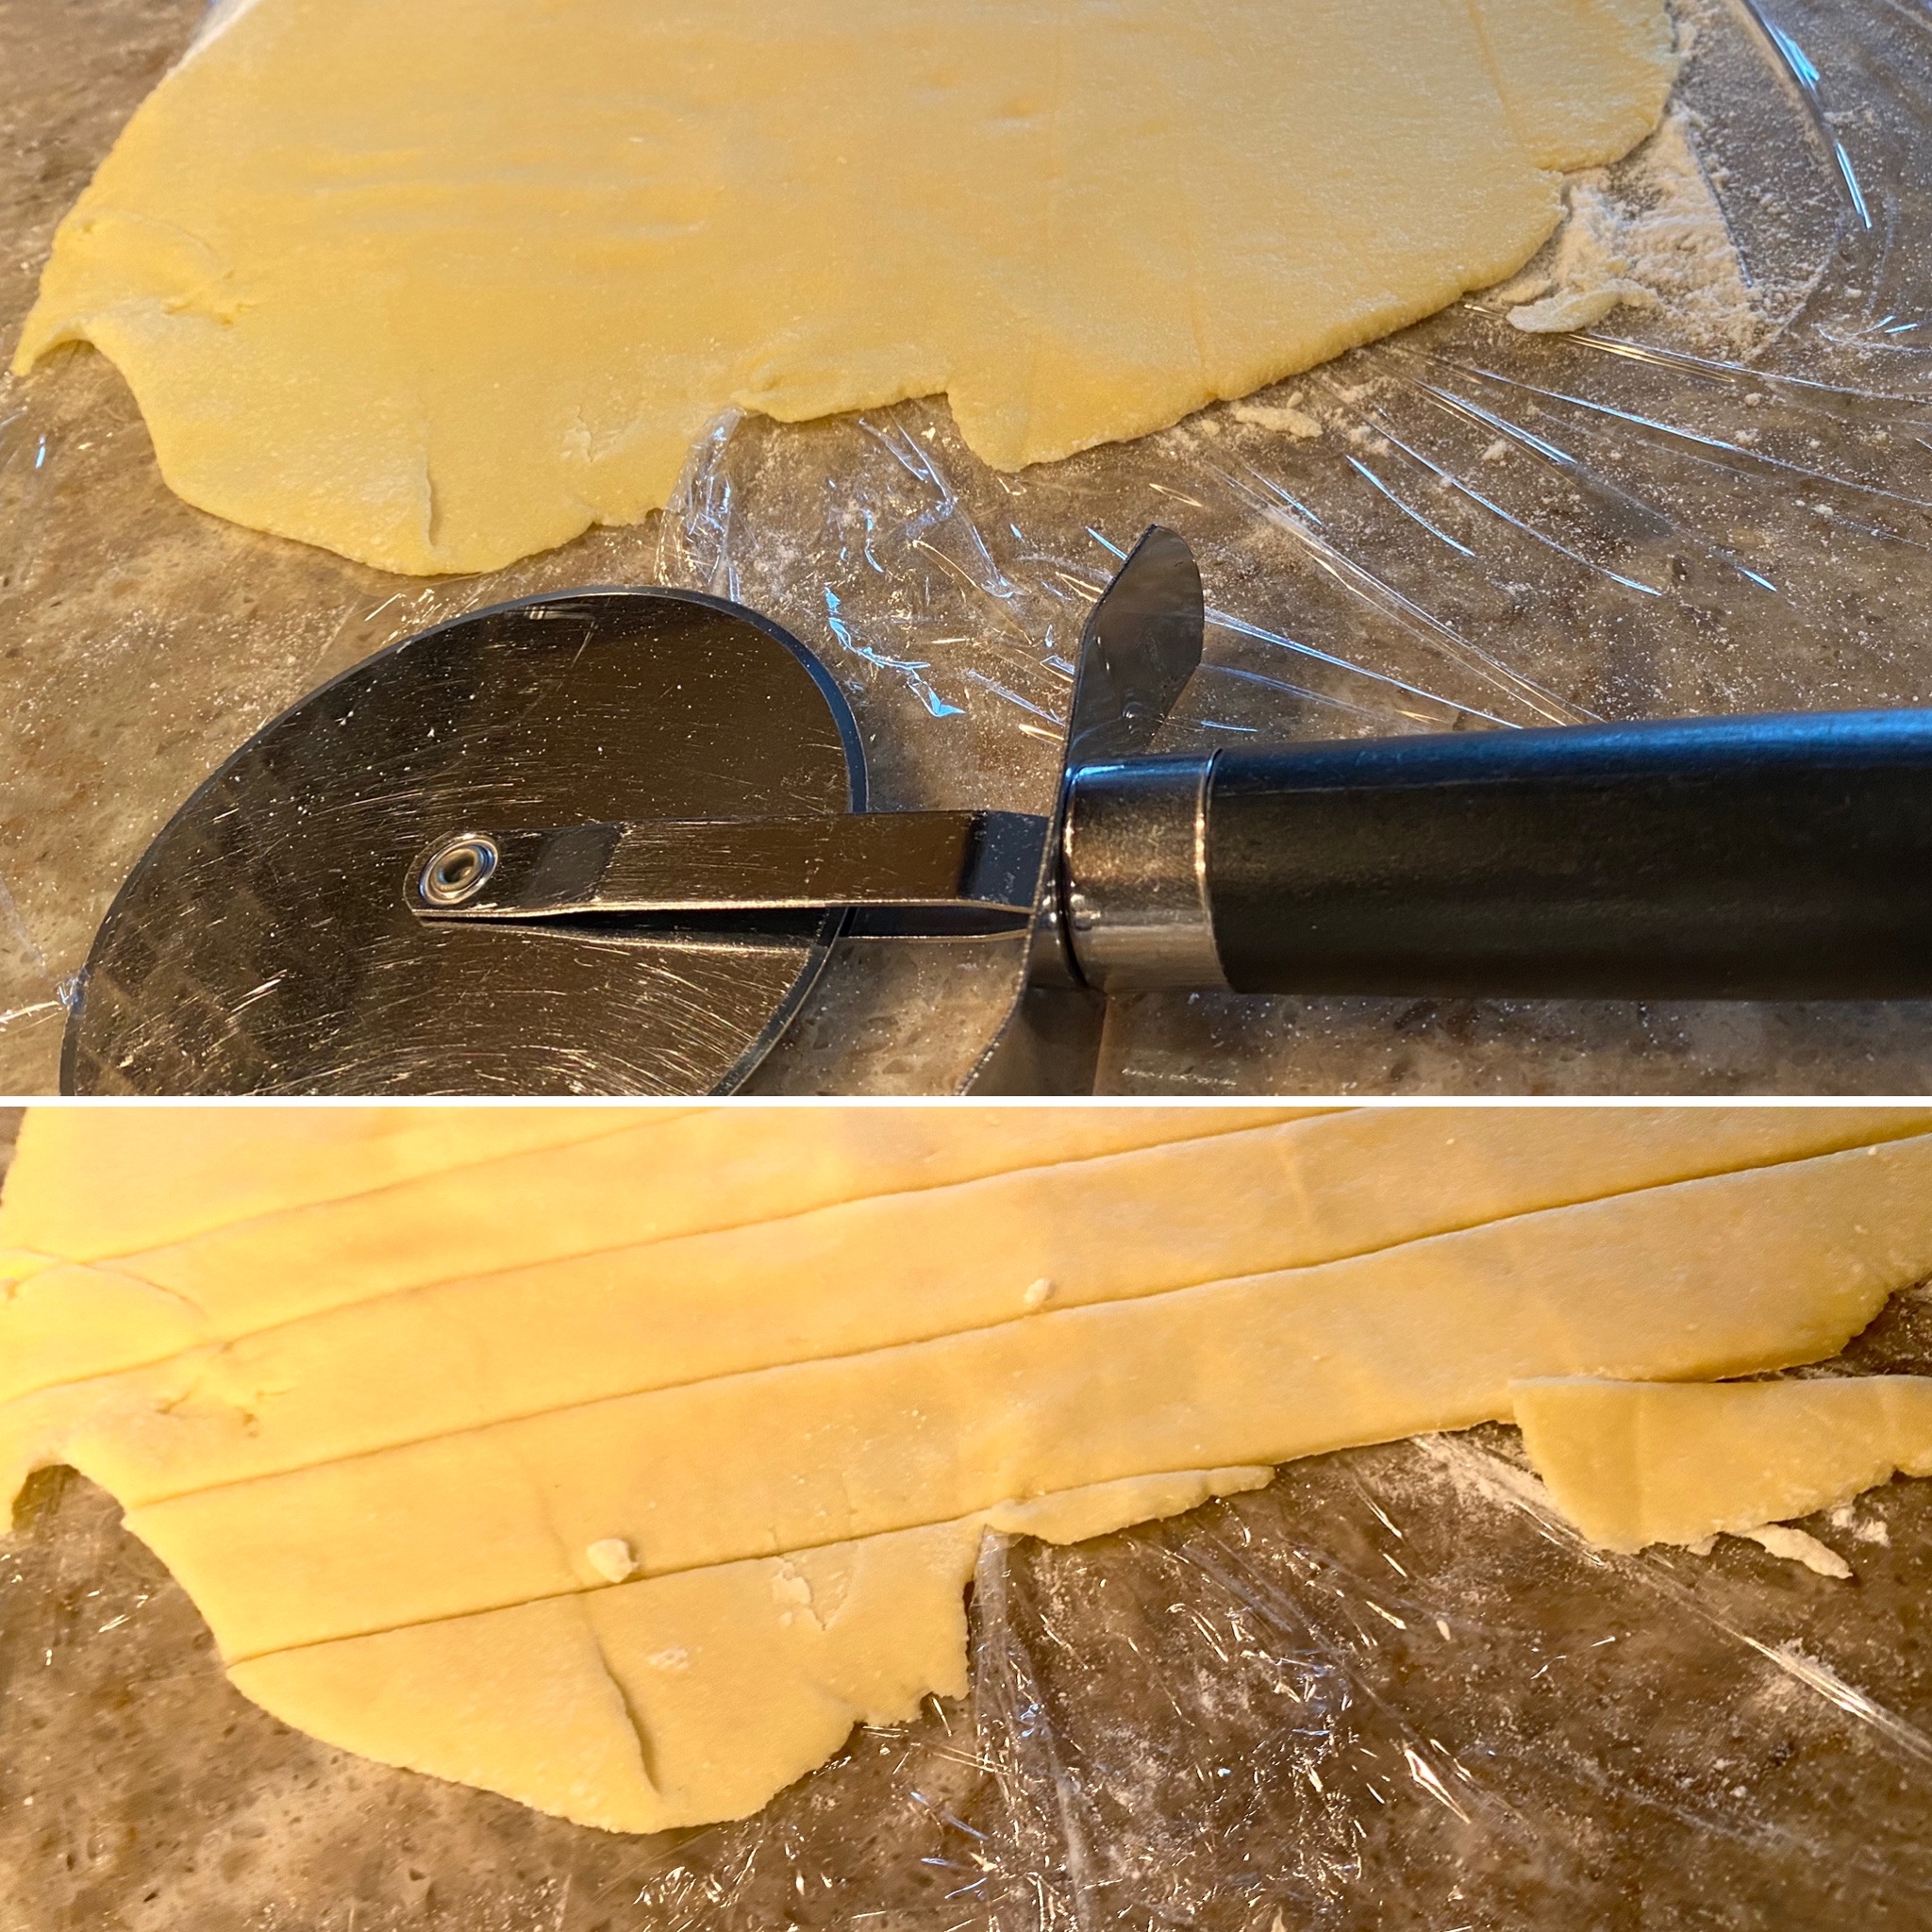
With a pizza cutter, cut dough into noodles - any shape, width and length you’d like.
BACK TO THE SOUP!!!:
Drop one noodle at a time into your simmering soup pot.
Stir.
Cook COVERED for 45-60 minutes at a simmer.
Add water as needed.
Taste.
Add pepper and Kosher salt, if needed.
Serve with plenty of your egg noodles in each bowl!
 |
HOMEMADE CHICKEN BROTH:
(When I am feeling fancy and
get an early start on this soup.)
Glean all the chicken meat off your
Costco rotisserie chicken.
Place the chicken carcass in another
cooking pot filled with filtered water.
(Literally everything but the string
used to hold the legs in place.)
Bring to a boil and then turn
down to a simmer for 2-3 hours.
You should lose 2-3 inches of the
water level through this process.
Once your carrots, celery, onion,
and garlic are cooked and fragrant,pour your homemade chicken broth into your large soup pot using a strainer to catch any bones or skin.
Let the carcass remnants cool and then discard.
|
 |
The secret to this recipe???
A spicy creole seasoning.
Goes from simple to AMAZING! |
 |
Knead egg noodle dough on a floured surface 10-20 times.
Pound out into a large circle. |
 |
Push out to a 1/4 - 1/8 thickness with a rolling pin.
With a pizza cutter, cut dough into noodles - any shape, width and length you’d like. |
 |
Clean up is done in a flash if you
put plastic wrap
down before you start your
kneading of the dough. |
 |
Half way through your cooking process -
remove the soup pot lid and
gently stir the noodles
to get the ones on the top
circulated to the bottom.
Cover again and finish the total
cook time on your egg noodles. |
 |
Fully cooked noodles!
These noodles are from the
lovely Tasha Schroeder
- one of my favorite foodies/inspiration.
Miss and love you friend! |
 |
Jane Austen
It does not look like it...
But this is how she helps me in the kitchen.
I get stared at from the back of the couch. |
... ... ... ... ... ... ... ... ... ...
(It's a recipe FOR your recipe!)
CLICK TO GO TO:
... ... ... ... ... ... ... ... ... ...
Click Link FOR: Mama Jo's Recipe Blog TABLE OF CONTENTS
... ... ... ... ... ... ... ... ... ...
For the Original Homemade Egg Noodles:
Tasha’s Homemade Egg Noodles
Combine well in a medium bowl:
2 eggs
3 Tablespoons water
1 teaspoon sea salt
When combined well, ADD and combine thoroughly with a wooden spoon:
2 cups flour
Knead egg noodle dough on a floured surface 10-20 times.
Pound out into a large circle.
Push out to a 1/4 - 1/8 thickness with a rolling pin. .
With a pizza cutter, cut dough into noodles - any shape, width and length you’d like.
Drop one at a time into your simmering soup. Stir.
Cook for 45-60 minutes at a simmer and COVER.
Add water as needed. Taste. Add pepper and Kosher salt, if needed.