
There's been a trend the last few weeks... I've seen it. There has been an up-tick with baking at home (and now NO flour or sugar in the store!). In addition to baking, there's been lots of things going on at home - homeschooling, guest room closet organizing, home-project-to-do-lists, and (in addition to all of these) I think one of them has been cleaning out the fridge.
...AND I would bet money more than a few of you cleaned out your fridge at some point in the last 3 weeks, found your supply of "Dotty" (what I named my Natural Yeast a LONG time ago) dried up, stored in a ziplock at the back of your fridge and realized that you had in your hand the ability to make your own bread; and not just ONCE - the ability to make bread for as LONG as necessary.
I need to apologize and I will do it quickly here and now: I laughingly said at nearly every basic natural yeast bread lesson "OK! This dehydrated yeast is for when the zombie apocalypse happens and there's no bread in the store! Keep this in your fridge until then... " Again, I am so sorry. Much to my boy's disappointment, there are no zombies. Regardless - zombies or NO zombies - store bread is indeed either gone or in short supply with COVID-19 either keeping people in their homes and/or making huge grocery shopping trips.
Back to the dehydrated Natural Yeast in your hand as you clean out your fridge...
Over the last few years I've sent dry natural yeast flakes in the mail, handed them out the car window in the parking lot at church, and MOSTLY there has been an ample supply of them given freely at any of the basic natural yeast bread lessons I've done individually or in large groups.
My blog post to re-hydrate said flakes has been viewed more than anything else the last few weeks...
You've brought your supply of "Dotty" back to life! The perpetuation makes me happy!
Now let's use it to re-supply that corner at the back of your fridge - perpetuate "Dotty" a few more years; share her a few more times...
PLUS - knowing that this blog post is now wanted is the push I needed. I had been meaning to post this post for far too long.
I usually give myself 2-3 days to leave this out on the counter. I definitely don't plan on having people over for dinner if I'm in the middle of this... I already decorate like an old gypsy - I don't need to add everything else I do to the decor!
You can start this process without making bread, however, the photos for this post will show the process with. I just do it all at once - starting the dehydrating process pairs perfectly with making natural yeast bread as follows:
NOTE: These are NOT the same "natural" yeast flakes that you find/buy at the grocery store. These are a living organism used for the leavening of bread and other baked goods.
CLICK LINK FOR: Baking with Natural Yeast - BASIC LOAF
 |
Gather your supplies! Ready to use Natural Yeast from the fridge. (HAPPY and HEALTHY yeast is preferred... and dare I say required) Parchment paper Cutting board (to move your drying Natural Yeast if needed) Flour Filtered drinking water Fork |
 |
You'll need a piece of parchment paper large enough to cover your cutting board. |
 |
IF you're making bread - use the Natural Yeast amount needed and then feed your jar as normal. Add flour and water to feed your jar of Natural Yeast. NOTE: When adding your flour and water, do NOT exceed 1/2 of the amount of Natural Yeast in your jar. EXAMPLE: After adding Natural Yeast to my bread mix shown in the above photo on the right, my jars each had a 2 cups remaining. I added 1 cup flour and 1 cup water to each jar and mixed thoroughly. |
 |
Place 1/4 cup - 1/2 cup of mixed Natural Yeast on your parchment paper. |
 |
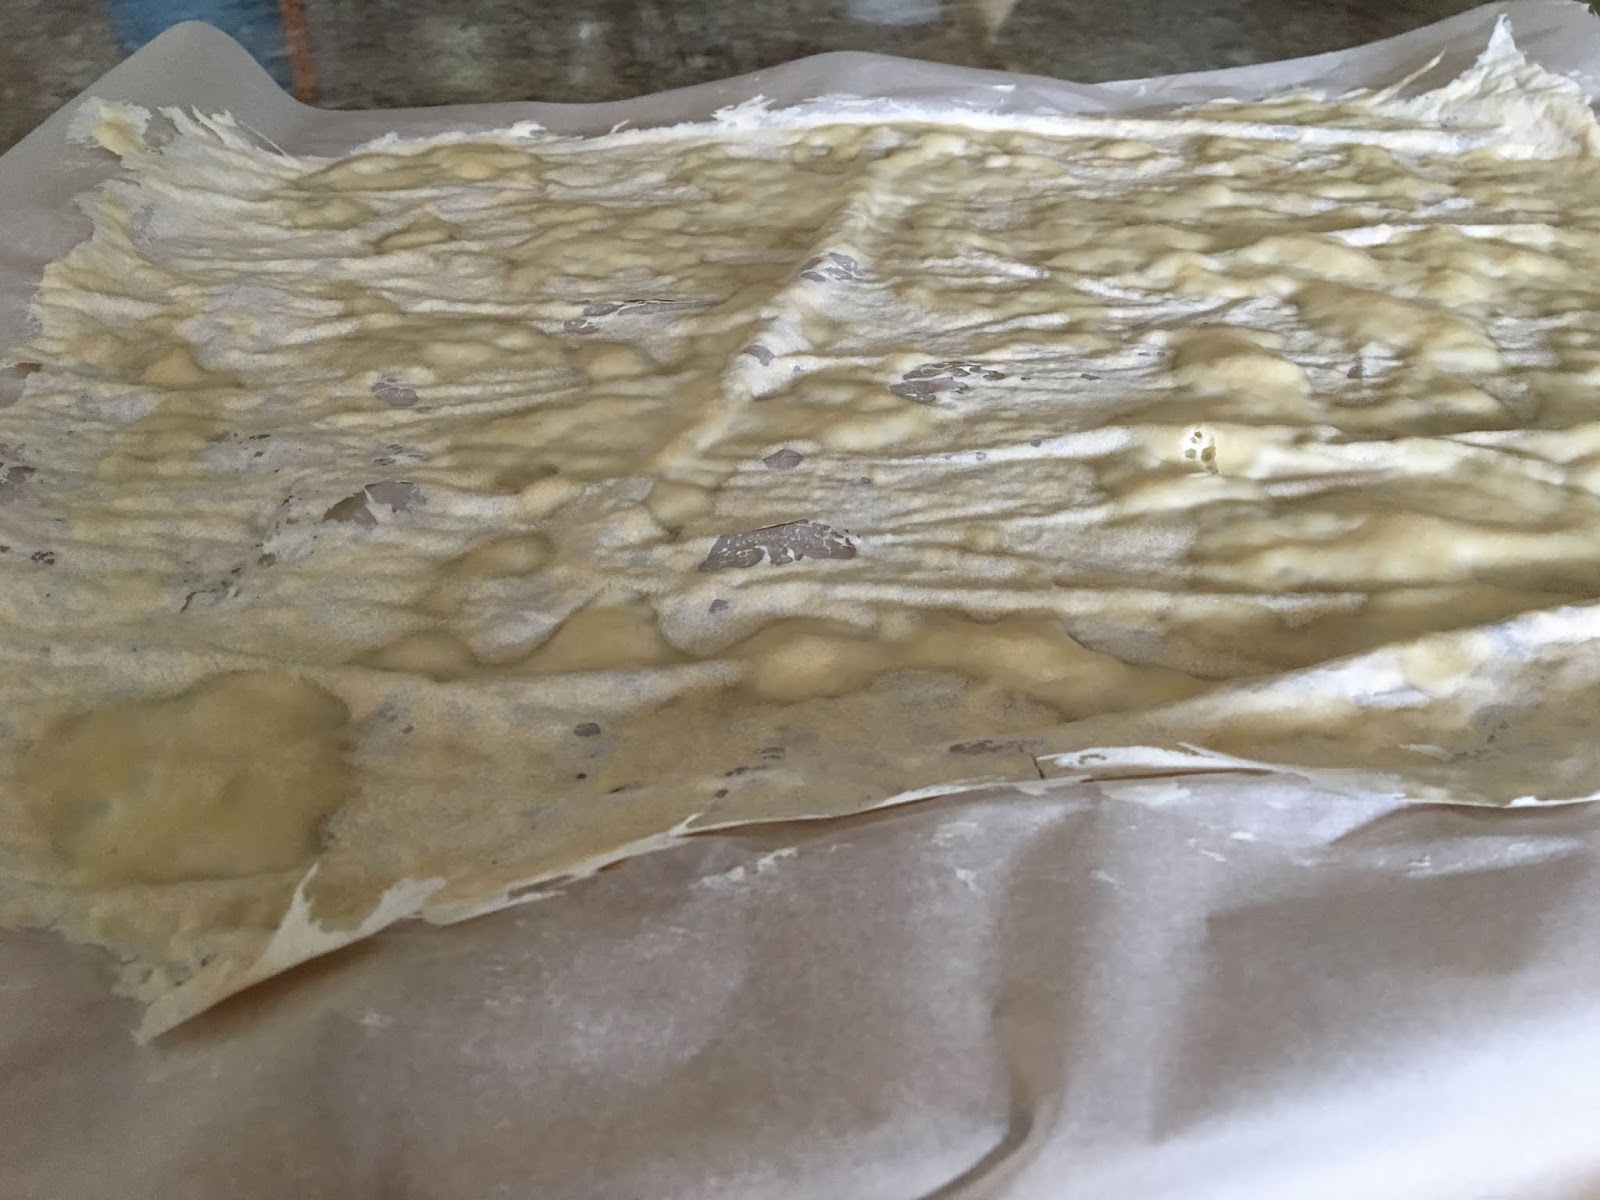
Spread out as THIN as you can. There will be thicker spots than others... No worries! It will all eventually dry-out! EVEN in Houston in the summer it will dry out... It just takes a lot longer. |
 |
DAY 1 - 7PM (Made pizza the next day with the dough) |
 |
DAY 2 - 12 noon |
 |
DAY 2 - 8PM |
|
DAY 3 - 10AM (Made bread with the dough) |
 |
The parchment paper will conform to the dryness of the Natural Yeast. It will likely start breaking into large pieces - MOST IMPORTANTLY - It will be dry to touch and you won't see ANY wetness, even in the thicker parts of it. |
 |
Grab your supplies to store your now dehydrated Natural Yeast. Sharpie Quart-size "freezer" bag rubberband |
 |
The pieces will brake and crumble easily. Some may need a little more help to break than others. Perfectly fine!!! It will all re-hydrate when needed. |
 |
Get as much air out of your bag as you can before sealing it up - I prefer using a "freezer" quart size for the thickness and long-term storing abilities of the plastic. Secure with a rubber band - and remember to date your yeast! I usually have 2 or 3 of these bags stored in the back of my fridge. Putting on the date you stored it will help you use up or share the oldest one first... |
 |
DONE. READY! Store in your fridge for sharing, First-Aid for your jar of natural yeast, or for the next (hopefully NEVER!) quarantine. |
CLICK LINK FOR: Mama Jo's Recipes - Table Of Contents
CLICK LINK FOR: Baking with Natural Yeast - Rehydrating Yeast Flakes
CLICK LINK FOR: Baking with Natural Yeast - PIZZA
CLICK LINK FOR: Baking with Natural Yeast - Bret's Dinner Rolls