Mine? Well, since you asked, I am inclined to answer around a level 15. YUP!!! They are detested. YUCK! Please no. They spill. They spill on kids. They spill on the table. They spill to the floor. And I forget, how many steps does it take to get it all done?
A huge question for you then: What's the alternative to the awful, terrible, no good little bowls filled with with dye all over my kitchen?
My fellow repurposing friends, the answer : "Tie"-Dyed Eggs.
My discovery of this alternative happened by chance more than a few years ago on my favorite food-blog ourbestbites.com.
My fellow repurposing friends, the answer : "Tie"-Dyed Eggs.
My discovery of this alternative happened by chance more than a few years ago on my favorite food-blog ourbestbites.com.
After trying it out, I ventured into the web searching through several other websites with the same idea. Now, after years of using the same silk pieces until they die (I LOVE MY PUN) out and cycle in new ones, I've got a fool-proof method that works EVERY TIME. I pinkie promise. And the best part of all? Oh my, it is amazing: You get the eggs cooked and colored ALL AT THE SAME TIME. AMAZING!
Here you go... photos and all.


Click Link FOR: Mama Jo's Recipe Blog TABLE OF CONTENTS
Here you go... photos and all.

Required Items:
raw eggs - no more than 12-24 at a time
100% silk ties your husband is done with... or purchased at your favorite thrift store
cotton rags
rubber bands
sewing scissors
very large cooking pot
white vinegar
slotted spoon
large pot or metal bowl
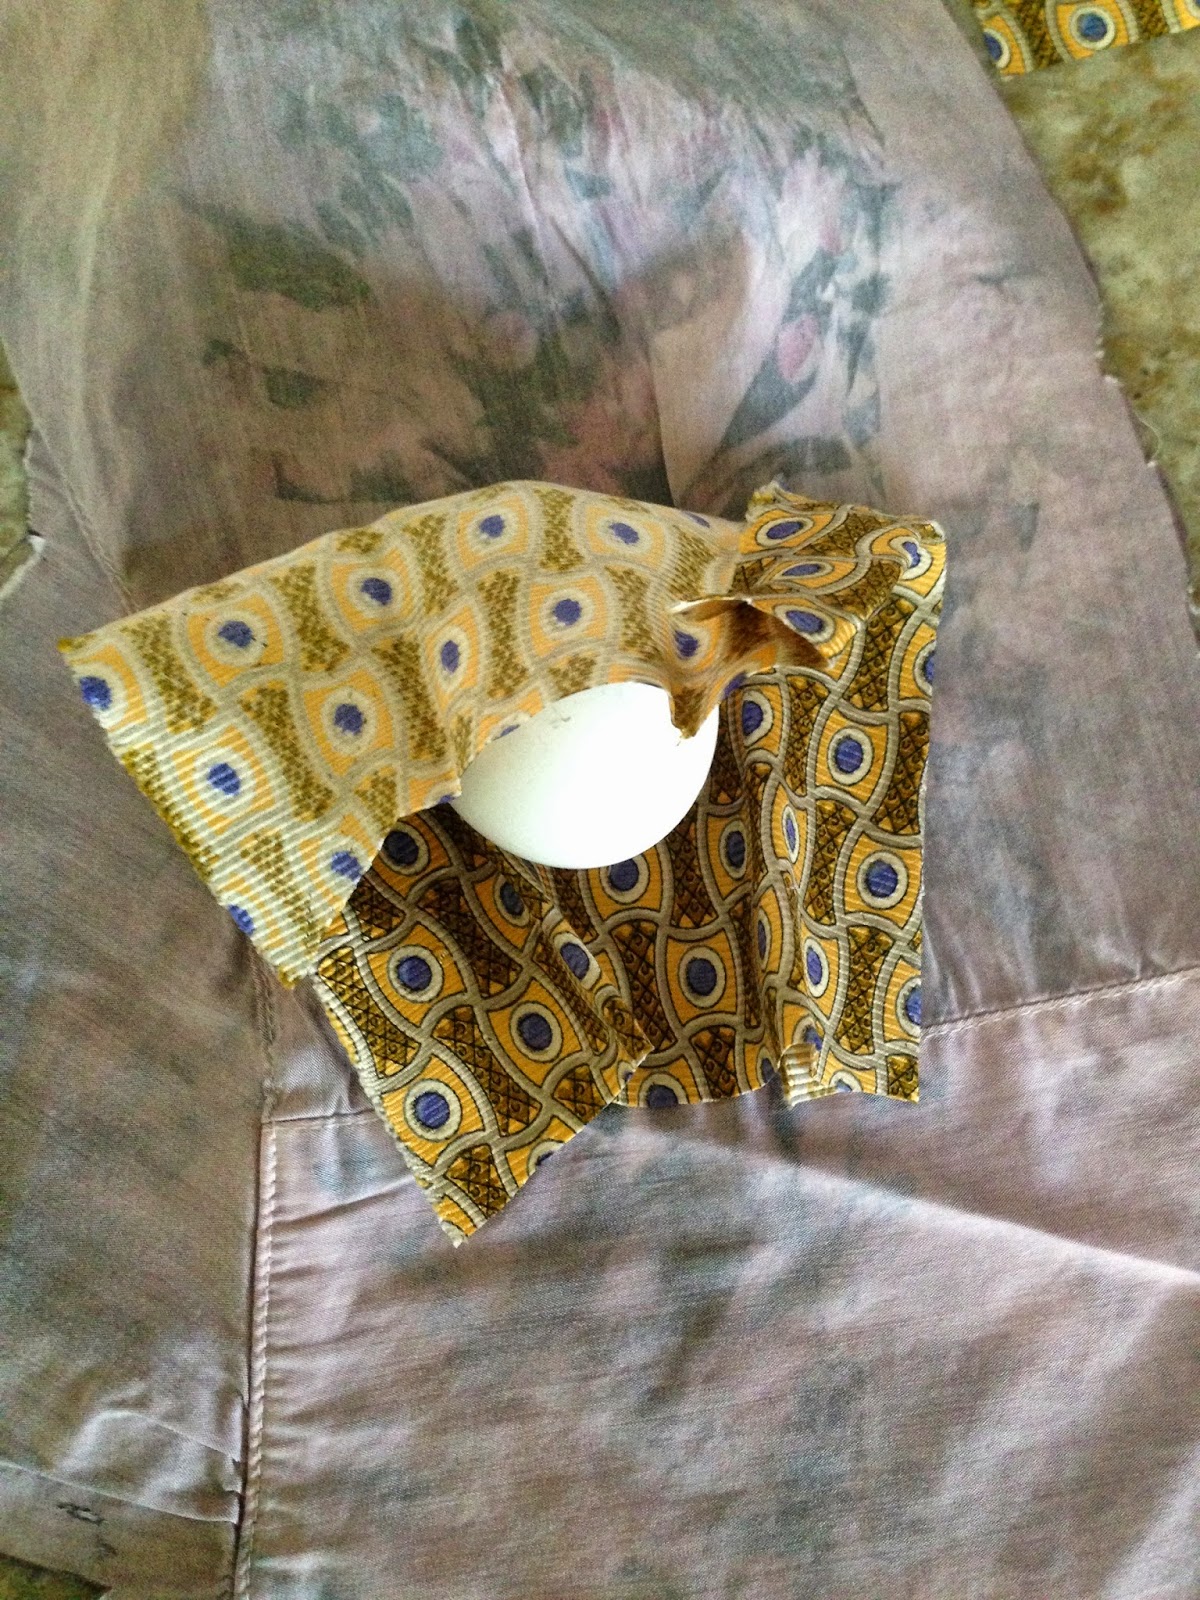
Cut your silk pieces large enough to
wrap around your egg.
You may also use strips of leftovers once
you get down to the ends of your ties...
This makes for some pretty surprising eggs!
Wrap your pieces as best you can with the
FACE of the silk pressing onto the egg shell.
Getting a rubber band tied
at the top is best.
However, your egg will still dye
without this step, it will just have
more blank spots.
Once wrapped in its silk piece or pieces,
wrap with a cotton rag.
(The one pictured is in its 7th year of
egg dyeing... it is indeed well used.)
With the cotton rag twisted at the top,
secure with a knotted rubber band as well
and GENTLY place at the bottom of
your largest cooking pot.
Repeat until the bottom of your pot is filled
with NO MORE than 1 layer of wrapped eggs.
NOTE: You do not have to fill the bottom of your pot with wrapped eggs to have this work.
You just don't want to over load the pot and
have mushy eggs in the end... :0/
Fill your pot with cold water more than twice the amount over the top of your eggs.
NOTE: That means it's a nearly full pot...
Add 1/4 cup white vinegar.
Bring to a boil.
Let boil at an easy, rolling boil for 12-15 minutes.
Remove from heat.
Place pot next to your sink.
In your sink, run cold water
into a large pot or metal bowl.
If your tap water is warm like mine in Texas,
add ice cubes to the final rinse
of water to make it cold.
One at a time, gently place cooked eggs into the bowl.
Keep the water going until the eggs cool enough to handle, 3-5 minutes.
Unwrap (it's like opening a present!)
and see what you have created...
KEEP YOUR SILK PIECES
Keep your silk pieces and reuse until
they do not transfer color.
Dry completely on an old towel and
keep in a dry container.
These are from silk pieces I have had
for more than 5 years...
They are still "tie"-dyeing!
Transfer back into egg cartons and refrigerate.
Gift to family, friends and neighbors...
The Easter Egg
- especially a beautiful egg -
is a reminder of the season we celebrate.
- He is Risen
- He Lives
- He is the true gift that
we have been given
Happy Easter!
XOXO, Jo
 |
| 2022 with Reagan |
Love these, first year I didn't hate decorating eggs. Thank you for sharing. We found the thinner silk ties worked the best
ReplyDelete