Monday, April 15, 2019

GLUTEN-FREE Sugar Cookies


Let's be personal for just a moment... this original recipe was a labor of LOVE!  It took nearly 10 years to find!  We went through  A  LOT - (A  WHOLE  LOT!) of sugar cookie recipes before finding one that my handsome man loved.  

Then, I had the task of wrapping my head around making it gluten-free. 

Without further procrastination, (it has been a "draft" since December 2017...) I give you:  Bret Sr.’s Favorite Sugar Cookie

... ... ... ... ... ... ... ... ... ...


1 cup (2 sticks) butter, softened
1 ½ cups sugar

1 egg
1 ½ teaspoons vanilla
½ teaspoon almond extract

3  cups Gluten-FREE flour mixture
1 teaspoon baking powder


Preheat oven to 375 F.  

In a mixing bowl, cream butter with sugar with a hand mixer (or a Kitchen Aid) mixer until combined.  

Once combined, beat sugar and butter on HIGH for 10-12 minutes until light and fluffy.

Beat in egg and extracts.  

In separate bowl, mix flour, and baking powder; add to butter mixture 1 cup at a time and mixing in completely after each addition.  

DO NOT CHILL DOUGH.  

Divide dough into two balls.  

On your counter sprinkle an Tablespoon or two of the gluten-free flour mixture to roll out each ball ¼ inch thick - one at a time.  

Monitor your use of the cookie dough.  
Do not roll out and cut more than 3 times.  
TOSS whatever is left over after rolling it out 3 times.  
(WARNING:  your cookies will be nasty… Don’t be tempted to roll out more than 3 times.)

Dip cookie cutter in flour before each use.  

Bake cookies on a baking sheet with parchment paper for 10-12 minutes or until cookies are just barely, barely brown.  

DO NOT transfer them to a cooling rack immediately.  
Let sit on baking sheet for 2-3 minutes before transferring.  
Lift parchment paper gently on opposite corners and let cool completely before icing.


NOTES AND TIPS:  I use what’s left as a lump cookie with pretty sugar sprinkled on top instead of rolling out into another shape.

If you want to skip icing just sprinkle your cookies with colored or large granulated sugar before baking!  Skipping the icing makes these cookies incredibly fast since there is NO CHILL TIME... (HECK YES!)


... ... ... ... ... ... ... ... ... ...

Sugar Cookie Icing:

When sugar cookies are baked and cooled make the following in desired colors.  I usually make 3 or 4 to accommodate the number of cookies made.  I use fairly large cookie cutters.  For smaller cookies, more icing will be needed.

For each color:

1 cup powder sugar
2 teaspoons milk
2 teaspoons light corn syrup
¼ teaspoon almond extract
food coloring

In a small bowl, stir together powder sugar and milk until smooth.  

Beat in corn syrup and almond extract until icing is smooth and glossy.  

If icing is too thick, add more corn syrup.  

Add food coloring until desired color is achieved.  

Use the back of a spoon to distribute icing and then to paint sugar cookies.

... ... ... ... ... ... ... ... ... ...


NOTES  FOR  G-FREE  FLOUR  BAKING:
You are using a white rice-based flour...
Be careful to note that the cookies will remain extremely
WHITE and you will over-cook and/or burn your
cookies if you are waiting for a
"light-golden brown" color on top.

...It's never gonna happen! 


I realized when Payton made these on her own
(to give out to her friends! So cute...)
that there needed to be a visual
on how thick the cookies need to be!

And a  1/4  INCH  is pretty thick guys...

I have squished enough of these over the years
to know what it "feels" like when the right thickness.
But here's something for y'all to LOOK at.  :0)

The fastest way to make these sugar cookies is to
squish a ball of cookie dough out to a  1/4 inch thick,
cut a shape with a cookie-cutter within the circle,
(DON'T CUT ALL THE WAY DOWN!),
finish off your cookies with some colored sugar
before baking and then BAKE.
Easy-peasy...


... ... ... ... ... ... ... ... ... ... 
(It's a recipe FOR your recipe!)

CLICK TO GO TO: 


... ... ... ... ... ... ... ... ... ...


Click Link FOR:        Mama Jo's Recipe Blog TABLE OF CONTENTS


Tuesday, April 2, 2019

Baking with Natural Yeast - PIZZA (BONUS: with sauce recipe!)


Our Version of "Hawaiian" Pizza:

- BACON! (cooked)
- Fresh Pineapple
 - Mozzarella
- Homemade Sauce (recipe below)
- 1/2  of the dough from
a READY TO USE
natural yeast basic bread dough
(recipe linked below)
- grapeseed oil


Baking with Natural Yeast Basic Bread Dough - 
mixed the day before and now READY TO BAKE! 

NOTE:      2 large pizzas per basic bread dough recipe

... ... ... ... ... ... ... ... ... ...


Click Link for Basic Bread Dough:             Baking With Natural Yeast - BASIC BREAD DOUGH


Mama Jo’s Pizza Sauce Recipe: 

1/2 cup Bertoli’s EXTRA virgin Olive Oil
1 and 1/2 cups chopped onion

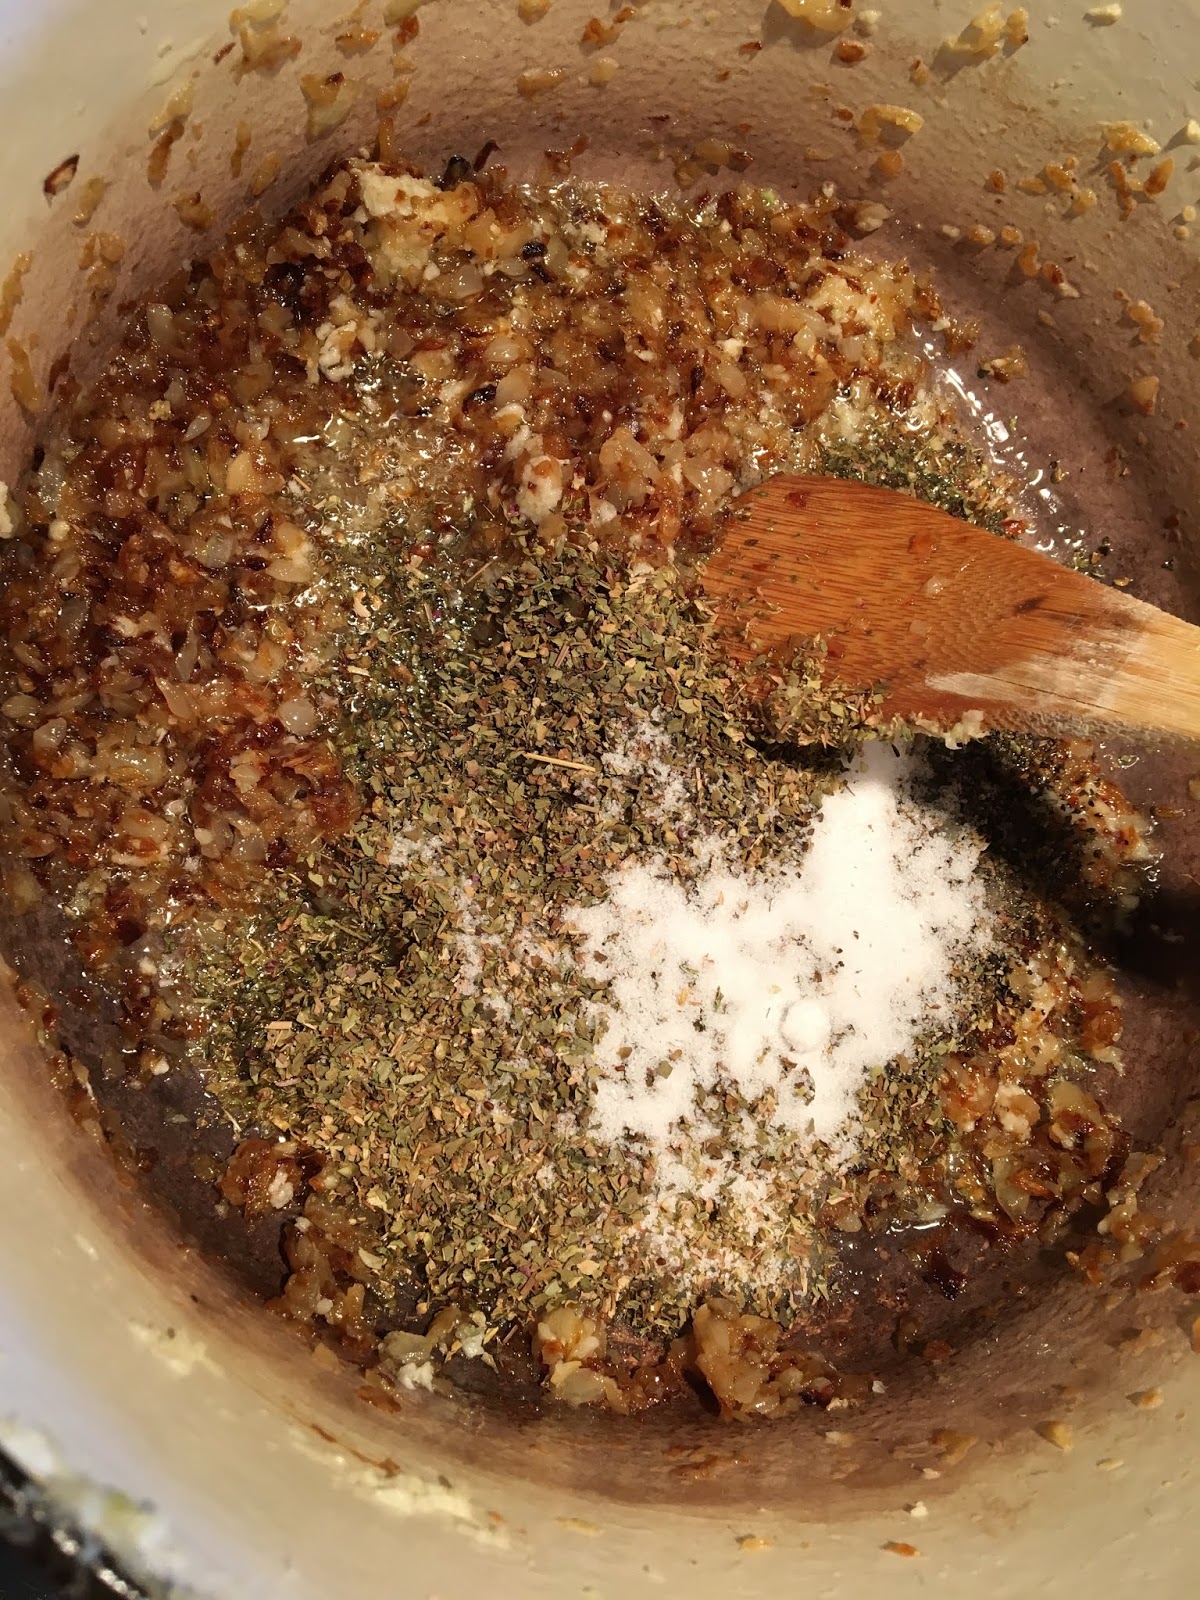
In a large cooking pot heat the oil and then add onions.  
Cook until dark golden yellow and caramelized - constantly stirring.


Then add: 

1 bundle of minced garlic  (8-10 cloves)
3 TABLESPOONS oregano
2 TABLESPOONS basil
2 TABLESPOONS sugar
2 teaspoons sea salt
1 teaspoon coarse black pepper 
20 (individual...) red pepper flakes 

1 (30 oz.) can tomato sauce 
1 (8 oz.) can tomato puree 

Simmer for 15-30 minutes

Makes enough  sauce for 4-5 homemade pizzas.
Refrigerate  or freeze  any extra sauce you do not use. 

Bake at  425°  for 15-18 minutes.


Be sure to caramelize your onions 
BEFORE
adding the garlic or you will 

scorch/burn your garlic.


Garlic just needs a few minutes of
cooking before you add the spices.


I know... It may seem funny.
But this is the "just-right" amount of both!


Your sauce should have a lovely
SHEEN of olive oil.

If not, add a few more Tablespoons
until it does!


Spray with Pam cooking spray and then
sprinkle a coating of cornmeal on
your FLAT baking stone.


I use my hand at first, wet with water
so the dough doesn't stick...

And then a roller also wetted with water
to roll out the dough.
Keeps the crust CRISPY!  Not soggy...


OR  - Use a bar pan with parchment paper.
Spray with Pam cooking spray and then 
sprinkle a coating of cornmeal on
your parchment paper.


I use any where from 1 - 1 & 1/2 cups of sauce.

TIP: Use the bottom of your measuring
cup to spread your sauce.


MEAT  LOVERS

- Bacon (cooked!)
- Pepperoni (uncured)
- Sausage (cooked!)


HAWAIIAN

- Bacon (cooked!)
- Pineapple (fresh)


... ... ... ... ... ... ... ... ... ...


FOR PITA PIZZAS:


Prep on a baking tray lined with foil.


Set your oven to HIGH BROIL and “toast” the side of the pita that will eventually be the bottom (I prefer the bumpy side for my bottom so that the sauce is on the flatter side…)


Broil for 2 minutes and then pull out of the oven 

- FLIP YOUR PITA OVER - 

layer what you want on the side of the pita that was not “toasted”.


HIGH BROIL for 2-4 minutes - be careful not to burn your pizza! 


... ... ... ... ... ... ... ... ... ...


... ... ... ... ... ... ... ... ... ...


Wednesday, February 27, 2019

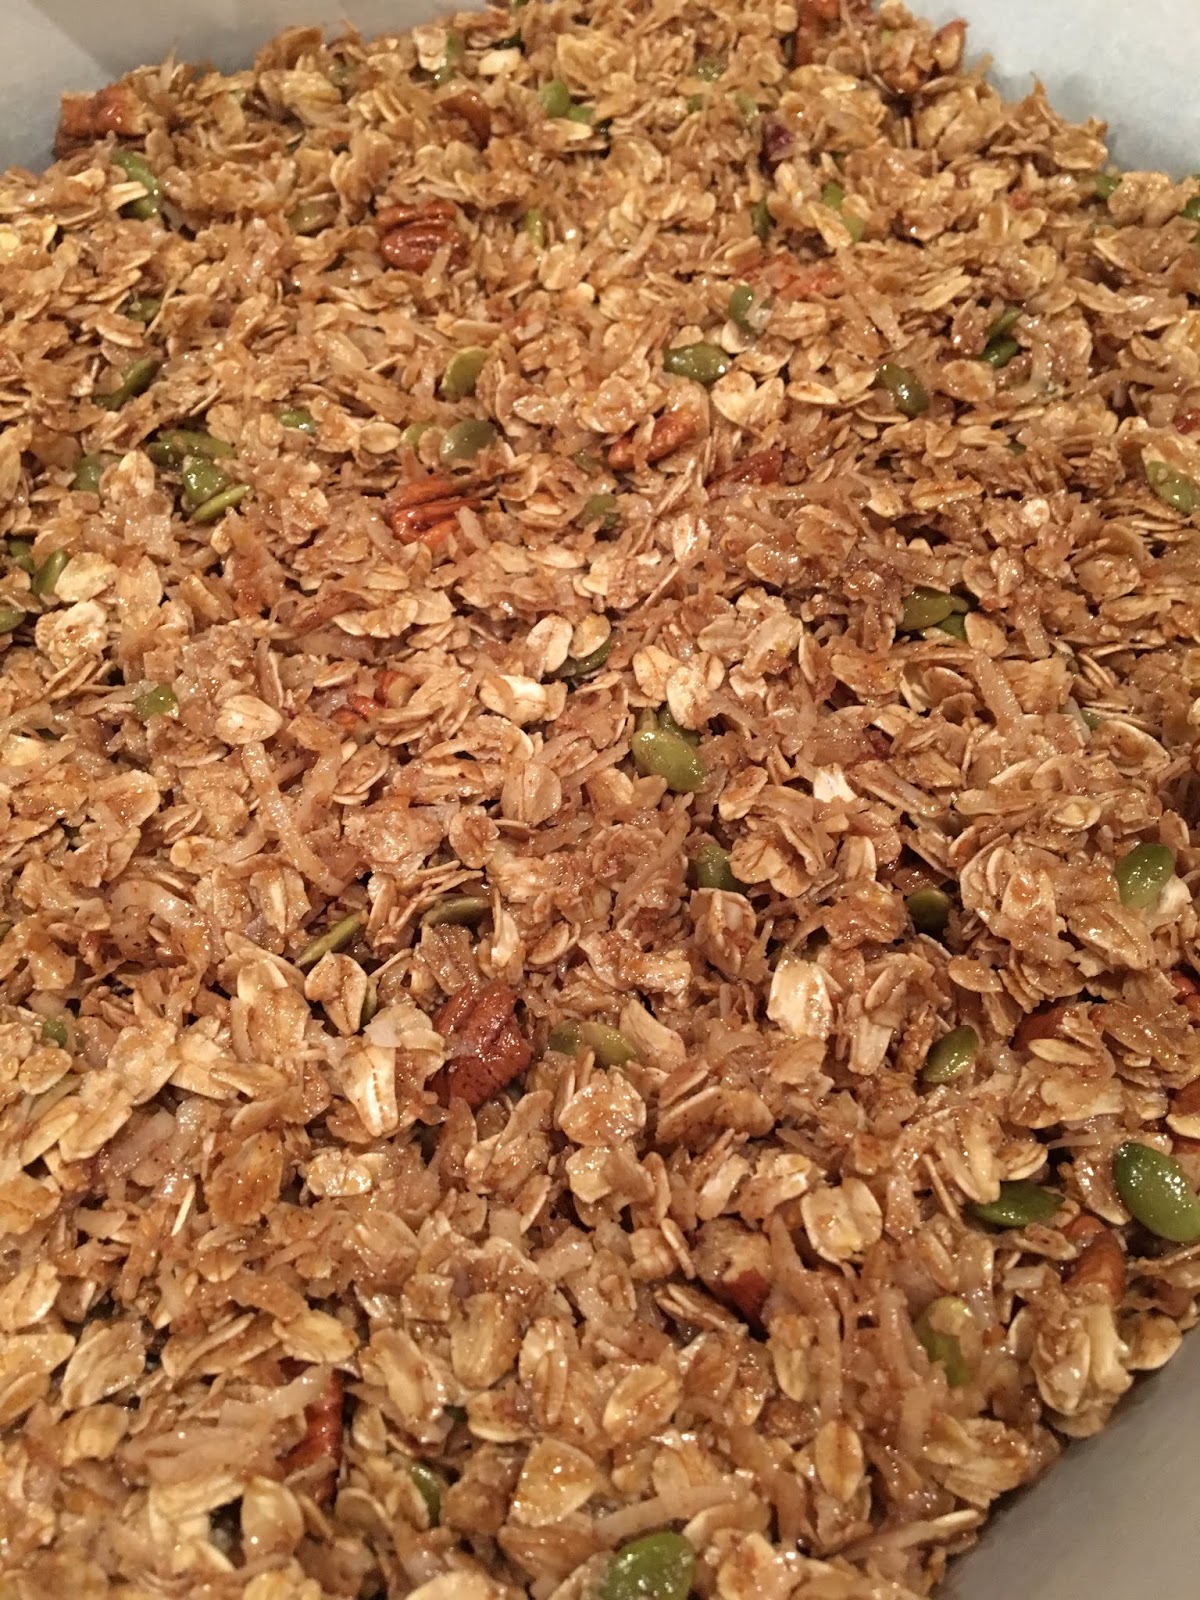
Gluten-Free UPDATE for Coconut / Pecan Granola


6 cups old fashioned oats
2 cups Unsweetened coconut flakes (it's really just 1 whole package...)
1 cup pecan pieces
1 cup raw pepitas (these are GREEN unshelled pumpkin seeds)
2/3 cup milled flax seed
1 Tablespoon cinnamon
1/2 teaspoon pink Himalayan salt

1 1/2 cups brown sugar
1/2 cup water

1/2 cup unrefined, coconut oil
1 Tablespoon vanilla
1 teaspoon almond extract
(optional:) 1 teaspoon coconut extract 

2 baking sheets (preferredpampered chef bar pans)
parchment paper


In a large bowl mix together oats, unsweetened coconut, pecan pieces, pepitas, milled flax seed, cinnamon and sea salt.  

Combine well. 


In a small or medium sauce pan, combine water and brown sugar.  
Bring to a boil for 1 minute.  

Remove from heat.  
Add unrefined coconut oil, vanilla and almond extract to the water and sugar mixture. 

Last combing step!  
Add your sugar mixture to the large bowl.  
Combine wet and dry ingredients until mixture is uniform and not clumpy.

Line  2 baking sheets with parchment paper.  
Divide 1/2 of the mixture between the baking sheets and level.


Bake in the oven at 250, with your racks evenly spaced, for your first set of 18-20 minutes.  

Remove both pans and gently remix your granola on each baking sheet.  
Replace baking sheet to your oven - SWITCHING THEIR POSITION.  

Bake another 18-20 minutes, your second set... and... 

REPEAT:
Remove both pans and gently remix your granola on each baking sheet.  
Replace baking sheet to your oven - SWITCHING THEIR POSITION.

Bake for your third and LAST TIME!  18-20 minutes... and... 

REPEAT:  
Remove both pans and gently remix your granola on each baking sheet.  

Let cool completely before transferring it to an air-tight container. 

Enjoy this form of "oatmeal" as a quick snack, as cereal with milk, or with your favorite yogurt.  (Definitely makes Non-fat Greek yogurt happier... as well as "oatmeal" traumatized children!!!)


Click Link FOR original post:            Coconut & Pecan Granola


Wednesday, November 7, 2018

Baking with Natural Yeast - Kolache BREAKFAST Loaf


RECIPE  UPDATE  AS  OF:  10/28/2022

Over the years this recipe has changed in a very significant (BETTER!) way...

Super simple to implement.  
(I will include some visual aid with photos.)
The ingredients DO NOT change, the steps DO NOT change, the ONLY thing to do differently is to make TWO breakfast loaves with the same amount of ingredients.  

The benefits are as follows:  less bread per slice, you magically double your baked amount WITHOUT changing the amounts (MAGIC!), and there is no more wrestling your dough into the parchment paper before stapling.  AHHHHH... y'all, it's so much better!  Observe in the next photos:


-----------------------------------


CLICK to watch the YouTube Link with Instructions:
Baking with Natural Yeast - Kolache BREAKFAST Loaf


(Please click on the link above and watch video for detailed instructions!)


What you'll need:

Drinking water

Ready to bake natural yeast dough - NOTE: enough for 1 basic loaf (make the day before)

Pampered Chef Stoneware large BAR pan / Cookie sheet - (1 inch edge)

Parchment paper

8 ounces sharp cheddar cheese - Grated   *** OR USE:    5-6 slices of your cheese of choice

1 pound sausage - Cooked

12 eggs - Cooked and scrambled


BAKE  at 400 for 28 minutes.  

LET COOL on a cooling rack for 15- 20 minutes before tearing off paper and slicing.


-----------------------------------


Click Link FOR:    Baking with Natural Yeast - Basic Bread

Click Link FOR:    Mama Jo's Recipe Blog TABLE OF CONTENTS


Thursday, September 14, 2017

Pork Taco Bowls

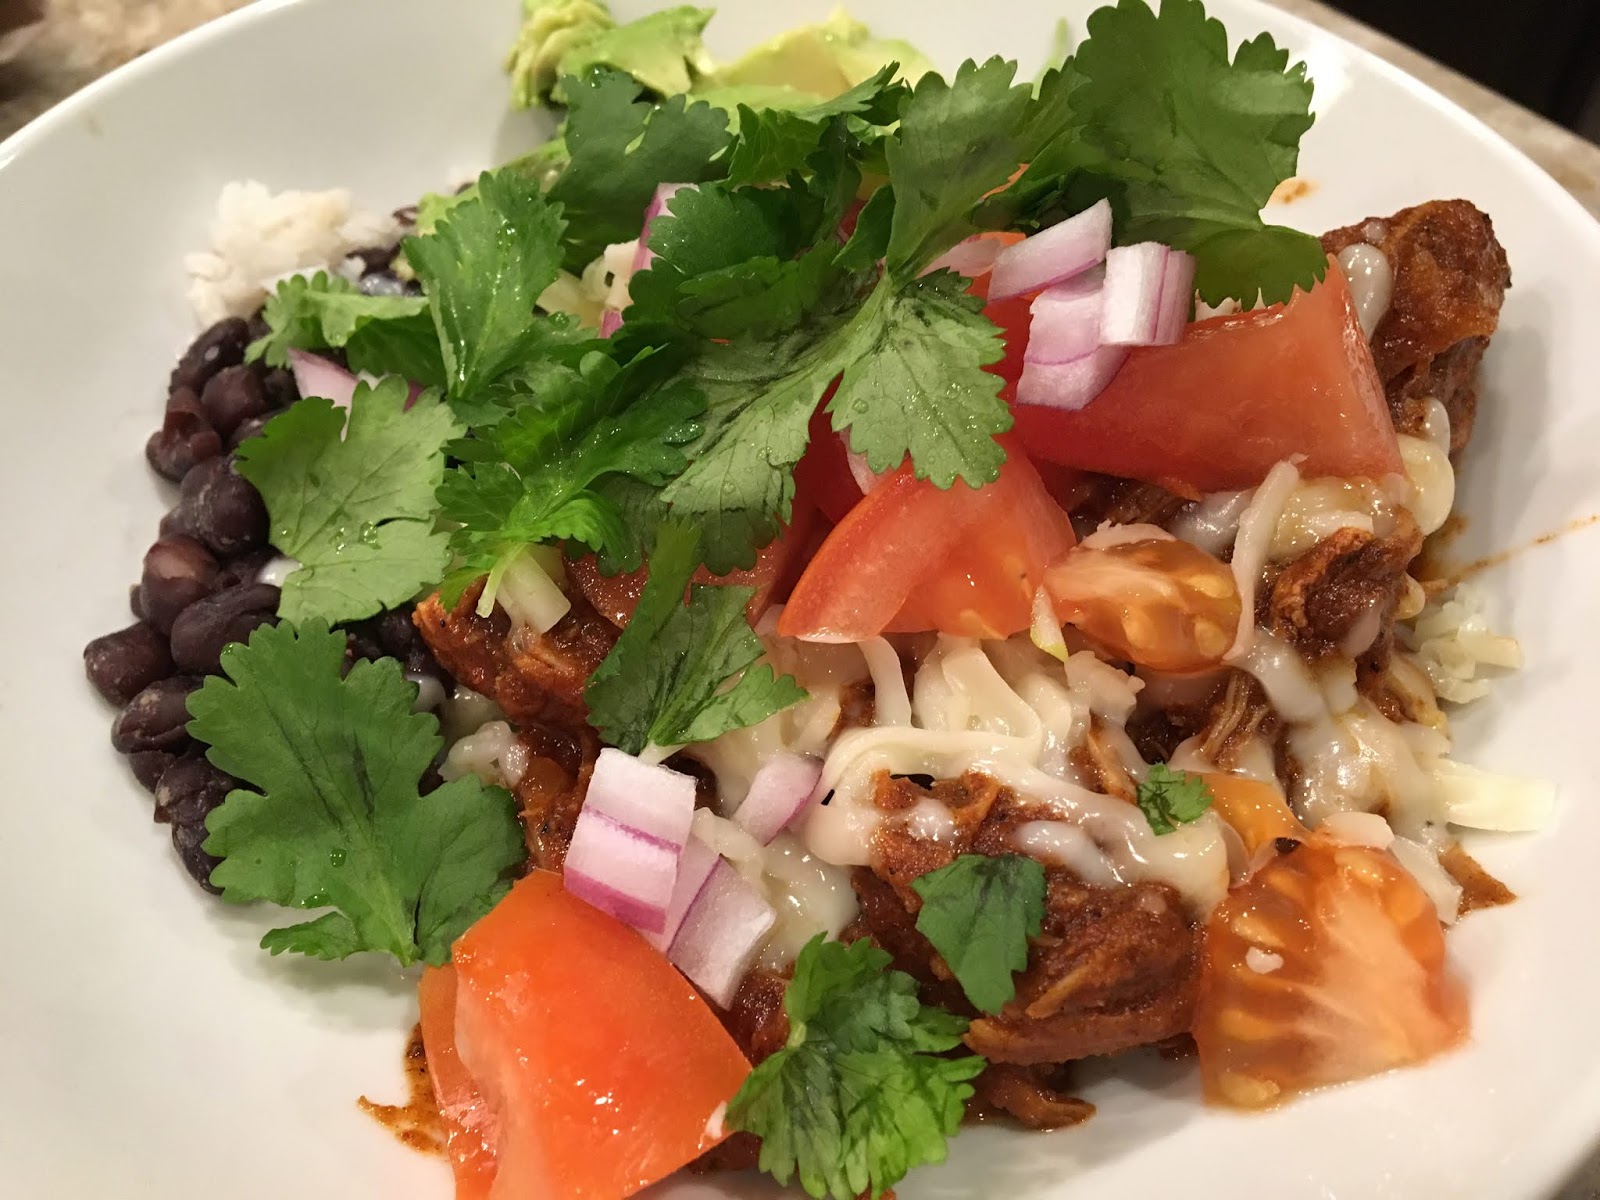
Shredded Pork Taco Bowl

WITH:
shredded pork
coconut rice
seasoned black beans
shredded Monterey Jack cheese
diced tomato
diced red onion
cilantro
avocado


A Dutch oven favorite!  
...especially in the oven outside,
all the cooking heat stays out of the house.


2  (30 oz.) cans tomato sauce
9 TABLESPOONS chili powder
9 TABLESPOONS light brown sugar
8 heaping teaspoons ground cumin
6 teaspoons ground coriander
3 teaspoons Kosher salt
1 teaspoon coarse black pepper
1 bundle (8-10 cloves) pressed garlic
3-4 medium yellow onions, sliced into rings
6-8 pound pork shoulder (or buttocks) trimmed of any excess fat


Pre-heat oven to 250 for 4-6 hours of cook time.

Pre-heat oven to 325 for 3-4 hours of cook time.


Combine the tomato sauce, chili powder, brown sugar, cumin, coriander, Kosher salt, pepper and garlic in a small bowl.

Place onion slices on the bottom of your cookware

IE:  enameled cast iron pot, extra-deep Pampered Chef stoneware baker, dutch oven... your pick.

Please note:  with the extra-deep Pampered Chef stoneware baker you must cover with its lid OR use a double or triple layer of foil while baking.

Place meat, fatty side up, into your preferred baking pot/dish on top of the onion slices.

Pour tomato sauce mixture over the meat and onion slices, making sure the sauce gets under the meat and onions as well.

Cover.  Bake.  Check.

Check by testing the meat:  it should shred.
If not, re-cover and bake for an additional 30-45 minutes and test again.


Some additional toppings that are favorites in our home are as follows: 
(and are easy to do while your pork is cooking!)


Seasoned Black Beans:

(I prefer making my own - this recipe is for either 4 cans of black beans, "No Salt Added"; or one bag of dry black beans - pressure cooked)

4 cans of black beans ("NO Salt Added" is preferred as previously noted)
DO PLEASE DRAIN AND RINSE your black beans which ever way you decided to go!

3-4 cups water (The amount will depend on how long you let the beans simmer for. If they start to get too dry, add water)

2 teaspoons Kosher salt
1 teaspoon coarse black pepper
1 TABLESPOON cumin
1 teaspoon coriander
1 teaspoon garlic powder
1 teaspoon onion powder

Optional (and preferred): 

2 Tablespoons “Better Than Bouillon” chicken broth

Let simmer on low for 15 to 30 minutes.


Coconut Rice

2 cups water
1 15 oz. can coconut milk
2 cups jasmine white rice
1 teaspoon Kosher salt
1 Tablespoon sugar

In medium pot or large fry pan (pan with a lid!). 

Stir and bring all to a boil on med/high.

Boil/stir for one minute.

Put lid on pot. 

Turn burner to lowest setting and cook for 22-24 minutes. 

Remove from heat and let rest for 5-10 minutes.  


ADDITIONAL TOPPINGS:

Lime wedges 
Diced red onions 
Diced tomatoes 
Lettuce 
Cilantro
Diced avocado 
Monterey Jack cheese, shredded 


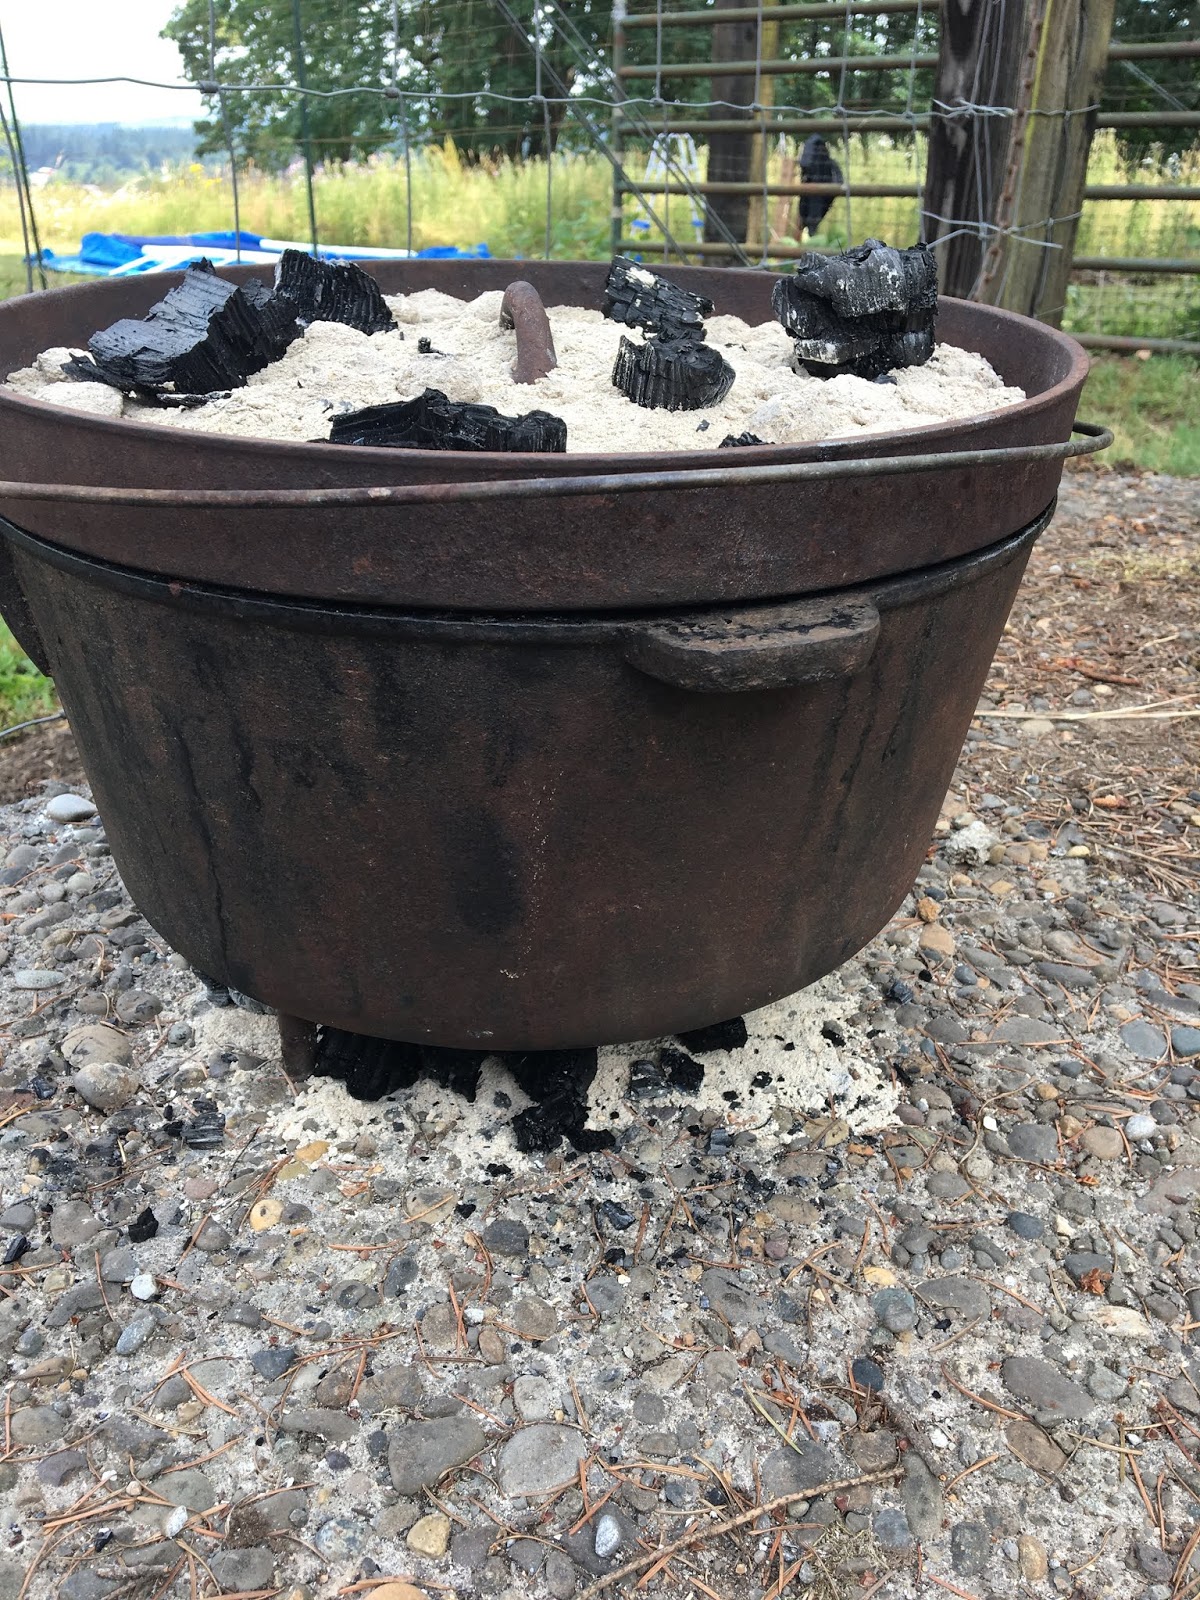
A Dutch oven named  BERTHA.
15+ pounds of pork...
the recipe quadrupled.
It was a LOT of food   :0)


What was I thinking??!! 

Out of the fire on a windy day,
and trying to cook 15+ pounds of pork!?
NOT my best moment. 

I orginally took this photo to show 
y'all the color of the charcoal.

Looking at it now, I really should have
made the fire-pit big enough for Bertha 

...and LEFT HER IN THE FIRE to cook!

Moving my quadrupled batch to the oven.
Not my favorite moment of the day.

...But happy to be in Oregon(!) with my parents, 
my sisters and their families so it all evens out.  :O)

The fire ended up being good for something in the end.
The kids got to have dessert FIRST since we realized
dinner was going to be much (much!) later than planned.

Eventually we all got to eat... at around 9:30PM
AND had leftovers for a few days!

(Try to cook OUT of the fire you ask?
...NEVER  AGAIN!!!)


Click Link FOR:       Mama Jo's Recipe Blog TABLE OF CONTENTS