Monday, February 15, 2016

Ham and Lentil Soup


Serve with some toasty Natural Yeast Bread.


Comfort food.  Most people will read this and think of a baked Mac and Cheese...  (Fleming's Steakhouse please!)  Or maybe a fall-apart pot roast paired with roasted potatoes and carrots.  (I will blog that one later... promise!)  For me, it's soup.  

Alas - my children are over it, ready to breakup with anything that resembles soup, and I am not.  I'm still smitten and in love.  :O)  The weather down here in Texas isn't helping the relationship my children have with soup... we're enjoying a lovely winter with 70 PLUS degrees each day, making it hard to successfully cheerlead soup when presented for dinner.  

My arsenal of dinner choices have been shaped for nearly 12 years by blowing wind and a balmy 20 SOMETHING degrees in Idaho.  Nine months of winter used to make it easy to keep my love of soup  going strong... Not so much when we really only have 3 months of winter (and sometimes that's an exaggeration!)  So these will be for you out there... those of you with frost in the corner of your windows, deep in snow, with freezing toes and fingers and in need of a hot winter soup.

I have updated my arsenal of soups, photos and all, and have double checked my amounts by making each recipe again to make sure each of my steps were included in the final edits.  

Here is the first in the lineup...

ENJOY!


Ham and Lentil Soup


3 Tablespoons olive oil 
1 1/2 medium onions, chopped
6-8 stalks of celery, sliced
2-3 lbs. (12-15) carrots, peeled and sliced
3 teaspoons sea salt - OR 2 teaspoons Kosher salt
1 1/2 teaspoons freshly ground black pepper 
1 bundle garlic, pressed
2 bay leaves 
2 teaspoons thyme
2 quarts chicken stock 
2 cups water
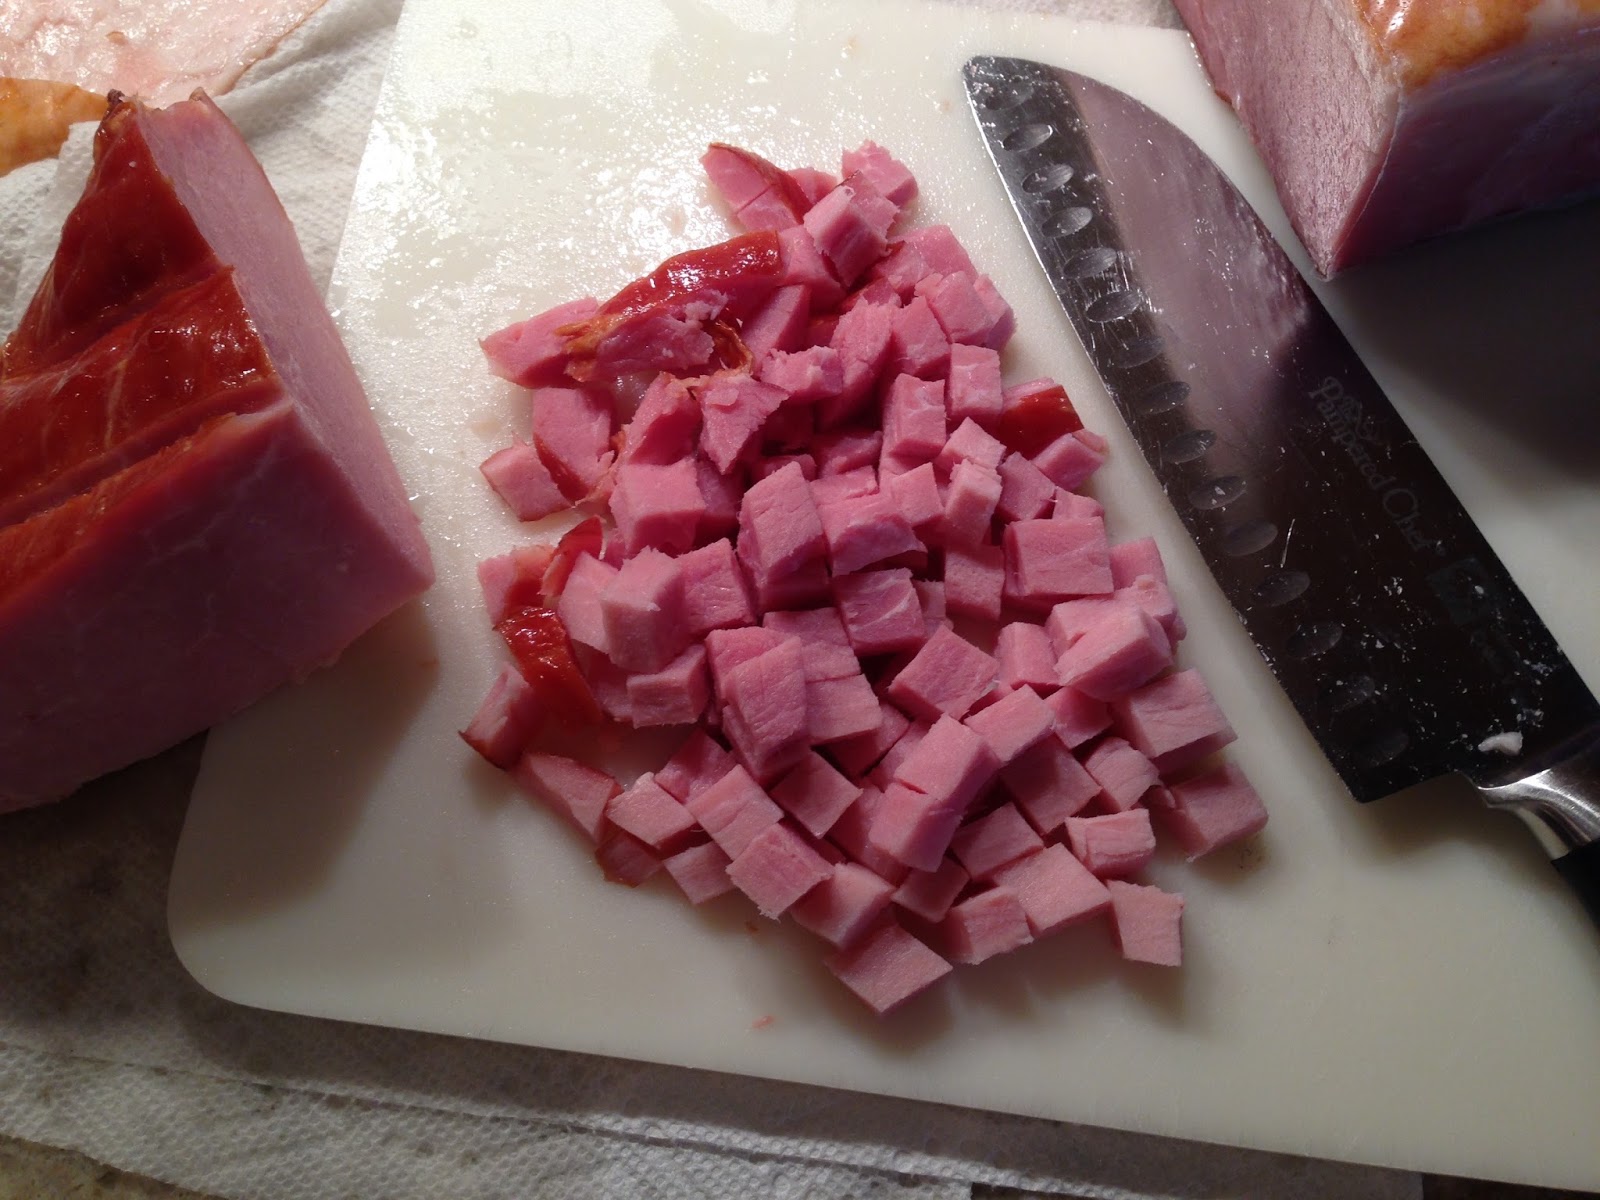
1 pound ham, cubed 
1 pound lentils 
1/4 cup chopped parsley or parsley flakes


In a large pot, over medium heat, add the oil. 

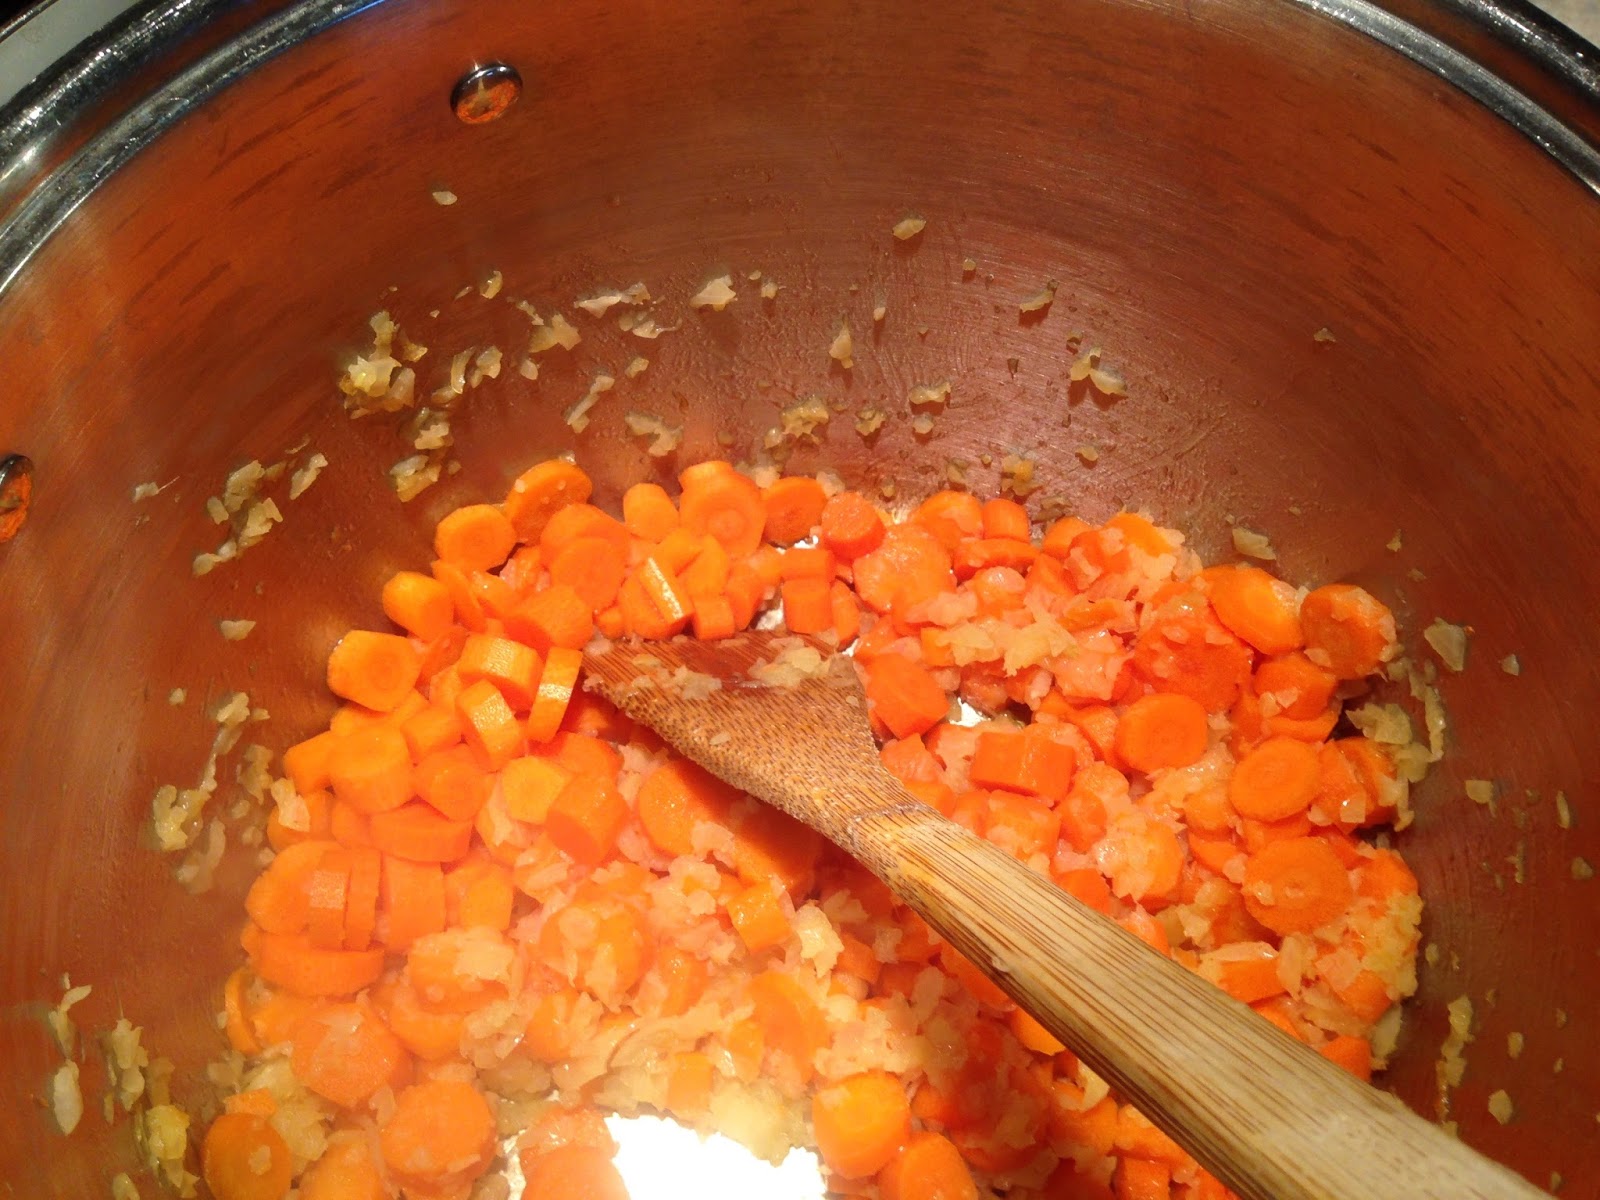
When the oil is hot, add in the following order: onions, celery, and then carrots.  Sauté vegetables until soft and onions start to caramelize.

Add cubed ham pieces.  Stir.   

Add minced garlic, thyme, salt and pepper. Sauté for 4 minutes. 

Add liquids, parsley, bay leaves and lentils.

Bring the liquid to a boil, reduce the heat to medium-low and cook 30-45 minutes, or until the lentils are tender. 

Re-season with salt and pepper if needed. 

Serve with a natural yeast bread.


*** OPTIONAL:   Add 2-3 yukon/yellow potatoes, peeled and cubed, at the last 20 minutes of cooking.

*** NOTE:  Excellent freezer dinner!


Gather up your stuff!


Always start with your onions...
It keeps everything else from sticking to the pan.


Add your carrots as  you get them peeled and sliced.
I've come to realize how much this is a needed,
dare I say required SOUP STEP.
Your carrots and other veggies need to be prep-cooked.
No one wants to crunch a carrot while eating soup...
Just saying...


Next!  Celery.


Find yourself a cooked ham - or cook one and use the leftovers.
Either way, you'll need about a pound of it!  :O)


Cube it up...


Add it in...


As your adding all your ingredients,
keep everything stirred up and moving about.
You'll notice the onions and carrots start to caramelize a bit...
It's what you want to see!
But do not leave it too long, it will burn.


And then GARLIC.
(Insert heavenly smells here.)


NOTE:  Add all of your garlic at once.
DO NOT add bit by bit as you mince.
It will cook quickly and you do not want to burn it.


Chicken broth - Anyway you like it.
Box.  Can.  Homemade.  Better Than Bullion.
Bullion if you can find it these days...
Whatever you want.  :0)


Rinse and add your 1 pound of lentils.


Bring to a full boil and then let simmer 1/2 hour to 1  1/2 hours.


As your soup cooks down, add water as needed.
NOTE: You may need to add salt and pepper
depending on how much water is added!
Taste your soup before serving...
add only 1/2 teaspoon of salt and/or pepper
at a time until desired taste is achieved.


Serve with some toasty Natural Yeast Bread.
I prefer a Natural Yeast Bread with added flaxseed,
but do not have a photo of it...
Will update when I think of it!  :0)


Are you in love too???


Thursday, January 28, 2016

Muddy Hot Chocolate Mix

NOTE:  Large quart jars hold 6 servings, 
and pint jars hold 3 servings. 
In total this recipe makes 24 servings.


Baby, it's cold outside!  Okay... it isn't right now in Texas, but I'm sure it's cold somewhere!  And once in a while, it does actually get cold enough to have hot chocolate.  


This one is my favorite.  It is very similar to a hot chocolate I used to buy in Twin Falls, Idaho from a coffee house that made their own Mexican Hot Chocolate with a touch of cinnamon.  

Mine offers three (yes!)  THREE different kinds of chocolate... FOOD  IS  LOVE ...and your tastebuds will be feeling the love for more than a few servings if you decide you'd rather not share.


5  1/2  cups powdered milk 
5  1/2  cups sugar 
3  1/2  cups cocoa powder 
3  1/2  cups chocolate chips - Milk Chocolate and DARK Chocolate (60%-75%)
2  TABLESPOONS ground cinnamon 

Combine all the dry ingredients in a large bowl.

Mix well with a wooden spoon and then store in a dry, airtight container. 

To make the hot chocolate, simply add 1 cup of water per 1/2 cup of hot cocoa mix. 

Heat water and added hot chocolate mixture in a small saucepan over low heat, stirring consistently with a whisk. 

Heat until hot, but DO NOT boil.

About 6 to 7 minutes.

OPTIONAL:  serve with marshmallows (because you're having hot chocolate...). 


NOTE:  6 ingredients...
3 of them are different chocolates!
You're welcome.


(I never measure...
it's just one regular bag of milk chocolate chips
and one bag of EXTRA DARK chocolate chips)


COSTCO sized baking cocoa powder because 3 1/2 cups is a lot. 


When I am done combining all the ingredients,
and there are no remaining pockets of sugar or dry milk,
I will transfer the hot chocolate mix into my storage/gifting
container using serving size measuring cup.

Using the actual serving size amount
is ideal when I get
to the bottom of my mixing bowl.

I usually only have a few extra
Tablespoons to distribute among my jars
- these are pretty darn close-to-exact-amounts.  


NOTE:  Large quart jars hold 6 servings,
and pint jars hold 3 servings.
In total this recipe makes 24 servings.


If you do decide to share this loveliness, 
make sure your gift has instructions.
ENJOY!   :0)


Click Link FOR:        Mama Jo's Recipe Blog TABLE OF CONTENTS


Sunday, November 8, 2015

Peanut Butter Popcorn

I really shouldn't blog late at night... 
I think I need to make some!


A favorite... and honestly a neighborhood favorite.  :O)  You know you've got a good recipe when the kids down the street ask for it once in a while!  I love this popcorn not only for the three different sugars it's made with, but mostly I love this popcorn because it has peanut butter in it!  I can eat A LOT of this without feeling super sick... YEAH!  

My theory:  The peanut butter evens things out with my blood sugar before my body hits the overload line.  So maybe not such a good thing... and yet it is indeed.  :O)

This post was asked for long ago when this little blog was started and I asked for requests.  I have a friend, who has since moved, that went to our church.  I made this for a church activity she attended and unknown to all of us... she was pregnant!  And while she was pregnant THIS was one of the few things she could eat.   

So before we get started, TWO things:

1- You DON'T have to eat peanut butter popcorn until you get sick just to see where your overload line is.

2- You DON'T have to be pregnant to feel like this is one of the few things you can eat.  (You can pretty much eat this whenever you'd like... I'm finally adding it into my blog.)  ;O)


Peanut Butter Popcorn


1 C. popcorn kernels, air-popped
cooking spray

½ C. honey
½ C. corn syrup
1 C. sugar

1 C. peanut butter - your favorite
1 tsp vanilla


Pop 1 cup popcorn kernels according to your manufacture's instructions.  Separate the popcorn from the un-popped kernels and into two to three bowls very lightly sprayed with cooking spray.
In a medium space pan, combine honey, sugar and corn syrup.  Bring to a light boil and boil 2 minutes.

Remove from heat and stir in peanut butter and vanilla until smooth. 

Pour even amounts of peanut butter glaze over popcorn in each bowl ONE AT A TIME, and stir to coat.

Pull mixture out of each bowl as completed and onto a piece of parchment paper.  Let cool.

If there is any left to store...  Keep in an air-tight container.


Bret Sr. loves this Natural Jif Creamy...
I prefer Adams Crunchy, but have a hard
time locating Adams PB here in Texas  :O)


When you get your mixture to an easy boil,
set your timer and make sure you have your popcorn all the way ready.
You'll have to move quickly once your done boiling
and then add your favorite PB and vanilla.

This mixture will start setting up FAST!
And you want it on your popcorn... not stuck in your pan.  


Separating your popcorn from the un-popped kernels
will save you from dental pain later!
And this is where I get to say I am not liable for you forgetting...
(you got TWO REMINDERS!)  :O)


Using parchment paper keeps your counters happy!

TIP:  Do NOT use wax paper...
you might end up with wax-paper-PB popcorn.
YUCK


I really shouldn't blog late at night...
I think I need to make some!

A funny little thing:  Payton Olivia likes to call the
pieces with LOTS of coating "juicy".


Click Link FOR:           Mama Jo's Recipe Blog TABLE OF CONTENTS


Friday, October 2, 2015

Mama Jo's Banana Bread


Hello y'all!  It's been so long... I'm so sorry for that!  My little blog looks sad without having any posts for June... July... August... OR September!  I had a lot of fun this summer with my cute parade of kids - I just feel bad for YOU!  I had amazing plans to blog nothing but waffles in August - looks like we will have to save that one for another month ;0)


But since we are on the subject of breakfast --- let's get back to banana bread!  

(Say what? Huh, Jo -  Breakfast??? Really?  Banana bread for a breakfast food?) Heck yes!  With scrambled eggs and/or green smoothie - BEST BREAKFAST ever.  Ask my kids how many times I made it this week... and how many times I DIDN'T make oatmeal (please re-read granola blog for family insight with the oatmeal).

So it's official.  I found my blog again and remembered my password...  

This is for all you ladies out there making oatmeal all week long - I'm no longer one of you, and Payton Olivia is more than a little grateful.  :0)


BANANA BREAD

1. CREAM:
1/2 cup softened butter
1 1/2 cups sugar
2 egg yolks  (SAVE your egg whites!  
Put them aside in a bowl to whisk at the VERY end...)
1 teaspoon vanilla

2. COMBINE:
2 cups mashed bananas (about 5-7 ripe bananas)
1-2 teaspoons lemon juice

3. ADD:
  1/2 cup buttermilk

4. MIX IN A SEPARATE BOWL:
1/2 teaspoon salt
1 teaspoon baking soda
2 cups flour


Heat oven to 350.  

Cream together softened butter with the sugar.  
Then add and mix in egg yolks and vanilla.  
Mix well with a hand held mixer.

In their own bowl, pile up 5-7 naked bananas.  
Add 1-2 teaspoons lemon juice.  
Using the same hand held mixer, mash up all your bananas with the lemon juice.  
Combine with your creamed ingredients.

Add 1/2 cup buttermilk to the creamed items and mashed bananas; mixing with the hand held mixer.

Then add the combined dry ingredients; 
mixing again with a hand held mixer.

Beat the egg whites in a bowl until light and fluffy with a small whisk or fork.

Fold in beaten egg whites.

***Grease baking dish(s) with refined coconut oil (LouAna's is best!), or Pam cooking spray if you are doing a designed baking pan, and dust with sugar.  

(The stars are to make sure you know this is important --- grease, then dust with sugar... If you have questions about the sugar dusting, please re-read Emily's Brownie post.  If you still have questions after that, please don't ask them.  It's best with the dusting of sugar.  I can't promise amazing without it...) 

Fill whatever you are baking in NEARLY to the top!  
You only want to leave 1/2 inch space between the level of your batter and the top of your pan.  No more, no less. 
--- Note the edges in the photos for this step.

Bake muffins for 15-20 minutes.  
Small loaves 25-35 minutes.  
Large loaf 40-60 minutes.  

(OR UNTIL CAKE TESTER OR THIN KNIFE COMES OUT CLEAN and BREAD IS A DEEP GOLDEN BROWN.)

My pictured (AND FAVORITE FOR THIS!) bundt pan is a Pampered Chef Stoneware with 6 bundts.  They take 35-40 minutes.


Grab up all your ingredients
- plus 3 medium bowls,
one small bowl for your egg whites,
and all baking tools that make you happy...


Get your butter softened, and add sugar.
Get your bananas undressed ;0)
And put together your dry ingredients.


Using a hand mixer makes going from bowl to bowl
and adding ingredients easy peasy...
If you don't have one, get yourself one for Christmas
and mix thoroughly by hand until you do.


Add vanilla and egg yolks into your mixed butter and sugar.
Be sure to dump your egg whites in a small mixing bowl!
You still need them... just not right now.


Grab  your bowl of naked bananas and add lemon juice.
Pull them through your mixing beaters until mashed.


Don't kill your bananas and mash them
past chunky and into puree...
you want your banana bread to be a bit lumpy.  


Add your mashed bananas into
your creamed ingredients.  Mix.
Then add 1/2 cup buttermilk.  Mix.


Add your combined dry ingredients
and mix into your main bowl.
Batter will be very thick.


This little whisk is bliss! 
A fork or small whisk will do the trick...
This is the "before" on your egg whites
in that small mixing bowl.
You need a little elbow room
to get this done right,
so don't put it in a cereal bowl.
(You will have regrets and extra clean-up.)


TA DA!!!
Please make sure they are light and fluffy
before adding to your main mixing bowl...


Fold egg whites into your mixture gently.
Folding gently means you are patient...
It will happen, but it takes a moment!
This process makes this bread light and fluffy,
so it's worth it!
I pinkie promise...  :0)


Sugar.  Your.  Pans.


Fill up your pans nearly to the top with batter...
Pretty dang close to the top!  
About a 1/2 inch if you need to be precise.

Starting to brown up at 30 minutes...
However - cake tester came out
sticky and these pretties are 

NOT a deep golden brown.


MUCH   BETTER!


Let rest 10 minutes before bumping out of the pans!
They will break and fall apart if you don't...
Still eatable, just a big pile though and not very pretty.


Someone please invent a
"scratch-and-sniff" computer photo...  
:0)

ENJOY!!!
Breakfast... luncheon... 

family night treat... 
Sunbeam snack...
YES  PLEASE!