Showing posts with label snacks. Show all posts

Wednesday, September 10, 2025

SAMOAS POWER SNACK - A Wanna-Be Girl Scout Cookie


OH MY.
So tasty!
And I have completely convinced myself that I am eating a girl scout cookie (but I'm NOT...)

This recipe, or more accurately: a version of this recipe, has been circling my Pinterest feed for a few years.  I've done this one enough times now I know what I like and what is not optional. 

So if you're like me and would buy a box of the Samoa cookies (or 2) for you to eat by yourself... I present this delightful substitute! ENJOY!

... ... ... ... ... ... ... ... ... ... ... 

1 and 1/4 cup unsweetened coconut flakes - TOASTED
(the large kind if you can find them!)

2 cups (about 20) Medjool dates - PITTED
1/4 cup semi-dark chocolate chips OR dark chocolate pieces
2 Tablespoons almond butter
1/4 teaspoon pink Himalayan salt
1/4 teaspoon Mexican vanilla


Toasted Coconut:
Bake at 400 on a small cookie tray with parchment paper for 5-6 minutes.  At around 3 minutes: pull the baking tray out and toss the coconut for it to all evenly toast up.  (BE WATCHFUL! It goes from "toasty" to "burnt" really fast.)  Set aside.


Make The "Dough":

Pit all the dates.

Layer in a food processor or a DRY or WET Vitamix blender:
toasted coconut - 3/4 of it ONLY
pitted dates
almond butter
chocolate - 1/2 of it ONLY
vanilla
salt

Process until the mixture turns into a "dough" ball.


PULL IT ALL TOGETHER:
(you'll get a bit messy...)
Work the remaining chocolate into the dough.
Pinch off small amounts - about the size of a walnut - or use small cookie scoop and roll into 16 balls.
Roll and squish the dough balls in the remaining toasted coconut.

Store in an air-tight container and refrigerate.

Edible right away for sure!

However... best chilled overnight or 1/2 a day.

Store in the fridge for as long as they last... 


... ... ... ... ... ... ... ... ... ... ... 


Click Link FOR:       Mama Jo's Recipe Blog TABLE OF CONTENTS  


Sunday, November 24, 2024

Hard Boiled Eggs // from the Jennifers 2024


"From the Jennifers" you say?

Yes Sir - OR - Yes Ma'am!

All 3 girlfriends my husband dated right before dating me 26 years ago were named Jennifer!  And now my chicken ladies are named after them.  

I have 10 chicken ladies this go-round and I am pleasantly surprised at the size of their eggs since the eggs were TINY when they first started their laying production this spring.

Summer time I could find 8-10 in their house.  Now that we are in full "winter" for Houston it's more like 3-4.  Less daylight and colder temps creates natural changes to their habits and cycle.

Just enough for our little family of 3 lately!  

Bret Annalese has named us the survivors.  :0)

Surviving with urban-farm eggs isn't too shabby...


... ... ... ... ... ... ... ... ... ... ... 

Put all the eggs you want to hard boil in a pot
(Farm-fresh eggs should be washed/rinsed first...)

Cover with water +3 inches of water 

Bring to a boil 

Turn off your stovetop, cover your pot with a lid and let the eggs sit in the boiled water for 15 minutes 

Immediately drain all hot water and rinse with cold water 

Dump a bunch of ice on top 

❤️🥚❤️

Let them chill in the ice and water bath until the ice melts off

Dry a bit and put them all in the fridge

Use and eat as needed


... ... ... ... ... ... ... ... ... ... ... 


Click Link FOR:       Mama Jo's Recipe Blog TABLE OF CONTENTS  


Tuesday, September 12, 2023

Better Than HEB Homemade Tortillas

Friend who recently moved to Dallas from Oregon:
"Do you have HEB in Houston?"

ME:
"Yup!"

Friend who recently moved to Dallas from Oregon:
"Have you ever had their butter tortillas???!!!"

ME:
"I have!  A long time ago when I could still eat gluten... They're so GOOD! (I miss them.)"

Friend who recently moved to Dallas from Oregon:
"Sometimes I get home and I realize I've eaten ALL the tortillas..."


... ... ... ... ... ... ... ... ... ... 

3  cups all-purpose flour
1 1/2  teaspoons baking powder
teaspoons salt

1/2 cup bacon grease, cold  
(OR 1/2 cup butter
OR   1/2 cup lard
OR   1/2 cup shortening 
and in that order of preference)

cup hot (very hot) water

... ... ... ... ... ... ... ... ... ... 

INSTRUCTIONS:

 
In a large bowl, combine the flour, salt and baking powder. 

Cut in the bacon grease (or other fat) with a fork or pastry blender until the big chunks of bacon grease (or other fat) are broken up into a fine crumble and incorporated into the flour mixture

Add the hot water and stir until combined. 

Work the dough into a ball.

Keep the dough in your mixing bowl and knead the dough about 2 minutes; adding more a 1/4 cup more flour at a time if needed to take away the stickiness. 

Cover the dough with plastic wrap and let rest for 15-20 minutes. 

Pinch the dough off into pieces slightly larger than a golf ball. 

Work the dough into balls and then press down lightly to form a round roughly the size of your palm.

With a rolling pin or large drinking cup, roll each round out into a circle about a 1/4 inch thick. 

Repeat with the remaining rounds. 

Place the tortillas onto a large HOT cast iron skillet. 

Cook just until light brown circles appear. 

The longer these cook, the crispier they become so adjust you cook time and temp as needed - I like mine slightly floppy especially if I plan to use them for a quesadilla and plan to cook them up again.
  
Wrap in a clean kitchen towel and place in a warm oven until you have finished cooking all of the tortillas and are ready to serve. 

Serve warm or at room temperature.

If there are any leftovers refrigerate and reheat on your cast iron skillet.


... ... ... ... ... ... ... ... ... ... 

Click Link FOR:       Mama Jo's Recipe Blog TABLE OF CONTENTS  


Sunday, August 28, 2022

Jo's Hummus Dip


Funny thing... I had a reminder of WHY this blog started in the first place today.

The reminder was that this recipe was NOT in my digital file.  A file I had worked on and compiled from the beginning of my married life 22 years ago...  

And not only that, a file that only have NOW because I asked a handful of friends if they had an emailed copy of my recipe collection of favorites.  This particular recipe was not in that email copy because it wasn't the most up-to-date version of it.  What I have now on my computer is missing about 1/4 of the recipes printed and in my: Jo's Recipe Book of Favorites.  

How did this blog start from an emailed copy of that digital file?

Let me fill you in:  A few years into life here in Texas, our computer crashed (albeit with the helping hand of the Handsome Bret Sr. using a keyboard command meant ONLY for MicroSoft Windows).  ALL files were lost, ALL music, ALL photos and ALL videos were gone, and gone forever.  

I decided if I had to re-type my recipes, I might as well start a blog to do it and therefore be able to have my recipes with me where ever I go.

NO advertising on my blog though... I don't like it.  It's so distracting (and quite honestly annoying) to what you're trying to read or while looking through recipe photos.  It's not worth the 5$ it might make monthly.  

For ALL y'all (and me included) -  You're welcome.  :0) 


3 cans (15 oz) chickpeas, drained
1/2 cup AND 2 Tablespoons extra-virgin olive oil
1/4 cup water
1/4 cup * lemon juice
    (* keep out 1 Tablespoon until ready and 
    taste hummus before adding  
    ...and add in only if needed)
4 cloves garlic, pressed
2 teaspoons sea salt
2 heaping teaspoons ground cumin
3/4 teaspoon coarse black pepper
3/4 teaspoon paprika


In a blender OR food processor - combine all ingredients at once.

Blend on LOW speed until smooth.

Stop the blender OR food processor and push ingredients down towards the blade as needed to keep the ingredients moving through the blade.

If the mixture is too dry and/or mixture is getting stuck when moving through the blade:  ADD 1-2 more Tablespoons of 
extra-virgin olive oil.

Taste. 

Add little garlic, salt, pepper and/or lemon juice if needed.

CHILL.

Serve with fresh veggies and pitas OR store in a covered container in the fridge and use when wanted as a dip or sandwich spread.

Makes right around 3 cups of hummus.


... ... ... ... ... ... ... ... ... ... ... 


Click Link For:
    Baking with Natural Yeast - Pitas


Blog Post Dedicated To:

Payton Olivia Davis

(who did not believe me when I told her
I used to make my OWN hummus
all the time and never bought
it from the store... )


Friday, January 1, 2021

Ginger Green Smoothie - My Jamba Juice CopyCat


Pretty sure a daily green smoothie is the only thing keeping my husband alive! (...His words, not mine.)  This particular green smoothie has slowly crept onto the entire family's "Favorite List" - starting with me at the beginning of a race weekend...

A few years ago, when we met up in Utah for a long trail race, my sister Nicole insisted I order the “Greens and Ginger” smoothie from the airport Jamba Juice before we headed out.  

I was skeptical -  :0/  GINGER???  

I’ve never been a fan.  Unless it’s in baked goods...

But then I tried it... and oh man!  What can I say?  I don't have the words to describe - but Cindy, my yoga friend, phrased it perfectly:  it is de-lush.

All my kids now ask for it  -  and I regularly make this twice a day to have a spare for myself in the fridge.

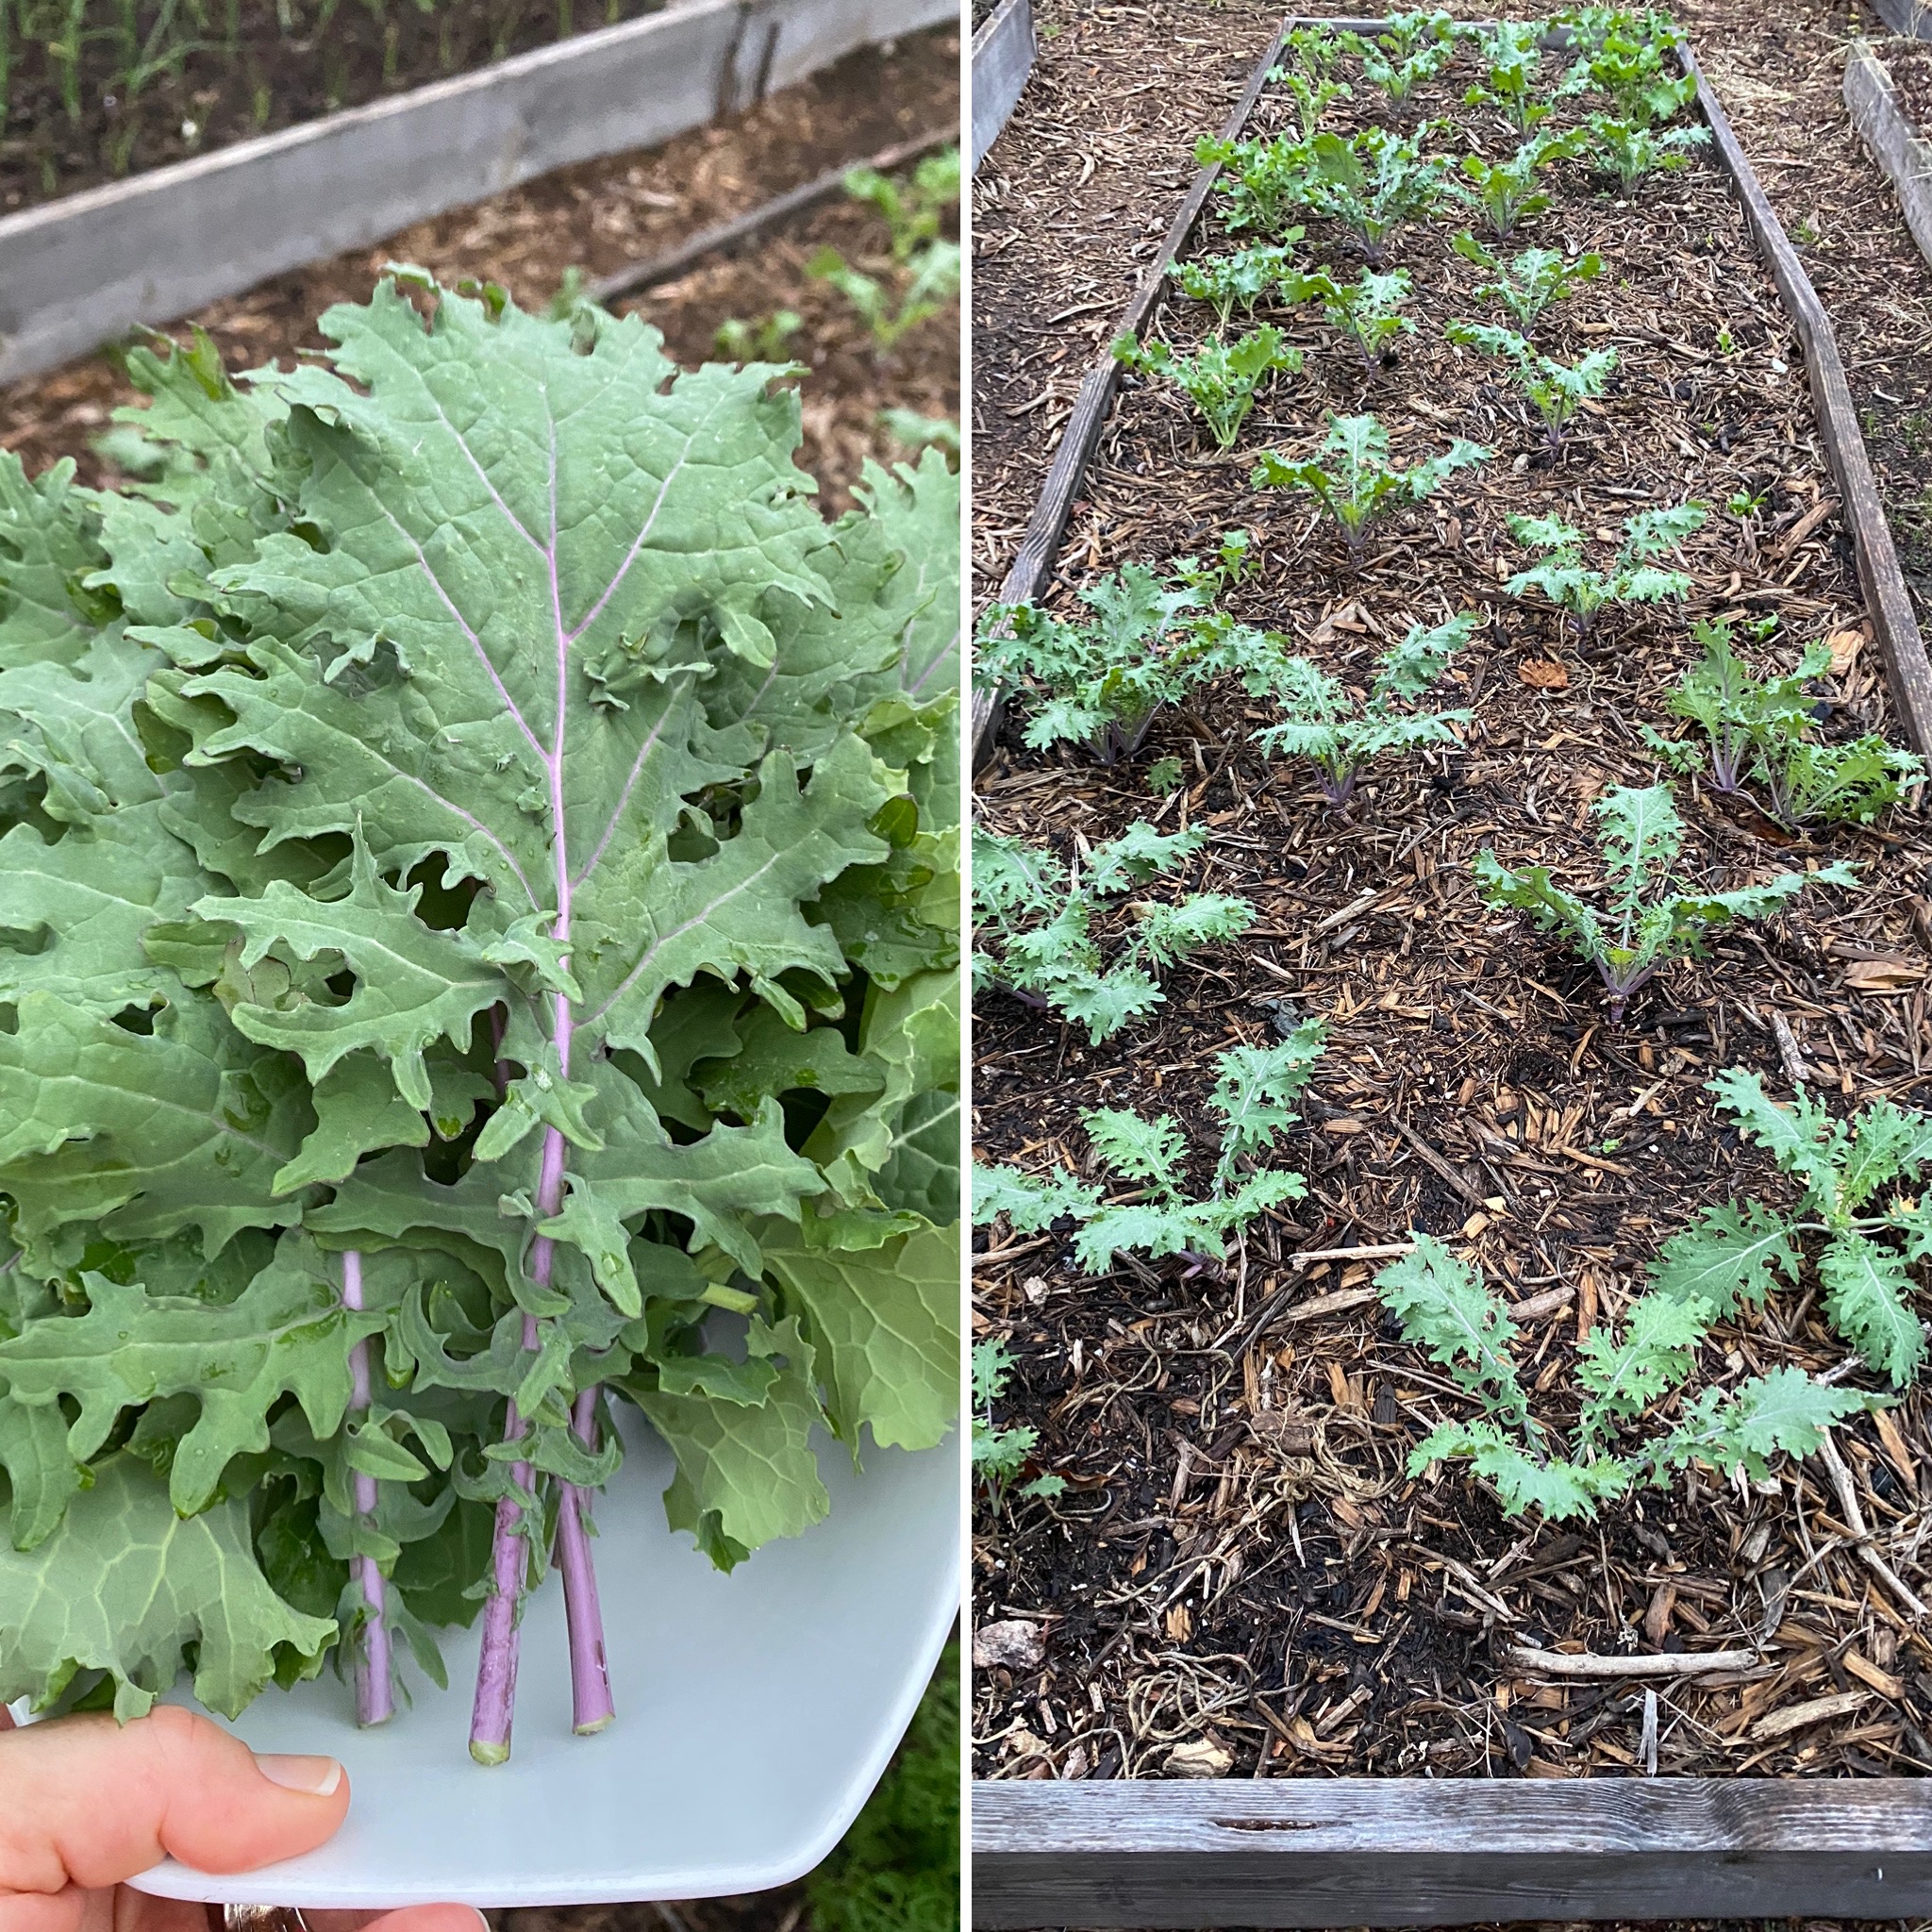
Lucky for me  -  the 2020 winter garden "smoothie bed" can finally keep up with amount of kale needed for these green smoothie requests!


Ginger Green Smoothie -  My Jamba Juice CopyCat

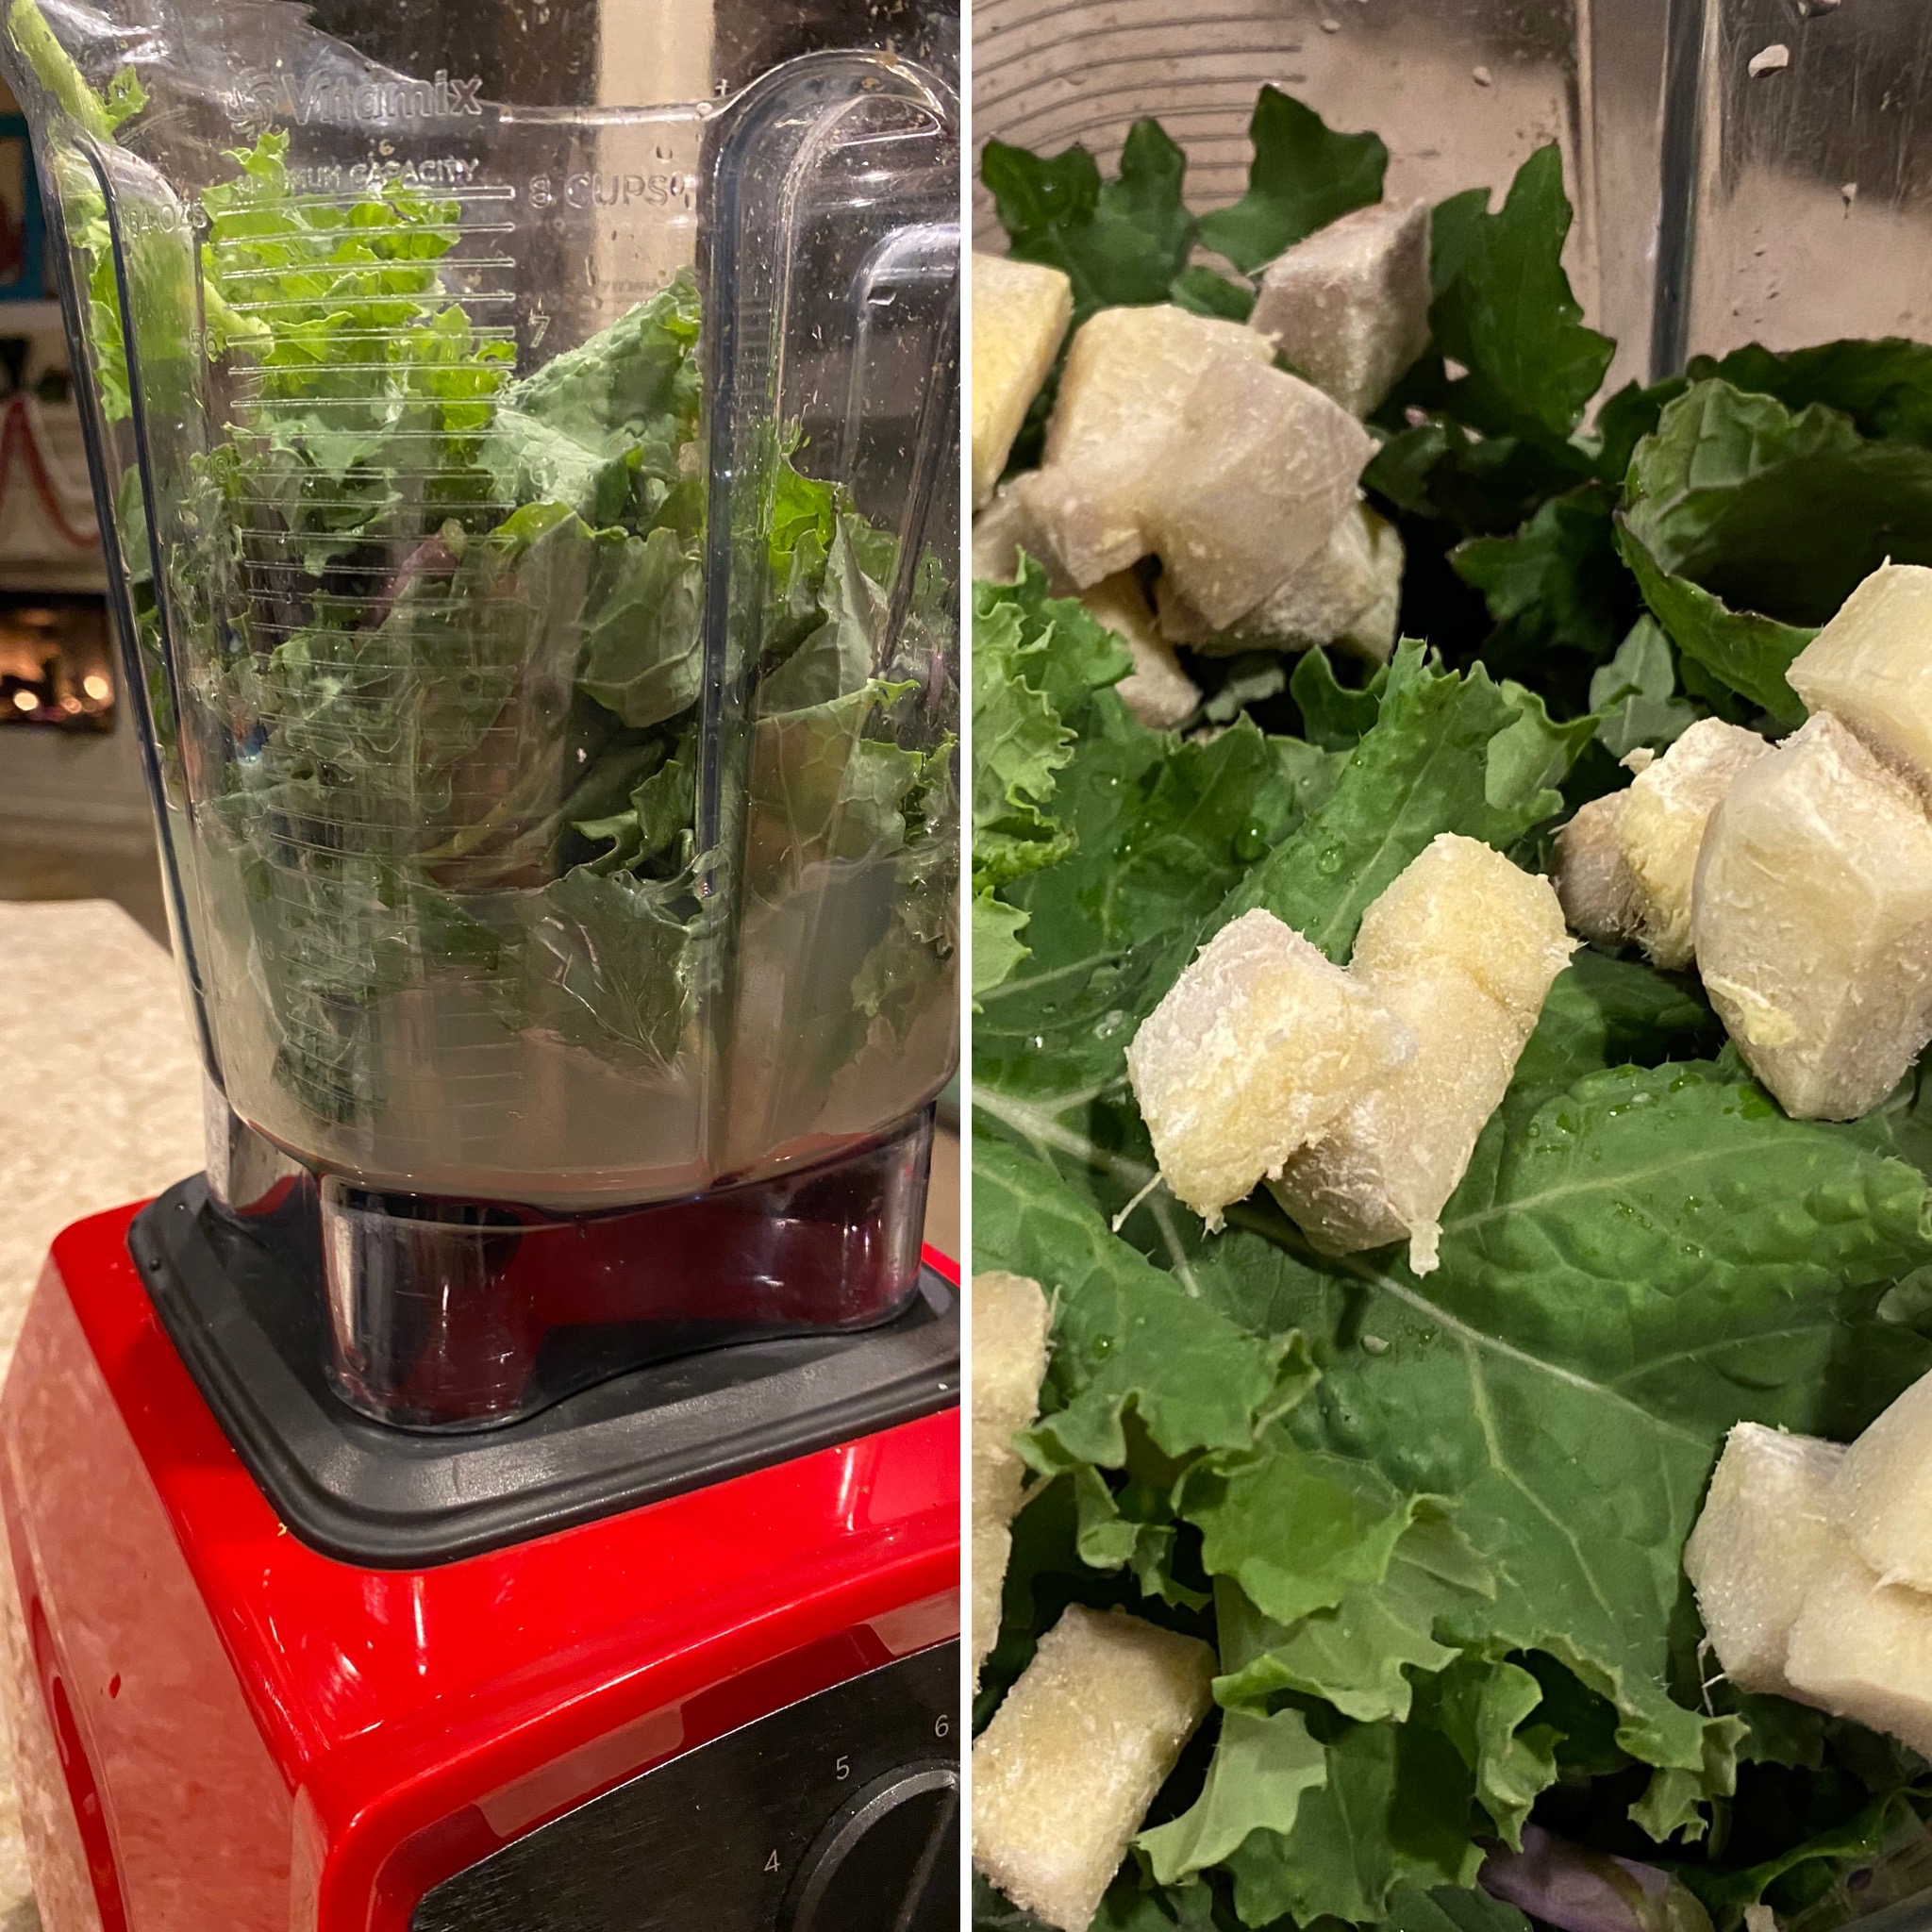
If you have a commercial grade blender - layer in this order and blend until throughly mixed.  Keep an extra 1/2 cup of water nearby if mix is too thick to finish blending. 

If you do not have a commercial grade blender, still blend in this order and throughly mix one layer at a time instead of mixing all at once. 


2  cups water 

4  TABLESPOONS  dry lemonade mix  
(OR  USE:   1  lemon, juiced  AND  3  TABLESPOONS  honey)

4  cups washed kales leaves and stems

1/4  cup frozen ginger pieces 

1 to 2 cups frozen mango pieces 

2  cups frozen pineapple pieces 

1/4  cup ground flaxseed 


Wash your fresh ginger
- then break into pieces.
Using a paring knife,
flatten the edges of
your ginger pieces
and cut away the peel.


Cut your ginger pieces
into a stackable shape
and then dice into
medium/small chunks.


Fresh on the LEFT.
Frozen on the RIGHT.
It will darken a bit once frozen.


2  cups water 

4  TABLESPOONS  dry lemonade mix  
(OR  USE:   1/2  of a lemon, juiced  
AND  3  TABLESPOONS  honey)

4  cups washed kales leaves and stems


1 to 2 cups frozen mango pieces 


2  cups frozen pineapple pieces 


1/4  cup ground flaxseed 


Cindy, my yoga friend,
phrased it perfectly: 
it is 
de-lush.


This is a true life
before and after photo...
The smoothie shown above was a photo
taken 24 hours before this photo.

If you have leftovers after
blending this recipe up - 
store in the fridge for up to
48 hours.

Be sure to shake or stir
in the water portion
that separates from
the more fibrous part.


Click Link FOR:


Sunday, November 8, 2015

Peanut Butter Popcorn

I really shouldn't blog late at night... 
I think I need to make some!


A favorite... and honestly a neighborhood favorite.  :O)  You know you've got a good recipe when the kids down the street ask for it once in a while!  I love this popcorn not only for the three different sugars it's made with, but mostly I love this popcorn because it has peanut butter in it!  I can eat A LOT of this without feeling super sick... YEAH!  

My theory:  The peanut butter evens things out with my blood sugar before my body hits the overload line.  So maybe not such a good thing... and yet it is indeed.  :O)

This post was asked for long ago when this little blog was started and I asked for requests.  I have a friend, who has since moved, that went to our church.  I made this for a church activity she attended and unknown to all of us... she was pregnant!  And while she was pregnant THIS was one of the few things she could eat.   

So before we get started, TWO things:

1- You DON'T have to eat peanut butter popcorn until you get sick just to see where your overload line is.

2- You DON'T have to be pregnant to feel like this is one of the few things you can eat.  (You can pretty much eat this whenever you'd like... I'm finally adding it into my blog.)  ;O)


Peanut Butter Popcorn


1 C. popcorn kernels, air-popped
cooking spray

½ C. honey
½ C. corn syrup
1 C. sugar

1 C. peanut butter - your favorite
1 tsp vanilla


Pop 1 cup popcorn kernels according to your manufacture's instructions.  Separate the popcorn from the un-popped kernels and into two to three bowls very lightly sprayed with cooking spray.
In a medium space pan, combine honey, sugar and corn syrup.  Bring to a light boil and boil 2 minutes.

Remove from heat and stir in peanut butter and vanilla until smooth. 

Pour even amounts of peanut butter glaze over popcorn in each bowl ONE AT A TIME, and stir to coat.

Pull mixture out of each bowl as completed and onto a piece of parchment paper.  Let cool.

If there is any left to store...  Keep in an air-tight container.


Bret Sr. loves this Natural Jif Creamy...
I prefer Adams Crunchy, but have a hard
time locating Adams PB here in Texas  :O)


When you get your mixture to an easy boil,
set your timer and make sure you have your popcorn all the way ready.
You'll have to move quickly once your done boiling
and then add your favorite PB and vanilla.

This mixture will start setting up FAST!
And you want it on your popcorn... not stuck in your pan.  


Separating your popcorn from the un-popped kernels
will save you from dental pain later!
And this is where I get to say I am not liable for you forgetting...
(you got TWO REMINDERS!)  :O)


Using parchment paper keeps your counters happy!

TIP:  Do NOT use wax paper...
you might end up with wax-paper-PB popcorn.
YUCK


I really shouldn't blog late at night...
I think I need to make some!

A funny little thing:  Payton Olivia likes to call the
pieces with LOTS of coating "juicy".


Click Link FOR:           Mama Jo's Recipe Blog TABLE OF CONTENTS


Monday, May 18, 2015

STRAWBERRY!!! ( and plain ) Apple Rings


A snack.  A happy apple snack.  ...AND  A  VERY  HAPPY  STRAWBERRY  APPLE  SNACK!!!  

On my list of school snacks and poolside-summer-snack-agenda are these HEALTHY and "healthy" apple slices.  The strawberry dried apple rings get the "air quotes" and lower case "healthy" label as they are sprinkled quite generously with Jell-O.  YUP!!!  Jello-O.  Not a typo.  And they are so AWESOME, you will dust off your dehydrator, go out and get a dehydrator, or wish you had one and hunt down someone you know to borrow one from.  

My dehydrator made its way down from the dusty cupboard above the fridge and found a permeant home these last few months on a pantry shelf.  Its previous home was too tall and too inconvenient for weekly use.  Now it gets hauled off of its new pantry spot when apples at HEB or Kroger dip below $1.00 per pound.   

Here is a happy little apple ring that was scarfed in the HOV line on a rainy afternoon:  

:0)  And the kids love them too!!!  A few weeks ago I ran out of my regular fruit leather snacks for my Sunbeam class at church... Realized my lack of fruit leathers too little and too late to run to Costco, and made these before going to bed the night before.  They are a confirmed hit with 3 year olds!!!  (Even the plain ol' just apple ones... and especially liked by the kiddos that don't love having sticky fingers after a fruit leather...)


So here's what you'll need to get this snack underway:

10-15 minutes   :O)
dehydrator
apple corer
cutting board
slicer 
1 apple per dehydrator tray                          
Strawberry Jello-O (or any Jell-O you may fancy)       

Wash and core your apples.

One at a time, slice the entire apple top to bottom with a "multi-purpose" slicer.  
NOTE:  Slicing them with this amazing kitchen tool keeps all your slices one uniform thickness.  All of the apples finish drying at the same time... BONUS!  No babysitting thick, floppy, half-dried apple slices.  

I have 4 dehydrator trays, (NOTE  TO  BRET  SR: I secretly wish for more...) and am able to dry one apple per tray.  EASY MATH!!!  Which works out nicely since, as all of my kids know, I ONLY do math that is easy math...

The top 2 trays I keep "plain" and the bottom 2 trays I sprinkle a 1/4 package of Jell-O per tray.  Keep your Jello-O apples on the bottom to eliminate any accidental Jell-O sprinkling on your plain apples.

My Easy-Peasy NESCO Dehydrator tells me 135 degrees will dehydrate my fruit.  GREAT!  I know that it typically takes 10-12 hours to complete... So starting a batch in the late afternoon or evening has me turning it off when I wake up.  By the time I'm done cooking up some dreaded oatmeal, the apple slices have had time to cool off before I start packing them up into lunches.

If you're keeping them in the pantry, you can stack them into a clean glass jar and keep them dry AND CUTE at the same time... or just grab a huge gallon zip-lock, shove them all in and call it good!  They won't last long, so you decide how much effort you're willing to invest in their storage.


Apples that become HAPPY APPLE  RINGS:
Granny Smith dry with minimal browning, 
Fugi, Pink Lady, Honey Crisp...  
Try what's on sale and see which apples you like best!


I actually bought this slicer years ago at TJMAXX just to do this!!!  :O)  
I'm sure I could use it (and should use it...) for many more things, 
but I'd love it just the same for taking care of this one task with my apples!!!  
(And for being dishwasher safe...)


I've used store brands and have been just as happy.  
I have tried all flavors of Jell-O and strawberry is the BEST for my 
food snobs (critiques) at home... 
you may love orange!  Or lime!  Or wild berry!  
Try them out... Comment with your fav!


You may even get your prep time reduced (or let's be honest... doubled)  :0)
with little hands managing apple slice placement.


Slices will over-lap a little depending on the width of your apples.  
No worries!!!  They will just get a little stuck together... 
lots of fun to rip apart while snacking.


Follow the instructions on your dehydrator for the adequate 
amount of time needed for fruit.


Someday... maybe four more trays...  ??? :0)
(HINTING  DIRECTED  AT  BRET  SR...)