Showing posts with label breakfast. Show all posts

Thursday, February 5, 2026

Bethany’s Bread - AKA: cake bread // Celiac Friendly // Gluten-Free


Nearly everything at our house gets named...
Cars and trucks most notably.
Jars of natural yeast.
And as you'll notice here on the blog: recipes.

Mostly that's just because it's how each different recipe is identified.  

For example: RED CHILI 
There's Dave's Camping Chili (which is exactly what I say when asked what's for dinner and that's what's been made...), and there's BBQ Chicken Chili. I have no idea what Dave named his chili!  But it's the name my family and I use to talk about, communicate about, the recipe.  

The main intention of this blog is to pass along recipes with MY edits, MY ideas, MY techniques to my four kiddos.  The titles of the posts are what we literally call them at home, and therefore their needed name here on the blog.

Huge shout-out and THANK  YOU to Bethany for sharing her favorite celiac friendly bread!!!  She came through on a "what's your favorite and tastiest celiac-friendly bread" ask when I was desperate to have something to make at home for Bret Annalese  - (I was sick and tired of bread that cost 10$ a loaf to buy!!). 

Officially named after you: Bethany’s Bread. 

NOTES:  original recipe from "Barefeet in the kitchen" - BFK
AND: her recipe says you can use a hand mixer... I respectfully disagree from personal experience with this recipe.  A hand mixer does not beat enough air into the dough and my very sturdy KitchenAid hand mixer nearly died in the process of trying it that way. YIKES.

... ... ... ... ... ... ... ...


COMBINE just the dry ingredients into your mixing stand bowl:

1 cup brown rice flour
1 and 1/4 cups oat flour
(Bob's Red Mill - a certified Gluten-Free Oat Flour is my favorite!)
2/3 cup potato starch
1/3 cup tapioca flour (sometimes called starch)
2 teaspoons instant yeast
1 and 1/4 teaspoon Kosher salt
1 and 1/4 teaspoon xanthan gum


Gather and prep, but keep separate from dry ingredients until cued in the instructions:

3/4 cup warm milk


1/4 cup melted butter
1/4 OR 1/3 cup honey


3 large eggs (added one at a time)


Optional: ( but not really... it's so good!) sprinkle of certified gluten-free oats for the top of the bread


TIP TO MAKE MILK:
make "whole milk" by mixing equal parts water and heavy whipping cream of the needed amount. (I don't use milk very often so I buy heavy whipping cream because it will last for a few months without spoiling.)

... ... ... ... ... ... ... ...

Instructions:

Place the dry ingredients into the bowl of your stand mixer.

Melt the butter in a small sauce or frying pan.

Turn off the heat and add the honey.

Whisk or stir it together and set aside.

Using a stand mixer and the paddle, gradually beat the warm milk into the dry ingredients. 

The mixture will be crumbly at this stage, but once the butter and honey is added, it’ll come together. 

Add the melted butter and honey to the mixing bowl and beat until thoroughly blended.

Add the eggs, ONE at a time. 

Beat the mixture till each egg is combined before adding the next one. 

Once you’ve added all the eggs, beat the mixture at high speed for 3 minutes. 

WHY:  This adds air to the thick batter, which helps take the place of the missing gluten as far as structure is concerned.
At the end of 3 minutes the batter will look like a thick buttercream icing.  (Another reason Gavin calls this "cake bread")

Leave the batter right in the mixing bowl and cover the bowl with a light cloth or plastic wrap.

Let the batter rise for 75-90 minutes. 

This batter will not double in size, but it will puff up. 

Scrape it into a lightly greased average-ish size loaf pan.

Wet a large soup spoon and use the back of it to smooth out the dough; you'll have to run the spoon under water a few times so that it does not become too sticky. 

NOTE: The smoother your loaf is before you put it into the oven, the smoother it’ll be once it’s baked.

Lightly sprinkle the top of the loaf with oats and press gently into the loaf. 

Loosely cover the pan with your plastic wrap from the mixing stand bowl and let the dough rise till it barely crowns over the rim of the pan - 60 to 90 minutes (I am usually waiting the full 90 minutes on that second rise).

Towards the end of the rising time, preheat the oven to 350°F.

Bake the bread for 30-35 minutes, until golden brown. 

Remove it from the oven and let rest 10-15 minutes before you remove it from the loaf pan and place onto a cooling rack. 

Slice when completely cool.


... ... ... ... ... ... ... ...


Click Link FOR: Mama Jo's Recipe Blog TABLE OF CONTENTS


Friday, October 31, 2025

Kenny’s Punkin Bread - Baking With Natural Yeast


1  1/2 teaspoon pink Himalayan salt 
3  teaspoons pumpkin pie spice 
5  cups unbleached flour 
(Keep your flour nearby… you may need a bit more - however much it takes to not be sticky!) 
Optional: 3/4  cup sugar (Auntie Jo’s edit)


1/3 - 1/2 cup natural yeast starter
1  1/4 cup water
1  1/2 cups pumpkin puree


Mix all ingredients together.


Add flour 1/4 cup at a time until dough is not sticky. 


Cover and let rise for 20-24 hours. 


To avoid adding flour right before baking: shape dough with gluten-free flour on the outside or use water and parchment paper or olive oil and parchment paper.


Once prepped for baking: use oven safe twine to divide it into 6 sections and score to your heart’s desire. 


Bake at 375 for 30-45 minutes. 


With the pumpkin puree its going to bake a little bit longer than usual… 


Cut twine to remove and discard. 


Let your baked punkin loaf rest on a baking rack before cutting and serving. 


Serving IDEAS:

Whipped butter with honey and cinnamon

Nutella 

Butter 


2025 White House Porch


... ... ... ... ... ... ... ... ... ... ... 


Click Link FOR:       Mama Jo's Recipe Blog TABLE OF CONTENTS  


Sunday, November 24, 2024

Hard Boiled Eggs // from the Jennifers 2024


"From the Jennifers" you say?

Yes Sir - OR - Yes Ma'am!

All 3 girlfriends my husband dated right before dating me 26 years ago were named Jennifer!  And now my chicken ladies are named after them.  

I have 10 chicken ladies this go-round and I am pleasantly surprised at the size of their eggs since the eggs were TINY when they first started their laying production this spring.

Summer time I could find 8-10 in their house.  Now that we are in full "winter" for Houston it's more like 3-4.  Less daylight and colder temps creates natural changes to their habits and cycle.

Just enough for our little family of 3 lately!  

Bret Annalese has named us the survivors.  :0)

Surviving with urban-farm eggs isn't too shabby...


... ... ... ... ... ... ... ... ... ... ... 

Put all the eggs you want to hard boil in a pot
(Farm-fresh eggs should be washed/rinsed first...)

Cover with water +3 inches of water 

Bring to a boil 

Turn off your stovetop, cover your pot with a lid and let the eggs sit in the boiled water for 15 minutes 

Immediately drain all hot water and rinse with cold water 

Dump a bunch of ice on top 

❤️🥚❤️

Let them chill in the ice and water bath until the ice melts off

Dry a bit and put them all in the fridge

Use and eat as needed


... ... ... ... ... ... ... ... ... ... ... 


Click Link FOR:       Mama Jo's Recipe Blog TABLE OF CONTENTS  


Tuesday, September 12, 2023

Better Than HEB Homemade Tortillas

Friend who recently moved to Dallas from Oregon:
"Do you have HEB in Houston?"

ME:
"Yup!"

Friend who recently moved to Dallas from Oregon:
"Have you ever had their butter tortillas???!!!"

ME:
"I have!  A long time ago when I could still eat gluten... They're so GOOD! (I miss them.)"

Friend who recently moved to Dallas from Oregon:
"Sometimes I get home and I realize I've eaten ALL the tortillas..."


... ... ... ... ... ... ... ... ... ... 

3  cups all-purpose flour
1 1/2  teaspoons baking powder
teaspoons salt

1/2 cup bacon grease, cold  
(OR 1/2 cup butter
OR   1/2 cup lard
OR   1/2 cup shortening 
and in that order of preference)

cup hot (very hot) water

... ... ... ... ... ... ... ... ... ... 

INSTRUCTIONS:

 
In a large bowl, combine the flour, salt and baking powder. 

Cut in the bacon grease (or other fat) with a fork or pastry blender until the big chunks of bacon grease (or other fat) are broken up into a fine crumble and incorporated into the flour mixture

Add the hot water and stir until combined. 

Work the dough into a ball.

Keep the dough in your mixing bowl and knead the dough about 2 minutes; adding more a 1/4 cup more flour at a time if needed to take away the stickiness. 

Cover the dough with plastic wrap and let rest for 15-20 minutes. 

Pinch the dough off into pieces slightly larger than a golf ball. 

Work the dough into balls and then press down lightly to form a round roughly the size of your palm.

With a rolling pin or large drinking cup, roll each round out into a circle about a 1/4 inch thick. 

Repeat with the remaining rounds. 

Place the tortillas onto a large HOT cast iron skillet. 

Cook just until light brown circles appear. 

The longer these cook, the crispier they become so adjust you cook time and temp as needed - I like mine slightly floppy especially if I plan to use them for a quesadilla and plan to cook them up again.
  
Wrap in a clean kitchen towel and place in a warm oven until you have finished cooking all of the tortillas and are ready to serve. 

Serve warm or at room temperature.

If there are any leftovers refrigerate and reheat on your cast iron skillet.


... ... ... ... ... ... ... ... ... ... 

Click Link FOR:       Mama Jo's Recipe Blog TABLE OF CONTENTS  


Thursday, May 5, 2022

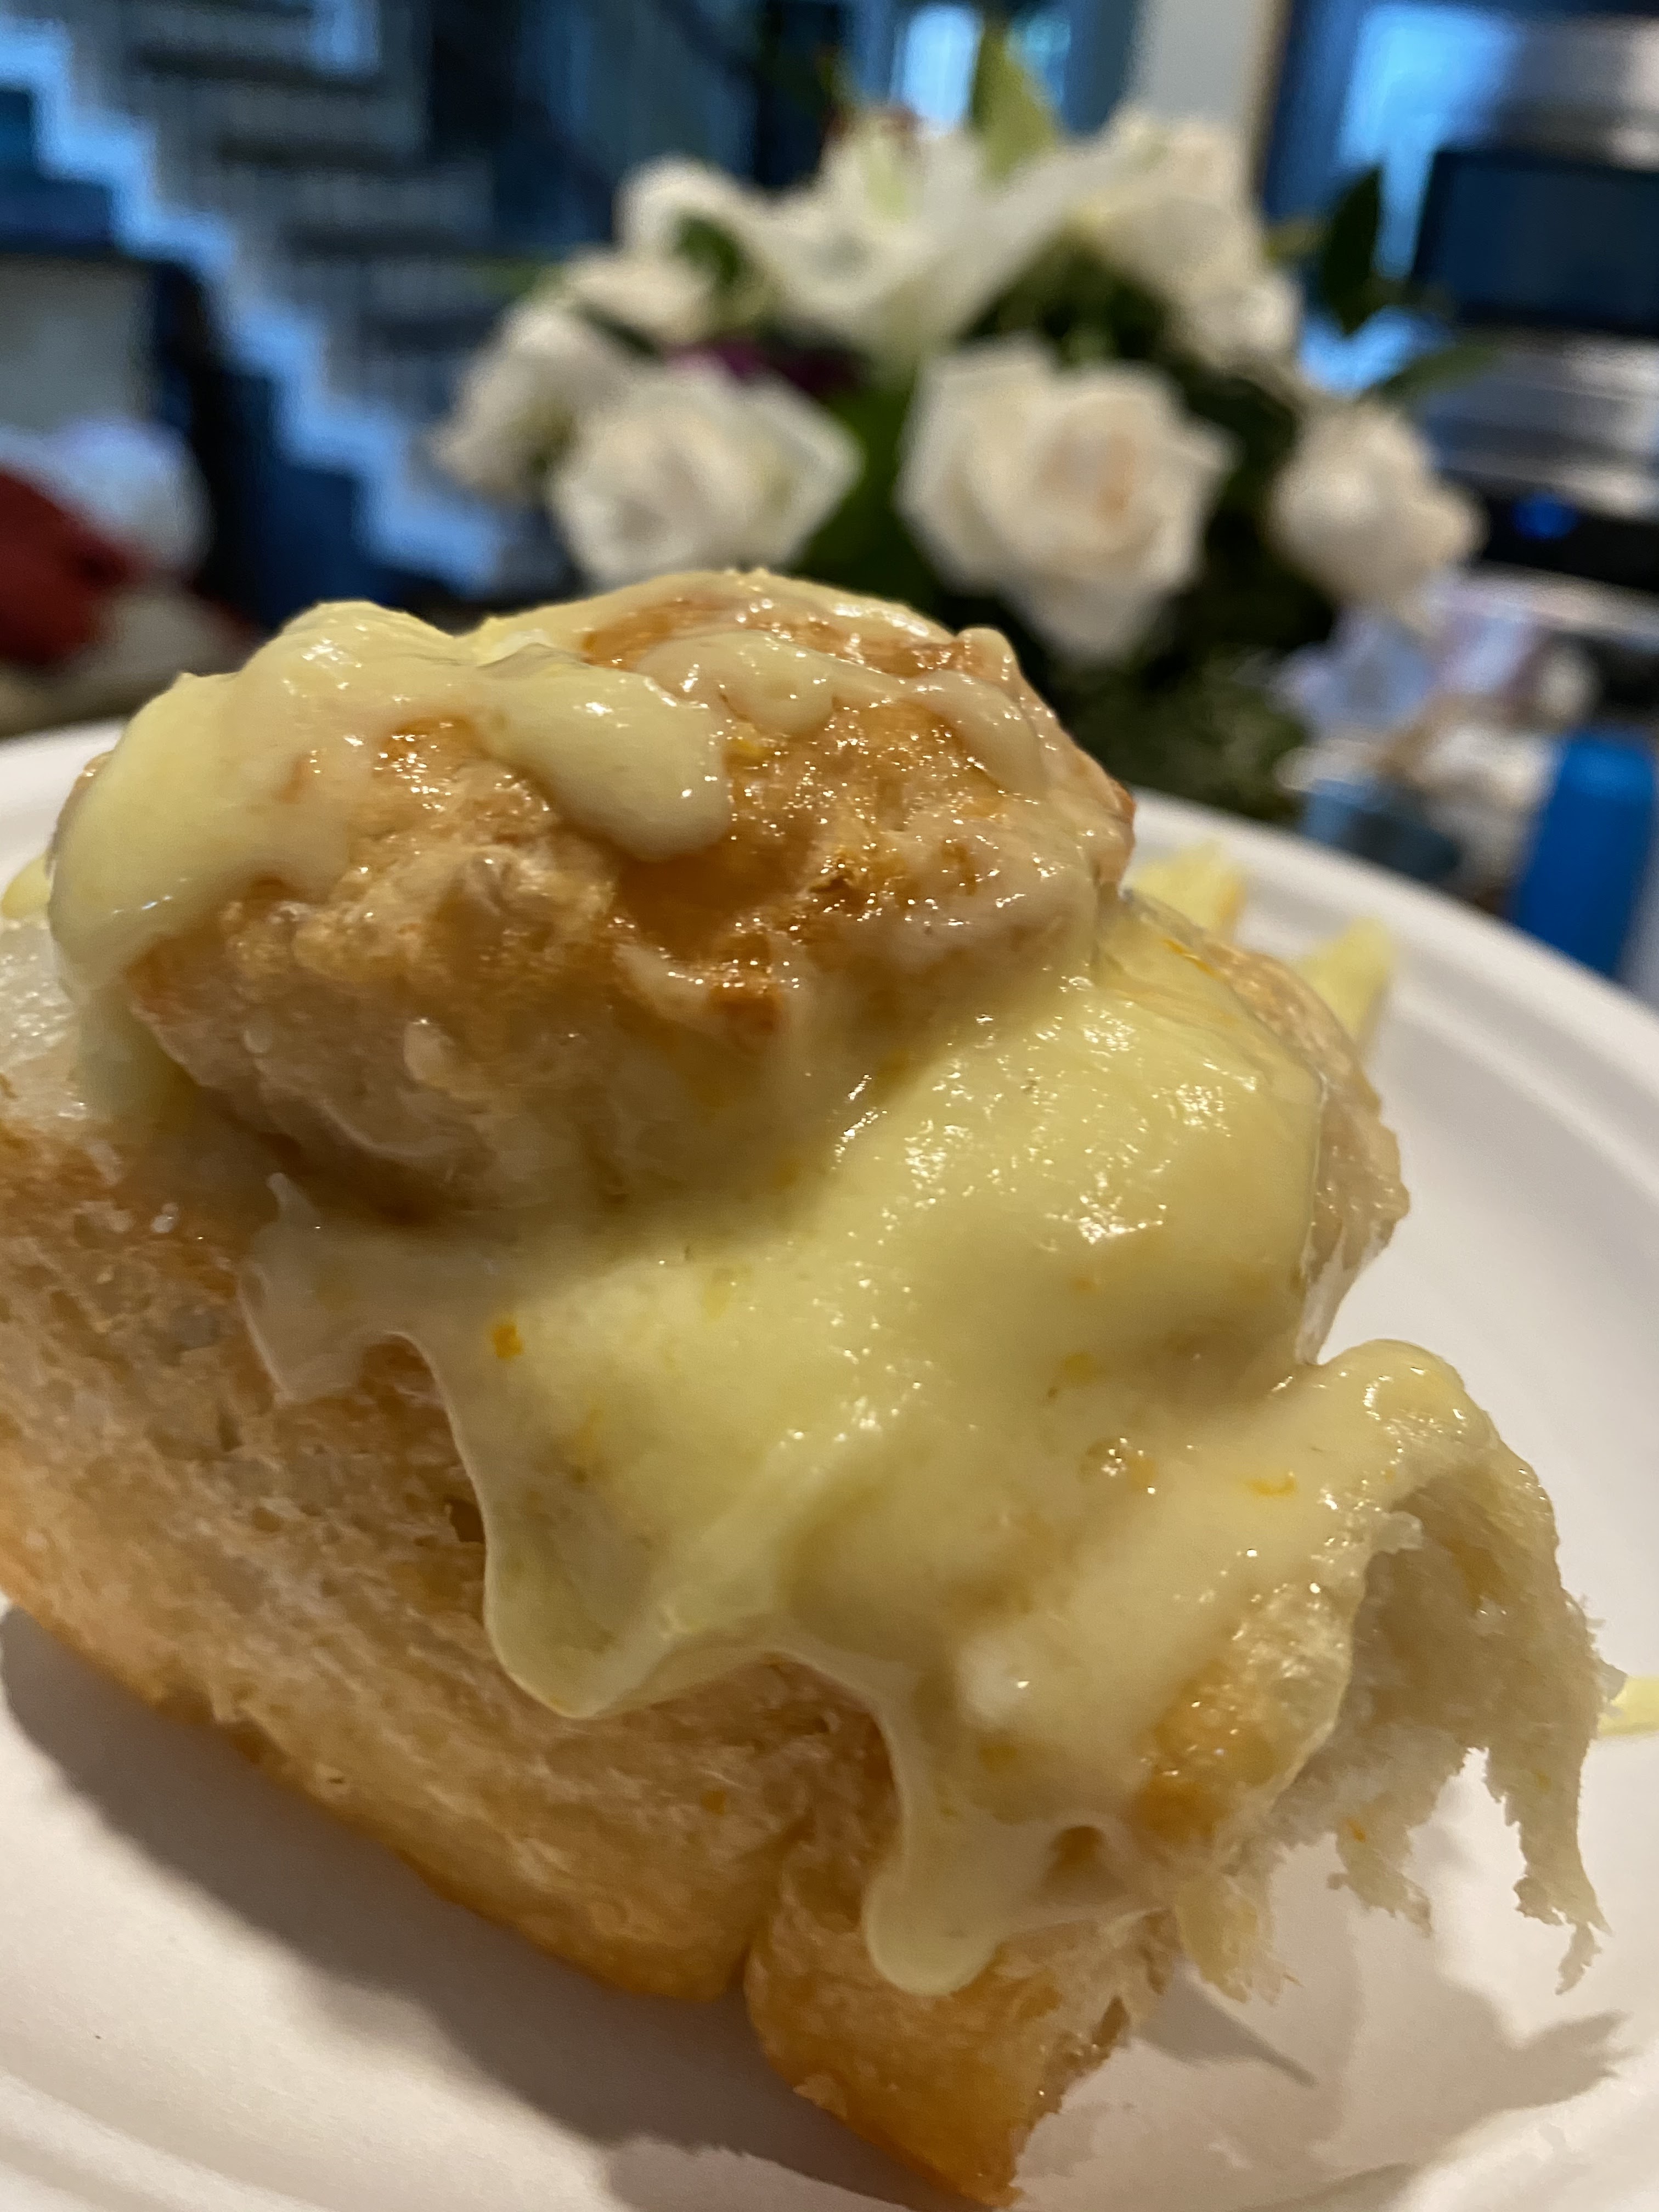
“Nic’s Amazing Natural Yeast Vegan (REALLY Amazing!) Orange Rolls - A recipe she created from her "oh so creative brain!" for her transitory vegan husband - whom she loves”

Text between Mama Jo and Nic as follows:

You can put it on your blog.

But you have to call it: 

Nic’s amazing Natural yeast vegan (REALLY amazing!) orange rolls - A recipe she created from her "oh so creative brain!" for her transitory vegan husband - whom she loves.


Sweet Orange 🍊 Rolls


Dough:


5 cups unbleached flour

1/2 teaspoon salt

1/2 cup sugar (OR Mama Jo's preferred: 2/3 cup sugar for a bit sweeter dough)


1/2 cup Natural Yeast start

1 cup water

1 orange zest (OR Mama Jo's preferred: 5-6 clementines)

1 orange/clementine juices + enough water to make one more cup


Let rise 8 hours or until double.


Roll out 1/2 of the dough at a time - “cinnamon roll” style - into rectangle - and then cover with 1/4 cup butter or 1/4 coconut oil and about a 1/2 cup sugar. 


Roll up and CUT into 6 rolls with floss.


Repeat for other 6 rolls.


Cover with plastic wrap. 


Let cut rolls rise until double. 


Remove plastic wrap.


Bake at 350° for 30 to 45 minutes depending on how golden/toasty brown you want them.


Immediately glaze straight out of the oven. (You will have to move the rolls a little bit from the edges of the pan, so the glaze doesn’t fall off the sides.)


Glaze:

1 orange zest (OR Mama Jo's preferred: 5-6 clementines)

1 orange juice (OR Mama Jo's preferred: 5-6 clementines)

5-6 Tablespoons butter or coconut oil

3-4 cups powder sugar


Timeline that works for Nic:

Maybe start early am

Let rise til double about 4 pm

Let rise again

Bake before you go to bed

Glaze in the morning 


Or start when you go to bed

Roll out in the morning 

Let rise til 12

Bake

Cool done by 2 ish...


Click Link FOR:   


Sunday, January 24, 2021

Toasted Pecan Apple Waffles - Gluten-FREE


Does this sound like you???  (Or maybe it's just me... )  :0)

It's the end of your day and you've finally finished all of your adulting.

Headed home from your errands you realize you have no idea what's for dinner and you begin to think through what your dinner possibilities might be.

Thankfully your weekly grocery shopping always includes a 1/2 gallon of buttermilk.

WHY  buttermilk you ask???  

Because - breakfast FOR dinner is always a YES.  

Bonus for me at 4pm:  it's incredibly fast.    

This happens at least once a week that we are having breakfast for dinner, and this recipe has been a lovely addition to the list of pancakes, waffles and breakfast tacos that make it to the table as a dinner.

If you don't need to be gluten-FREE, use cake flour and add a 1/2 teaspoon of salt.

If you don't need to feed a small army, HALF the recipe... 

OR make the whole thing!  Feed your neighbor's, the missionaries, or store the leftover batter for a breakfast later in the week... 

 
... ... ... ... ... ... ... ... ... ...  


3  cups gluten-free flour 
1  cup sugar
3  teaspoons baking powder
1  teaspoon baking soda
6  teaspoons pumpkin pie spice

1  Granny Smith apple  -  peeled, cored, and grated
1  Gala  OR  Fugi apple  -  peeled, cored, and grated
8  eggs - separated 
(Be sure to keep the egg-whites in a medium or large bowl for whipping at the end)
4  cups  buttermilk  (that's 1 quart all y'all!!!)
1  cup  (2 sticks)  of butter  - melted

1  and  1/2  cups  toasted pecan pieces


Chop and toast your pecans first.  Preheat the oven to 325 degrees F.  Toast the pecans in a shallow pan until they begin to get fragrant, about 7 to 10 minutes.  Let cool completely. 

Preheat your waffle maker and start gathering your recipe items.

Combine all your dry ingredients in a large bowl.

Add your buttermilk to the dry ingredients and mix thoroughly.

Add your grated apples and mix thoroughly.

Add your egg yolks and mix thoroughly.

Add your melted butter and mix thoroughly.

Beat the egg whites until foamy.

FOLD  carefully into the waffle batter to keep the batter fluffy.

Spray each side of your waffle maker and add batter to each waffle spot.

BEFORE  SHUTTING  THE  WAFFLE  MAKER:   
ADD  1  or  2  Tablespoons of toasted pecans to each dollop of batter.

Cook according to your waffle maker's directions... 

BUT  KEEP  IN  MIND:   These will take longer to cook with the fresh fruit!  

I have to add 3 to 4 minutes cook-time to these waffles compared to other recipes.

These particular waffles take 6-8 minutes to cook in my Belgian waffle maker.

... ... ... ... ... ... ... ... ... ... 
(It's a recipe FOR your recipe!)

CLICK TO GO TO: 
... ... ... ... ... ... ... ... ... ...  


BEFORE  SHUTTING  
THE  WAFFLE  MAKER:   

ADD  1  or  2  Tablespoons 
of toasted pecans to each dollop of batter.


One of my favorite ways to chop... 


You may think...
"Nah!  I don't need to toast the pecans."
YES.  YOU  DO.

It makes all the difference and is worth the effort!!!
If you have any leftover toasted pecans you can
just save them for the next time you make these waffles.


Cutest little waffle maker EVER!!!  

I wish I had a photo that would give
you perspective on how small it is...

It usually it gets used with cake batter
for tiny waffle cakes.
OR with leftover waffle batter as seen here. 

Such a fun snack! 
Or an easy fit into a lunchbox.


... ... ... ... ... ... ... ... ... ...