Thursday, June 30, 2022

Chicken Tortilla Soup - Slow Cooker


- Chicken Tortilla Soup
- Slow Cooker
- and a Lupe Tortilla TWIN... 

:0)

If you're from Texas and know the significance of that "TWIN" statement: YOU'RE WELCOME!

I can tell you which of my friends only order the soup for dinner or the soup and salad lunch combo because of how wonderful their Chicken Tortilla Soup is at the local restaurant "Lupe Tortilla" - YES.  It's that good.  Here's my version, which I feel is a literal twin to their's.


Chicken Tortilla Soup 
 - Slow Cooker -

1 rotisserie chicken, shredded into large pieces

2 small/medium onions, chopped
1 bundle of garlic (6-8 cloves) minced
olive oil

6 cups chicken broth
2 cups water
2 cans, 7 oz., chopped green chilies
1 can unsalted corn, drained and rinsed
2 cans black beans, drained and rinsed

2 Tablespoons cumin
3-4 teaspoons chili powder (spicier with 4 teaspoons…) 
2 teaspoons Kosher salt
1 teaspoon coarse black pepper
1 bay leaf

(OPTIONAL:)  And optional because I always order my soup WITHOUT the jalapeno slices... so if you want the Lupe Tortilla "twin" effect I suppose it is NOT optional:
1 jalapeno, carefully de-seeded and sliced into circles  

shredded Pepper Jack cheese
corn tortilla chips
1 bunch cilantro, washed and chopped


Start your slow cooker and add chicken broth, green chilies, rinsed and drained canned corn and black beans. (And jalapeno if you're going with the optional option...)

Add all the spices and shredded chicken to the slow cooker.

In a medium pan, saute chopped onions in olive oil until golden/dark brown and caramelized.

Add garlic to the caramelized chopped onions and cook until fragrant.

Add chopped onions and garlic to crockpot.

Cook on LOW for 6-8 hours; or on HIGH for 3-4 hours.

Right before serving, wash and chop cilantro leaves; add to the soup.


SERVE  ON  THE  SIDE: 
sliced avocados
grated Pepper Jack Cheese
corn tortilla chips


... ... ... ... ... ... ... 

STOVETOP OPTION:

Prepare and heat to a simmer in a large pot.

Simmer for 20-40 minutes.

Turn off heat and serve as directed above.

... ... ... ... ... ... ...


Sunday, June 12, 2022

CHICKEN PITAS ( - Optional: Vegan // Roasted Veggie Pitas - )


CHICKEN PITAS 

Optional: 
- Vegan // Roasted Veggie Pitas -


 ...another family favorite brought into existence by the lovely Auntie Nicole. Thank goodness she's around to make Uncle Dan's life better - because it filters into our lives as well! (I guess that means I should be thanking Dan too!)

So - ALL Y'ALL in Oregon: THANK YOU!

This is requested often.  
And we prefer it with chicken. 
(Even though it's just as amazing without it...)


There's four recipes to bring this about; five if you're going to use the CHICKEN option.

#1 - Pitas with Natural Yeast Bread Dough
        NOTE: Start dough the night before.
#2 - Roasted Veggies
        NOTE: Start veggies first - everything else can be done                while they're roasting.
#3 - Tzatziki Sauce
#4 - Avocado Spread (Double for more than 3 people)
#5 - CHICKEN (optional)


#1 - Pitas with Natural Yeast Bread Dough

CLICK  LINK  FOR:    Baking with Natural Yeast - Pitas

1 prepped recipe of: Basic Loaf - Natural Yeast dough
grapeseed oil  OR  olive oil for cooking
cast iron skillet
plate
small bowl


#2 - Roasted Veggies
 
1  head of cauliflower, washed and cut into small florets
2 cans of chickpeas, rinsed and drained
3 Tablespoons olive oil
2 teaspoons chili powder
2 teaspoons garam masala 
1 teaspoon Kosher salt
1/2 teaspoon coarse ground pepper
1/4 teaspoon cayenne pepper

Line a 9X13 pan with foil (OR bar pan with at least a 1 inch edge) 

Roast veggies at 450 degrees for 15-20 minutes and gently stir.

Roast veggies for an ADDITIONAL 15-20 minutes.


#3 - Tzatziki Sauce

1/2  English cucumber; peeled, grated, pressed/squeezed
1 cup plain Greek yogurt (OR Veganeese)
2 cloves of garlic, pressed
1 and 1/2 Tablespoons dill; dried or fresh
1 Tablespoon lemon juice
1/2 teaspoon Kosher salt
1/8 teaspoon coarse black pepper

Combine all in a small or medium bowl and keep in the fridge until ready to use.


#4 - Avocado Spread (Double for more than 3 people)

2 ripe avocados, diced
2 cloves garlic, pressed
2 Tablespoons olive oil
2 Tablespoons water
1/2 bundle of cilantro; washed, dried and minced
1 teaspoon cumin
1/2 teaspoon salt
juice of 1 lime

Combine all in a small or medium bowl and keep in the fridge until ready to use.


#5 - CHICKEN (optional)

2 pounds of chicken tenders
1 teaspoon Kosher salt
1/2 teaspoon coarse black pepper
olive oil - for cooking

Combine all in a small or medium bowl and keep in the fridge until ready to cook.

Once the pitas are made in the cast iron skillet, cook 1/2 of the chicken until done.

Cook remaining portion.  

Keep covered with foil to maintain moisture.


Sunday, May 29, 2022

Pumpkin Pie Ice Cream


Pumpkin Pie Ice Cream

Perfectly Paired with a gluten-free
graham cracker and/or chocolate syrup.


Pumpkin Pie Ice Cream


4  cups half and half  (or see listed substitutions)

2  cups heavy whipping cream

2  vanilla beans  (or see listed substitutions)

1  and  1/2 cups white sugar

1/2  cup light brown sugar


7.5 oz canned pumpkin (1 cup)

1  teaspoon nutmeg

1  teaspoon ground cinnamon

1/2  teaspoon ground ginger

1/4  teaspoon ground cloves


Combine all dairy into a saucepan along with all the sugar. 

Split and scrape the vanilla beans into the dairy and sugar mixture. 

Bring to 170 degrees F. to dissolve sugar then let cool to room temperature. 

Once cooled completely, chill in the refrigerator overnight. 


NOTES:

When cooking diary on a stovetop - be VERY watchful!  It can erupt like a volcano-science-experiment up and out of your saucepan! Stir constantly and check the temperature often.


IF  USING  LIQUID  VANILLA  AS  A  SUBSTITUTION:  

Add vanilla AFTER sugar is dissolved and mixture is removed from heat.


Combine pumpkin and add the listed spices. 

Mix in a bowl to combine, then cover and chill overnight in the refrigerator. 


The next day, take pumpkin and dairy mixture out. 

Filter dairy mixture to remove large vanilla bean pieces. 

Add some of the dairy mixture to the pumpkin and mix well to loosen it up. 

Then combine both the dairy mixture and pumpkin mixture together thoroughly. 

Freeze in your ice cream freezer according to the manufacturer's instructions.

Let the ice cream harden for at least two hours unless serving immediately.


ADDITIONAL  INSTRUCTIONS  FOR

A  KITCHEN  AID  ICE  CREAM  BOWL:

MAKES  2  BATCHES!!!  

Split your combined final mixture in 1/2.  

(Keep one 1/2 in the fridge until your bowl is ready for use again in the next few days…)  

Retrieve your Kitchen Aid Ice Cream Bowl from the freezer and put to use immediately.  

Place white ice cream paddle in the bowl before adding ice cream mixture.  

Attach corresponding spring attachment to the rotating arm of the Kitchen Aid machine. 

Mix for 30 minutes on “stir” OR your lowest setting. 


Substitutions:

FOR - 4 cups half and half

SUB - 1 cup water, 1 cup whole milk, 2 cups whipping cream


FOR - vanilla beans

SUB - 1 and 1/2 teaspoons Mexican vanilla  OR  vanilla


Thursday, May 5, 2022

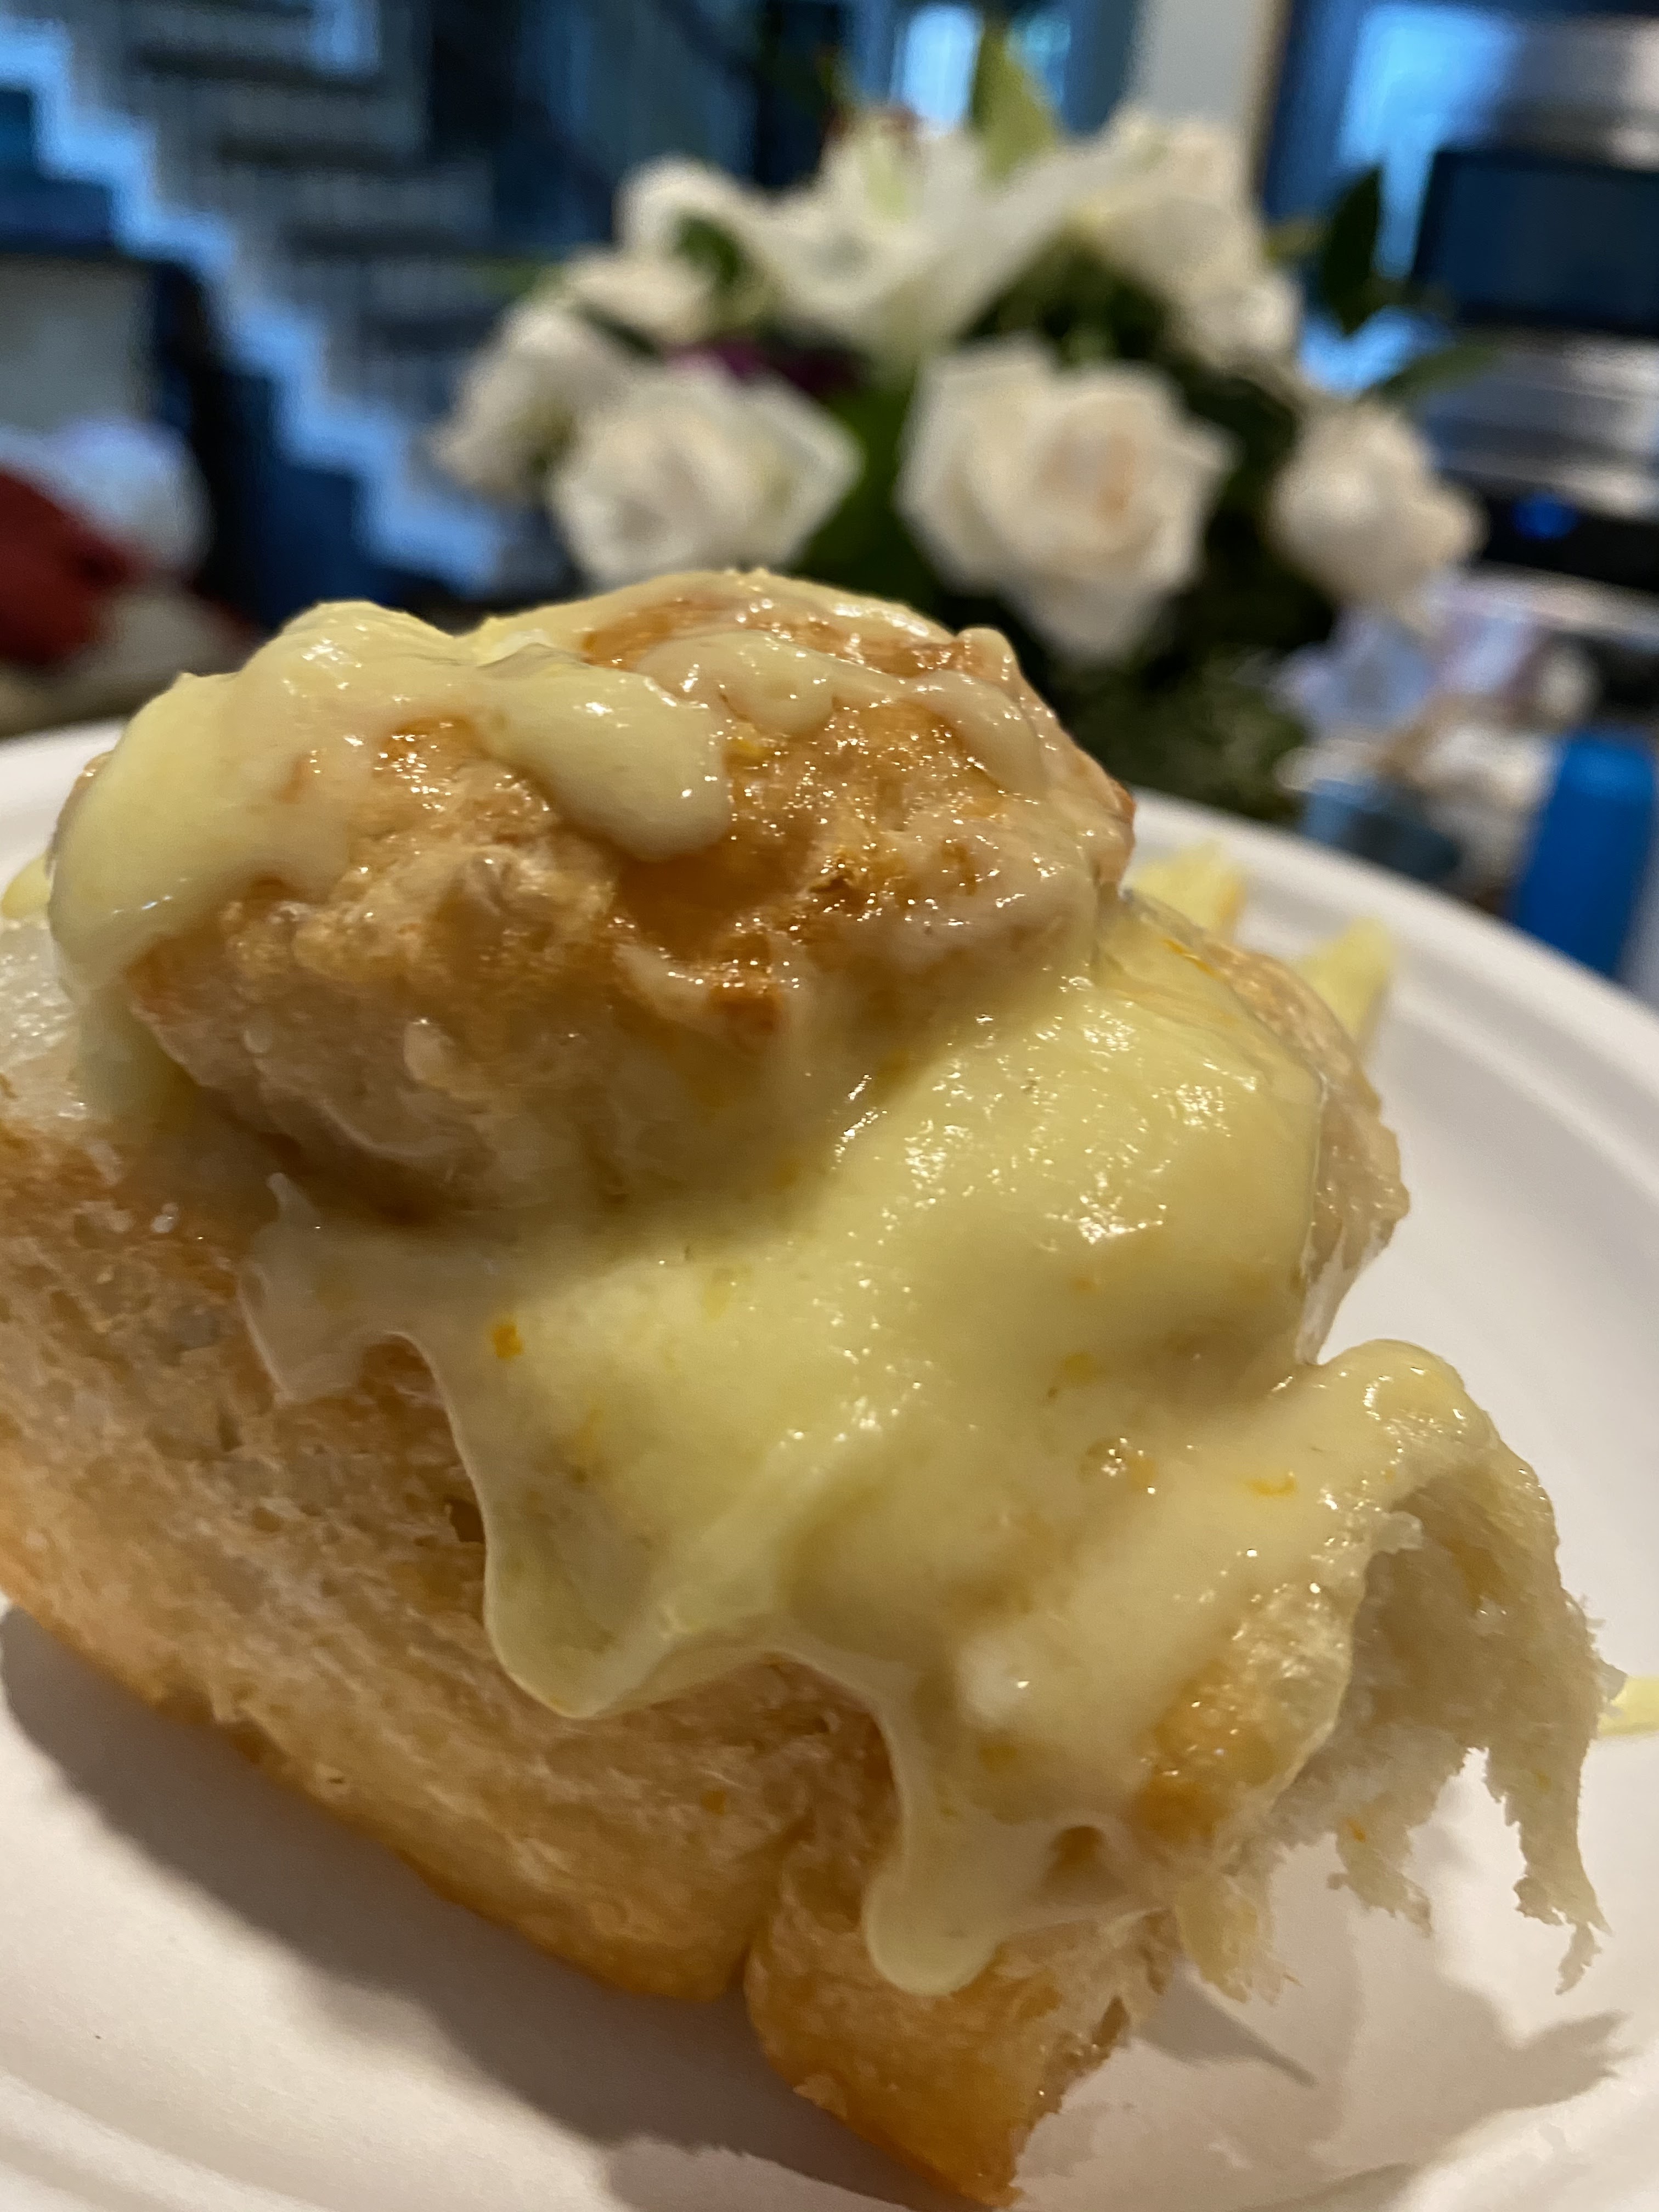
“Nic’s Amazing Natural Yeast Vegan (REALLY Amazing!) Orange Rolls - A recipe she created from her "oh so creative brain!" for her transitory vegan husband - whom she loves”

Text between Mama Jo and Nic as follows:

You can put it on your blog.

But you have to call it: 

Nic’s amazing Natural yeast vegan (REALLY amazing!) orange rolls - A recipe she created from her "oh so creative brain!" for her transitory vegan husband - whom she loves.


Sweet Orange 🍊 Rolls


Dough:


5 cups unbleached flour

1/2 teaspoon salt

1/2 cup sugar (OR Mama Jo's preferred: 2/3 cup sugar for a bit sweeter dough)


1/2 cup Natural Yeast start

1 cup water

1 orange zest (OR Mama Jo's preferred: 5-6 clementines)

1 orange/clementine juices + enough water to make one more cup


Let rise 8 hours or until double.


Roll out 1/2 of the dough at a time - “cinnamon roll” style - into rectangle - and then cover with 1/4 cup butter or 1/4 coconut oil and about a 1/2 cup sugar. 


Roll up and CUT into 6 rolls with floss.


Repeat for other 6 rolls.


Cover with plastic wrap. 


Let cut rolls rise until double. 


Remove plastic wrap.


Bake at 350° for 30 to 45 minutes depending on how golden/toasty brown you want them.


Immediately glaze straight out of the oven. (You will have to move the rolls a little bit from the edges of the pan, so the glaze doesn’t fall off the sides.)


Glaze:

1 orange zest (OR Mama Jo's preferred: 5-6 clementines)

1 orange juice (OR Mama Jo's preferred: 5-6 clementines)

5-6 Tablespoons butter or coconut oil

3-4 cups powder sugar


Timeline that works for Nic:

Maybe start early am

Let rise til double about 4 pm

Let rise again

Bake before you go to bed

Glaze in the morning 


Or start when you go to bed

Roll out in the morning 

Let rise til 12

Bake

Cool done by 2 ish...


Click Link FOR:   


Sunday, January 24, 2021

Toasted Pecan Apple Waffles - Gluten-FREE


Does this sound like you???  (Or maybe it's just me... )  :0)

It's the end of your day and you've finally finished all of your adulting.

Headed home from your errands you realize you have no idea what's for dinner and you begin to think through what your dinner possibilities might be.

Thankfully your weekly grocery shopping always includes a 1/2 gallon of buttermilk.

WHY  buttermilk you ask???  

Because - breakfast FOR dinner is always a YES.  

Bonus for me at 4pm:  it's incredibly fast.    

This happens at least once a week that we are having breakfast for dinner, and this recipe has been a lovely addition to the list of pancakes, waffles and breakfast tacos that make it to the table as a dinner.

If you don't need to be gluten-FREE, use cake flour and add a 1/2 teaspoon of salt.

If you don't need to feed a small army, HALF the recipe... 

OR make the whole thing!  Feed your neighbor's, the missionaries, or store the leftover batter for a breakfast later in the week... 

 
... ... ... ... ... ... ... ... ... ...  

3  cups gluten-free flour 
1  cup sugar
3  teaspoons baking powder
1  teaspoon baking soda
6  teaspoons pumpkin pie spice

1  Granny Smith apple  -  peeled, cored, and grated
1  Gala  OR  Fugi apple  -  peeled, cored, and grated
8  eggs - separated 
(Be sure to keep the egg-whites in a medium or large bowl for whipping at the end)
4  cups  buttermilk  (that's 1 quart all y'all!!!)
1  cup  (2 sticks)  of butter  - melted

1  and  1/2  cups  toasted pecan pieces


Chop and toast your pecans first.  Preheat the oven to 325 degrees F.  Toast the pecans in a shallow pan until they begin to get fragrant, about 7 to 10 minutes.  Let cool completely. 

Preheat your waffle maker and start gathering your recipe items.

Combine all your dry ingredients in a large bowl.

Add your buttermilk to the dry ingredients and mix thoroughly.

Add your grated apples and mix thoroughly.

Add your egg yolks and mix thoroughly.

Add your melted butter and mix thoroughly.

Beat the egg whites until foamy.

FOLD  carefully into the waffle batter to keep the batter fluffy.

Spray each side of your waffle maker and add batter to each waffle spot.

BEFORE  SHUTTING  THE  WAFFLE  MAKER:   
ADD  1  or  2  Tablespoons of toasted pecans to each dollop of batter.

Cook according to your waffle maker's directions... 

BUT  KEEP  IN  MIND:   These will take longer to cook with the fresh fruit!  

I have to add 3 to 4 minutes cook-time to these waffles compared to other recipes.

These particular waffles take 6-8 minutes to cook in my Belgian waffle maker.

... ... ... ... ... ... ... ... ... ... 
(It's a recipe FOR your recipe!)

CLICK TO GO TO: 
... ... ... ... ... ... ... ... ... ...  


BEFORE  SHUTTING  
THE  WAFFLE  MAKER:   

ADD  1  or  2  Tablespoons 
of toasted pecans to each dollop of batter.


One of my favorite ways to chop... 


You may think...
"Nah!  I don't need to toast the pecans."
YES.  YOU  DO.

It makes all the difference and is worth the effort!!!
If you have any leftover toasted pecans you can
just save them for the next time you make these waffles.


Cutest little waffle maker EVER!!!  

I wish I had a photo that would give
you perspective on how small it is...

It usually it gets used with cake batter
for tiny waffle cakes.
OR with leftover waffle batter as seen here. 

Such a fun snack! 
Or an easy fit into a lunchbox.


... ... ... ... ... ... ... ... ... ...  


Monday, January 11, 2021

Baking With Natural Yeast - BRET'S DINNER ROLLS


"Bret's Dinner Rolls" - as in the lovely Bret Annalese, not the Handsome Bret Sr.

Did y'all know I have TWO Bret Davis' in my life?  

Ways that they differ:
- years apart
- BOY Bret is my husband, GIRL Bret is my fourth child and second daughter
- they both like being called Bret. However, I call GIRL Bret by the name I "won" which is Bret Annalese...
- one likes to read non-stop for days on end and then re-read whatever novel series was just devoured.  While the other Bret would rather leave the books on the shelf unless they have to do with timber-framing a house, BBQ or gardening.
- one likes to talk for and be listened to for long, long, long conversations... The other would like for you to get to the point rather quickly.  

Ways that they are similar:
- they are both taller than me...  (NOT hard to do)
- they both order the "Daily Warrior" at Smoothie King
- their chin   :0)  
- their sarcasm
- their made-up "DAD JOKES"
- their food snobbery and desire for treats
- their fire making skills
- they don't clean up after themselves (IE:  shoes are always left out... everywhere)
- they LOVE, LOVE, LOVE my dog Jane Austen


MANY times we just say that they're "THE Bret's" - I  LOVE  IT!

It can be confusing to people who meet us as a family for the first time and fun for all of us at home when I'm mad and yelling at one of them and they don't know which one it is until I include a "Daddy Bret" or "Bret Annalese" with my angry commentary.
   
If you take another look at their similar list you'll see that they both are food snobs.  Which can actually come in very handy  for  ME  -  they often come up with a good idea about the food that is made in this house.  

As it happens to be the case with this idea/recipe - Bret Annalese requested that we have actual dinner rolls with our Thanksgiving dinner this year instead of our usual loaf of Natural Yeast Bread all sliced up.  Turns out, it was a great idea and a totally different result than our usual bread loaf (even though it is using the EXACT  SAME  RECIPE!).  

What brings about the difference y'all ask? 
- The rolls are shaped using grapeseed oil and then left to rise for 30 minutes before baking.  The rolls turned out to be incredibly extra-fluffy and delightful!

------------------------------------------------------------

TO MAKE:

You'll need make up a Natural Yeast Dough recipe the day before you want to bake your dinner rolls.  


Once your dough is ready around the 20-24 hour mark - gather up your items needed for the shaping and baking:

a circle or a 9X9 square baking dish/pan
grapeseed oil
small dish or plate for extra grapeseed oil needed for shaping
your prepped-the-day-before and now READY dough 

------------------------------------------------------------

Pour a few Tablespoons of grapeseed oil into your small dish or plate.

Grease your baking dish thoroughly with grapeseed oil using your hands (they need to be adequately oiled in order to handle your sticky dough...)

Pinch off a handful dough and then pinch into a roll - my girls informed me it looks like a Chinese dumpling.  And indeed it does.

Place in your greased baking dish with the pinched side facing down.

Repeat trying to get a similar size for each roll until the dough is gone.

Let rise uncovered for 30-45 minutes. 

NOTE:  if your house is cold it will take longer!  

Keep in mind you want to see the dough rise an inch or more.

Bake in your oven at 400 degrees for 28-30 minutes.

Let cool 15-20 minutes and serve warm.


Pour a few Tablespoons of grapeseed oil 
into your small dish or plate.

Grease your baking dish thoroughly with 
grapeseed oil using your hands 
(they need to be adequately oiled in order 
to handle your sticky dough...)


Pinch off a handful dough and then pinch into a roll 
- my girls informed me it looks like a Chinese dumpling.  
And indeed it does.


Place in your greased baking dish with the
pinched side facing down.


Repeat trying to get a similar size
for each roll until the dough is gone.


Let rise uncovered for 30-45 minutes 
- if your house is cold it will take longer!


Keep 
in mind you want to see the
dough rise an inch or more.


Bake in your oven at 400 degrees for 28-30 minutes.

Let cool 15-20 minutes and serve warm.


I love doing these rolls in my cast iron! 
If you have a size 8 or 10 - GIVE IT A TRY!